
This guide helps you get started with using Zoom with Asset Browser and the desktop clients. As pre-requisites to this guide, we assume that you have completed the Zoom Deployment Guide .
Launching Asset Browser
Asset Browser is a very powerful desktop and web application that allows users to browse and search assets that are stored inside of Zoom. Asset Browser is the center of your Zoom experience as it allows you to search, browse, view, checkout, check-in assets from your desktop computer or in your web browser.
To get started, let’s get you logged into Asset Browser. Launching Asset Browser
Once you are all set with logging into the Asset Browser, you are ready to start ingesting/importing/editing files. In the next section, we will learn how to Ingest Files into Zoom.
Home Page*
* This feature is available only in Zoom 7.0 or higher.
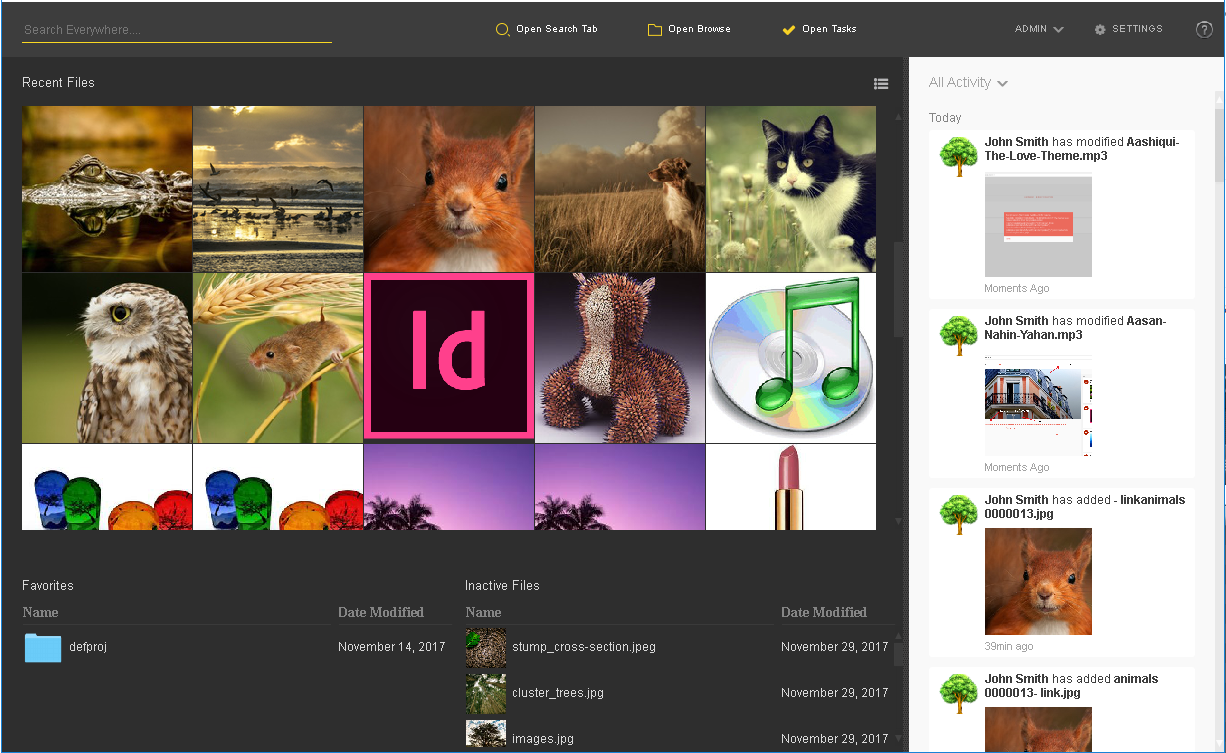
Search Bar
Launch a global search that spans file or folder name and also metadata right from the home page without opening a search tab first.


Recent Files
See all your recently modified or previewed files in the center of the Homepage. Double click on any file in this view to jump straight to to a tab with more details about the file.
Activity feed
Recently worked on files in your brand or project vault will show up in the activity feed on the right. Each file listed will have a thumb and also a user profile icon for the user who worked with the file (user profile icons are configured by the adminitrator).
Custom Widget Panels
Two panels may be configured for the lower part of the Homepage. Using the Settings you can control which two panels show up by default in your home page view. In the example above, Tasks and Favorites show up in this area.
Configure this setting by clicking Settings from the upper right corner of the Homepage. Exclude one of the three panels, Tasks, Inactive Files, and Favorite Files, from the Home page. Click Save.
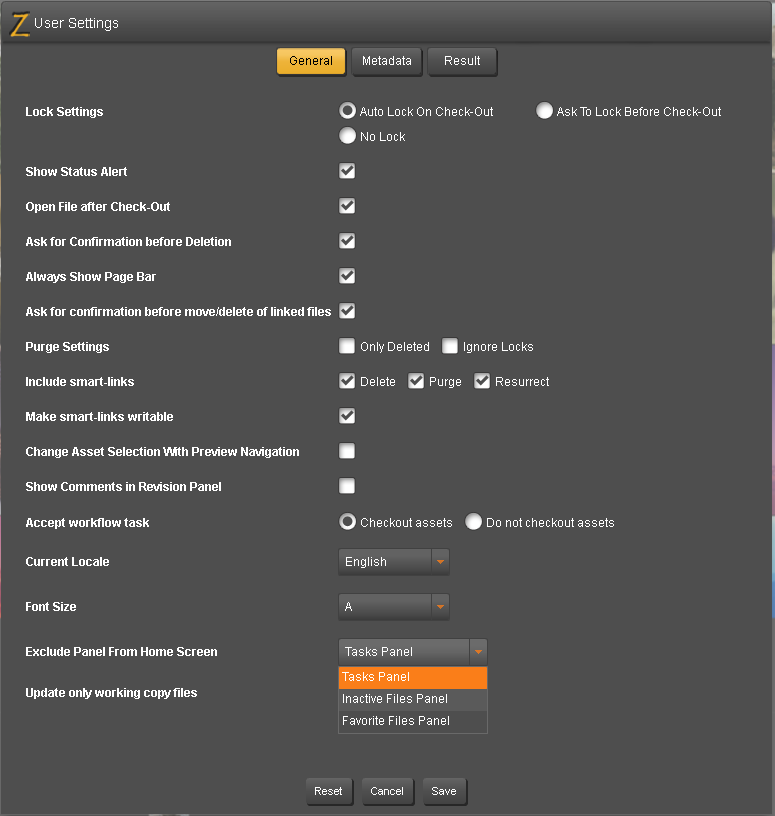
Alternatively, access the Settings from the user icon popup menu from anywhere in the Asset Browser.

Ingest Assets
There are a variety of different ways you can import assets into Zoom. To get you started, follow the instructions in the link below to import links.
In the Asset Browser, files can be imported as individual files and as folders. The following steps show how to import files into the Asset Browser using the defproj project that is created by default in Zoom. Thumbnails for supported file types are generated during the import process.
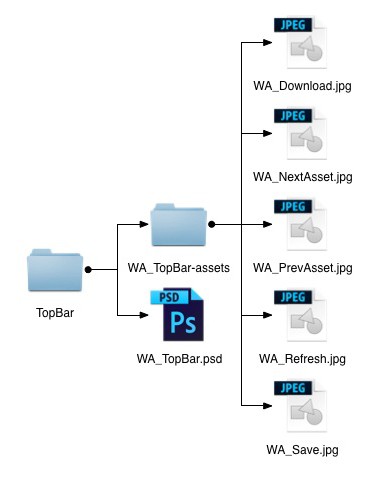
The examples below are based on a sample directory that is structured like the following and importing into the defproj project, which is created by default after first installing Zoom:
- In the top-left corner of the Asset Browser interface, click on the
 Browse button.
 - In the Path Navigator, click on defproj.
- In Finder or Windows Explorer, locate the folder that contains the files you would like to import into Zoom.
- Select the desired files in Windows Explorer or Finder.
- Drag-and-drop them into either the defproj folder in the Path Navigator or in the center view (Grid/List/Portfolio) of the Asset Browser.
Your files are now imported into the defproj project. If you also imported folders into this project, you will see them in the Path Navigator and in the browse view. You can navigate into the folder by double-clicking the folder or selecting it in the Path Navigator.
If the optional VideoFX module is implemented, the files will be routed to either an Ingest workflow with a transcoding engine or as direct assets into the Zoom database. For more details on storage management with Zoom please see this.
Asset Basics
Once you have successfully imported your assets into Zoom, you are going to need to learn some of the basics of how to work with assets in Zoom. Below are some of the core functions you need to learn to get started with Asset Browser:

Browse Mode in Asset Browser allows users to navigate and browse Zoom in hierarchal structure. Browsing is much similar to navigating files and folders on your own computer in your file system.
These instructions assume that you already have Asset Browser open and step you through how to navigate your files.
- Click the
 button in the top-left corner.
 - In the Path Navigator, click the arrow next to defproj to expand the folder.
- In the Path Navigator, click the sub-folder of defproj.
You can use the Path Navigator to navigate to different folders inside of Zoom. The contents will display in the center of your screen.
Zoom can generate high-resolution previews a variety of different file-types, even if you do not have that application installed on your computer. These previews include images, videos, PDFs, InDesign files, etc. For a full list of supported files for preview, see Supported File Formats, Codecs & Preview File Types .
The following instructions describe how to generate a preview of an asset in the Asset Browser.
Via Keyboard
- Select an item in Asset Browser.
- Hit the spacebar on your keyboard.
Via Mouse
- Select an item in Asset Browser.
- Double-click asset.
Assets in Zoom can be moved from one location to another via drag-and-drop. The following instructions show how to move an asset from one directory in Asset Browser to another.
- Click the
 Browse button in the top-left corner.
 - Navigate to defproj using the Path Navigator.
- Expand defproj in the Path Navigator using the
 expand arrow button.
 - Select a file inside of defproj.
Ex. Image01.psd
- Drag-and-drop the file to the subfolder in the Path Navigator. A square will appear over the folder, indicating that the file will be moved into that folder.
Assets can be renamed easily with the Asset Browser interface. The instructions below describe the different methods you can rename an asset in Asset Browser.
Clicking Filename
- Select an item in Asset Browser.
- Click once on the filename.

- Hit Enter on your keyboard.
Using Contextual-Menu
- Select an item in Asset Browser.
- Enter your new filename.
- Click OK.
Assets can be deleted with ease within the Asset Browser. It is important to note, however, that no assets or revisions are every truly deleted and assets can always be restored.
Whenever a person deletes an asset in Zoom, Zoom simply flags that asset as Deleted. The assets remain in the Zoom database and can be resurrected at any time.
In order to delete an asset, you must have appropriate permissions to do so.
The following instructions describe how to delete assets in Asset Browser:
- Select an item in Asset Browser.
- Click the
 Delete button.
Within Zoom, creating copies of files is easy using Smart Copy. Unlike conventional copying of files which takes up additional data, creating a Smart Copy allows a file to be copied and edited without having to duplicate data on the server. You can create smart copies of a file or an entire folder.
Using Contextual Menu
- Select an item in Asset Browser.
- Right-click on the asset and Select Smart Copy.
- Type in the path of the location you would like the Smart Copy to be created in.
- Click OK.
Using Keyboard
- Select an item in Asset Browser.
- On your keyboard, hit:
- Mac: Command ? + Option ? + C
- Windows: Ctrl + Alt + C
Bulk Smart Copy Using Cart
- Select items in Asset Browser.
- Click the
 Cart button to add the items to the cart.
 - Click on the Cart and Select Smart Copy.
- Choose whether you would like your smart copy to be in the current folder or in a different folder. If you click Save to other folder, click the Browse… button to navigate to the appropriate folder in Zoom.
- Under New Filenames, set whether you would like to keep the same filename or rename the files.
Metadata
Now that you have gotten a feel for how to move and manipulate assets in Zoom, now you will want to learn how to edit metadata, allowing you to make your assets more searchable in Zoom.
In Zoom, metadata is additional information about an asset. Commonly, this described as “data about data”. It is information that describes an asset beyond the digital data that is contained within it. This can include a variety of information from title, description, location, and a variety of other types of metadata. These are helpful because they allow users to search and filter assets based on this information.
Zoom comes with a variety of metadata fields out-of-the-box. Some of this information is automatically populated when files are imported into Zoom because they are stored as XMP metadata in the files.
Zoom also has the ability to track links between assets. For example, when using applications such as Adobe InDesign, Adobe After Effects, or Adobe Premiere, Zoom can automatically checkin and out assets that are placed inside of these project files, reducing the extra steps of checking in multiple files separately.
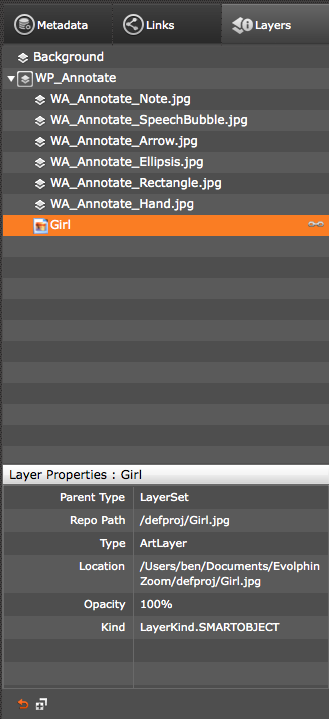
As of Zoom 5.1, Zoom also has the ability to read layers information from applications such as Adobe Photoshop, Adobe Premiere, and Adobe After Effects. This allows users to browse the layers structure of their project files without having to ever open the file. It also allows users who place assets in these projects to view the linked assets in Zoom
The following step describe how to edit file metadata for assets inside of Asset Browser.
Editing Metadata on Single Asset
- Select an asset in Asset Browser using your cursor.
- On the right sidebar, click on the Metadata panel.
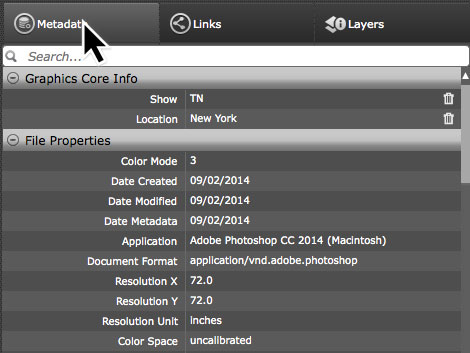
- Select a metadata field to edit.
City
- Click on the value area. The value should turn into a text-field or drop-down.
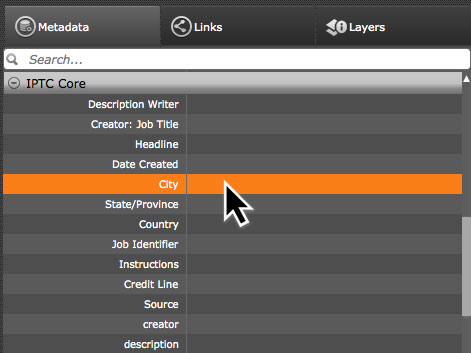
- Enter your metadata value.
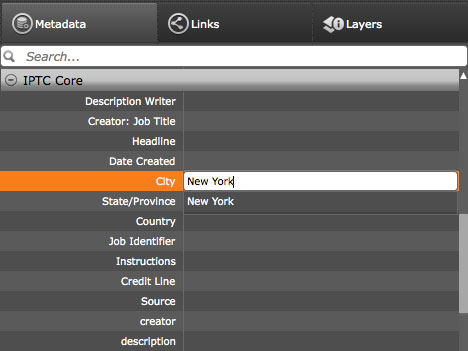
- Hit Enter on your keyboard.
Editing Metadata on Multiple Assets
- Select multiple asset in Asset Browser using your cursor and holding down Shift.
- On the right sidebar, click on the Metadata panel.
- Select a metadata field to edit.
City
- Click on the value area. The value should turn into a text-field or drop-down.
- Enter your metadata value.
- Hit Enter on your keyboard.
Mandatory Metadata and Custom Metadata
For additional information regarding Mandatory Metadata, please refer to Configuring Mandatory Check-in
Search
With metadata now placed on your assets, the next guide will help you learn how to search inside of Zoom using the Global Search tools.
One of the primary benefits of integrating Zoom into your workplace is the ability to search for files with minimum effort. Zoom has many features to allow you to search for assets inside of Zoom as well as further filter your search results to ensure you get the exact information that you are looking for.
Each asset inside Zoom has metadata associated with it. This can be from file properties such as the creation date, the file type, etc., or it can be information such as a title, description, keywords, etc. More the metadata that your assets have, more are the ways that Zoom’s search can be used to quickly find the files that you are looking for.
Search Options
The Search box is located at the top of the Asset Browser window. This Search box is always visible, even when no tabs are open. Users can enter search text here to run a search query on the Zoom database.
Every time, the user searches for a string using the Search box, a new Search tab is opened (if a Search tab is not already the active tab). Or, click  on the Home Page to open the Search tab.

Alternatively, click the Search  icon on the top left to open a blank Search tab.

The Quick Search box is shown inside a Search tab.

The Search tab shows the results of a search on the Zoom database. When the user searches for text using the Search box, it is called a Global Search, as it is executed on the whole database. After seeing the results of a Global Search, the user can also search within these search results. This is called Quick Search and it is triggered using the Quick Search box.

The Search Mode selector is next to the Search box. Click on the Search Mode selector to open a drop-down as shown below.

Each option in the drop-down triggers a different flavor of Zoom search and these are described in the sections below.
Basic Search – “Search Everywhere”
The basic search or the global search looks for the input search string in file names, project names, authors, metadata property names/values, revision comments, etc.

When typing into the Global Search, for example, you might be searching for all files that have a search text present anywhere in the name, comments, or metadata. We can do this by doing the following:
- In the Asset Browser, select the Search Everywhere menu option in the top-right corner of your screen in Search view.
- In the Search field, enter a term, for example, “bird”.
- Hit Enter or Return on your keyboard.
The search results will now show up for you to browse. Depending on the number of files in the system or your search term, you may have thousands of results, so you might want to refine your search results. Fortunately, Zoom has the tools to help you with that using Quick Search and Filters.
Quick Search
Quick Search is a feature that allows you to quickly find a file from within the search results displayed. For example, if your search term was Obama and you were now trying to quickly narrow it to include items that have Washington, you can do this using the Quick Search:
- Click the
 Search… field in the top left side of your viewer.
 - Type what you are searching for into the Quick Search field.
Ex. Nixon
- Zoom will list the matching items based on your current folder or search result.
If you type in an Asset ID number, the asset will show up under Asset Id, or an author name in Author, Date, Comment, etc.
- Click View All… under the category that you want to see.
Filters
Searching can sometimes return a large number of results. When this happens, it is helpful to have a filter to further filter your results. Zoom has filters to help narrow your search results to the specific asset you are looking for.
- Click on
 Add Filter.
 - In the Choose Filter field, type the name of the metadata field you want to filter by. As you type the name of the field, a drop-down list will appear showing which fields are available.
Keywords

- When the field appears, type in the value you want to search by.
Nixon

- When the field appears, type in the value you want to search by.
As you add filters, the content will narrow in your view. You can remove filters by clicking the  Delete next to that field.
Advanced Search – “Search Filename”
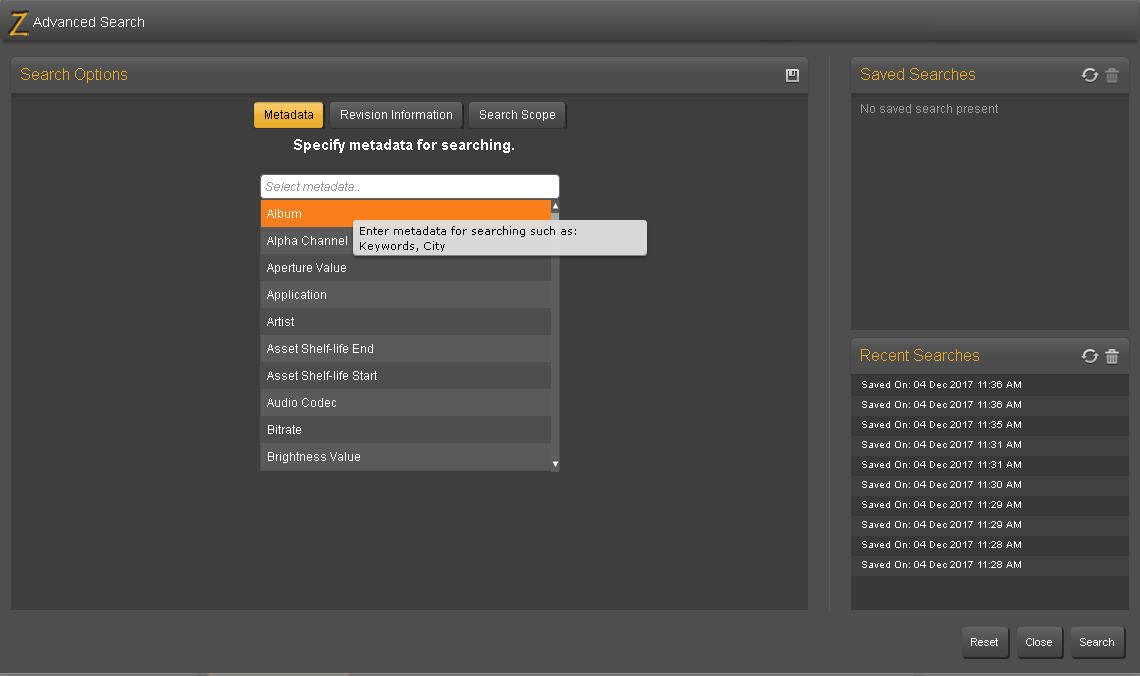
Users can select the “Search Filename” option to simply search for assets of specific file names. But more importantly, with Advanced Search, users can create a very granular search for specific items inside of Zoom using asset metadata.
Searching Based on Metadata Fields
- In the Asset Browser, click
 Search in the top-left corner.
 - Click Advanced Options.
- Under Select Metadata field, type the metadata field you want to search by and hit Enter on your keyboard.
Ex. Keywords
- Type the value that you wish to search by. A list of values that already exist in Zoom will be listed for you to Select.
Ex. Nixon
- When ready, click Search.
Searching Based on Revision Information
Revision information is information about the individual revisions of a file. For example, who it was who committed that version of a file, the comment when it was committed, the date range of when, etc.
The following example is based on the search query to answer “show me all of the items created by Ben today”:
- In the Asset Browser, click
 Search in the top-left corner.
 - Click Advanced Options.
- Click on Revision Information tab.
- Enter the Author name in the Author field.
Ex. Ben
- Under Date Range, check the From checkbox and set the date to today’s date.
- Click Search.
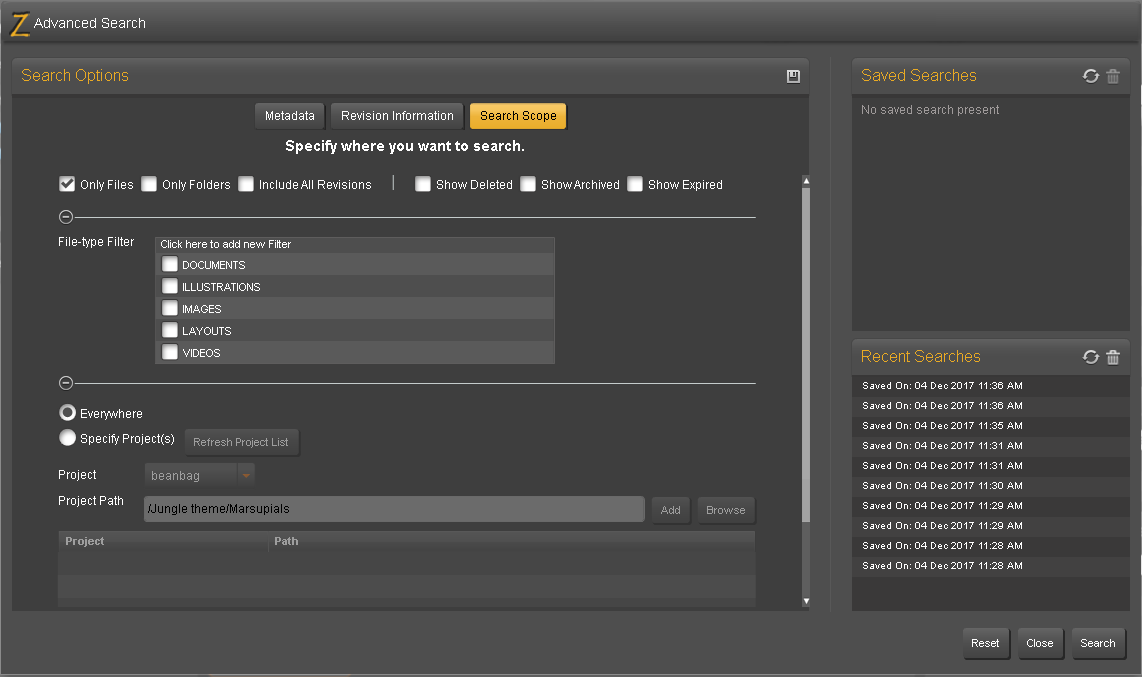
Search in Specific Projects
Searches can be narrowed to specific projects or folders. The following example will show you how to narrow your search to a specific project or folder:
- In the Asset Browser, click the
 Search in the top-left corner.
 - Click Advanced Options.
- Click on Search Scope (or Search Inside on Zoom 5.0 and earlier) tab.
- Click Specify Project(s)
- Click Browse.
- Navigate to the folder or project you would like to search in.
- Click OK.
- Click Add.
- Click Search.
You can add multiple search directories to the list during your search.
Save Search
You can save your searches for future use. This can be useful when searching for frequently searched assets in Zoom.
- In Asset Browser, click the
 Search in the top-left corner.
 - Click Advanced Options.
- Set your search parameters.
- Click
 Save.
Save. - Specify a name for the search.
- Click OK.
File-type Filter
From Zoom 5.1 onwards, you can filter your search results based on chosen File-type filters. For example, you may only want to see Images, Videos, or Layouts. Each of these File-type filters is further configurable by choosing which extensions to include in each of them. A few File-type filters are available by default.
Viewing File-type filters
- On a Browse or Search tab in the Asset Browser, click the Search type drop-down menu next to the Search box to open the Search type menu.
- Select Advanced Search from the Search type menu.
- Click the
 button to open the Advanced Search options.
 - Click the Search Scope button to view the scope options.
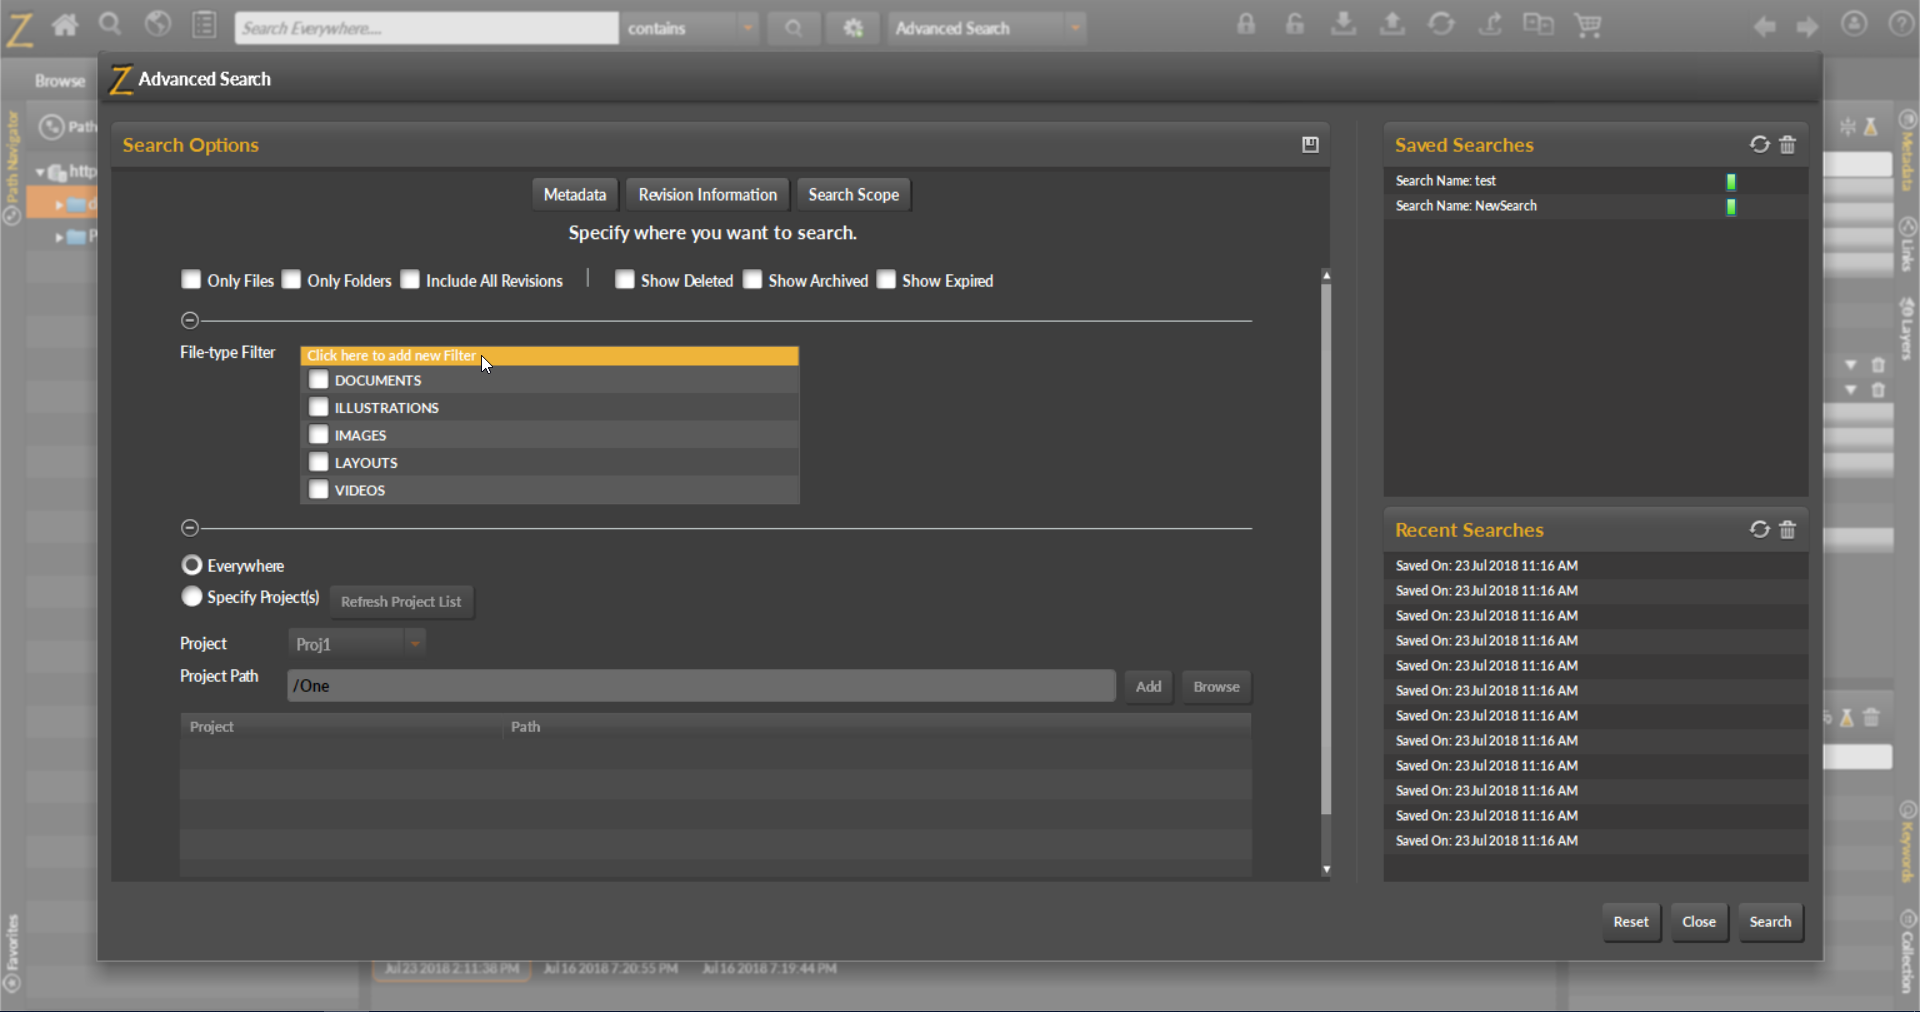
- Click the Click here to add new Filter option above the File-type Filter list box.
- The File Filter window is displayed.
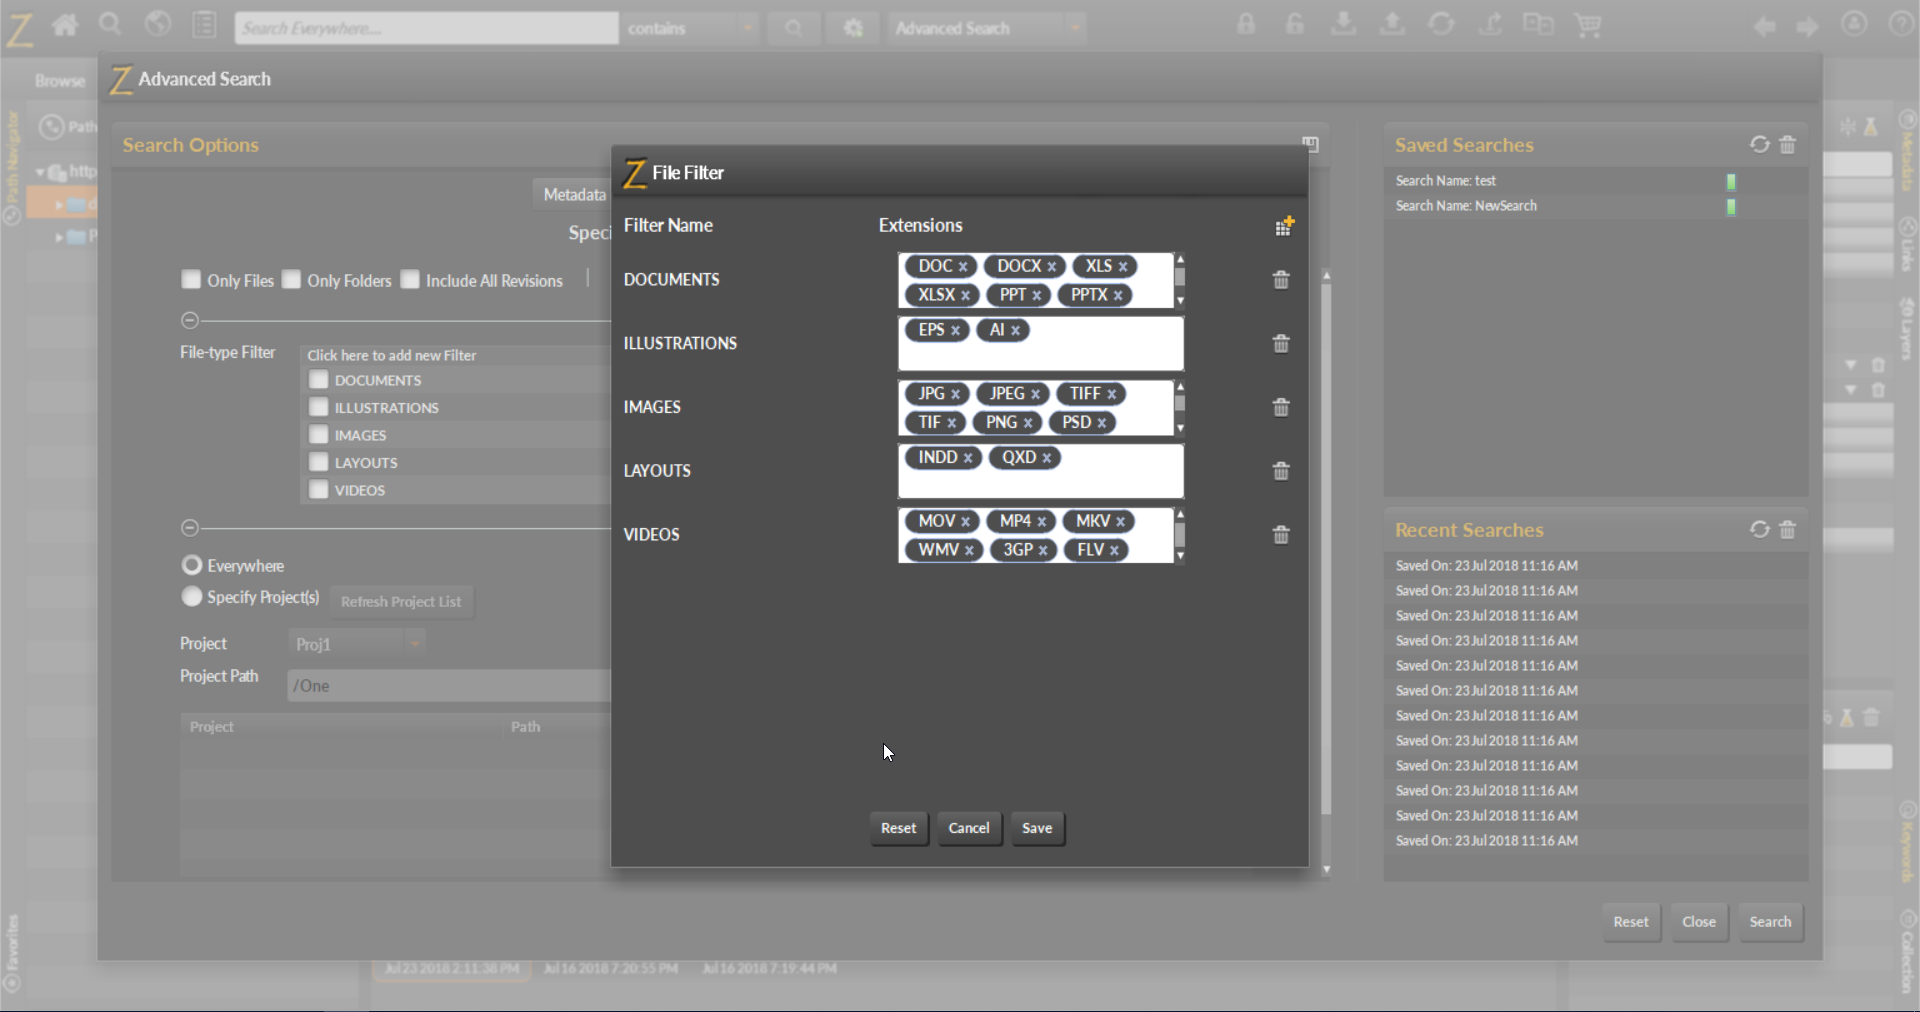
- This window has options to add, edit, or remove file type filters. These are discussed below in detail.
Adding a New File-type filter
- In the File Filter window, click the
 button in the top-right corner.
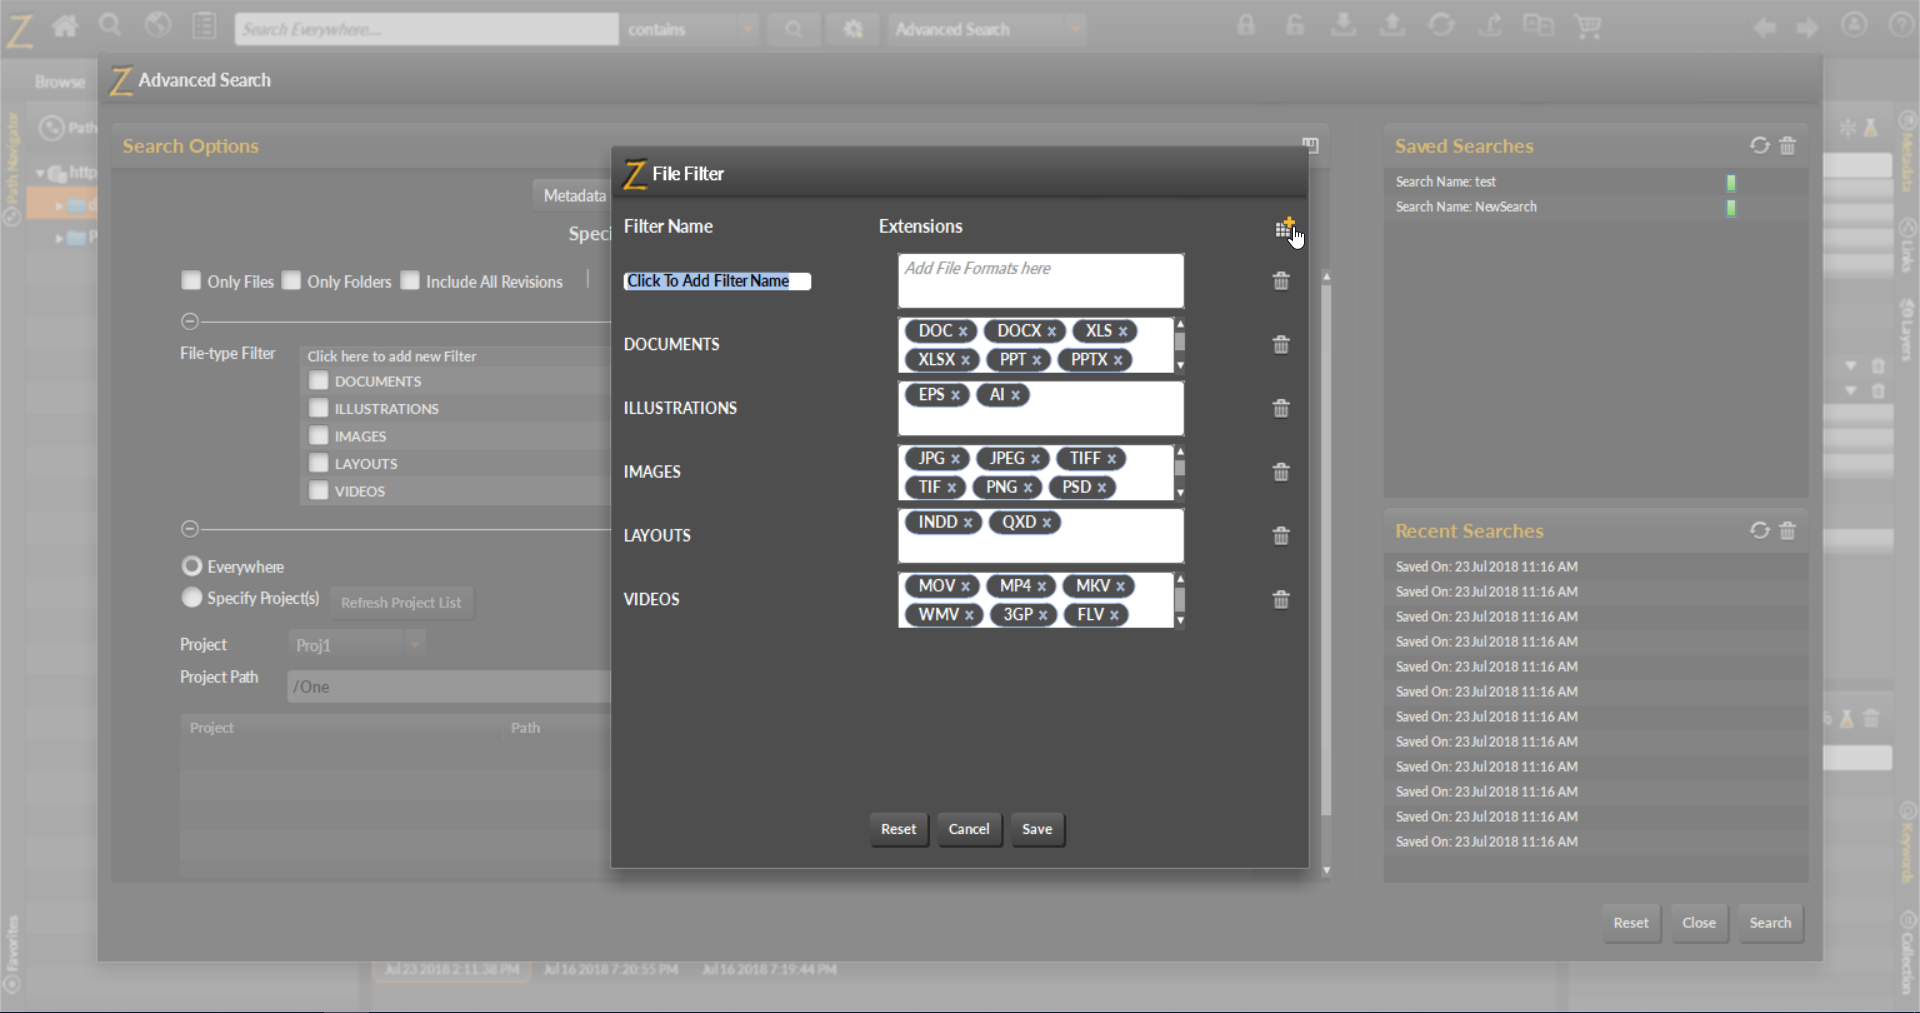
- Enter a name for the new filter. Enter an extension in the Extensions box and press Tab. Enter more file extensions, if needed, and press Tab after entering each subsequent extension.
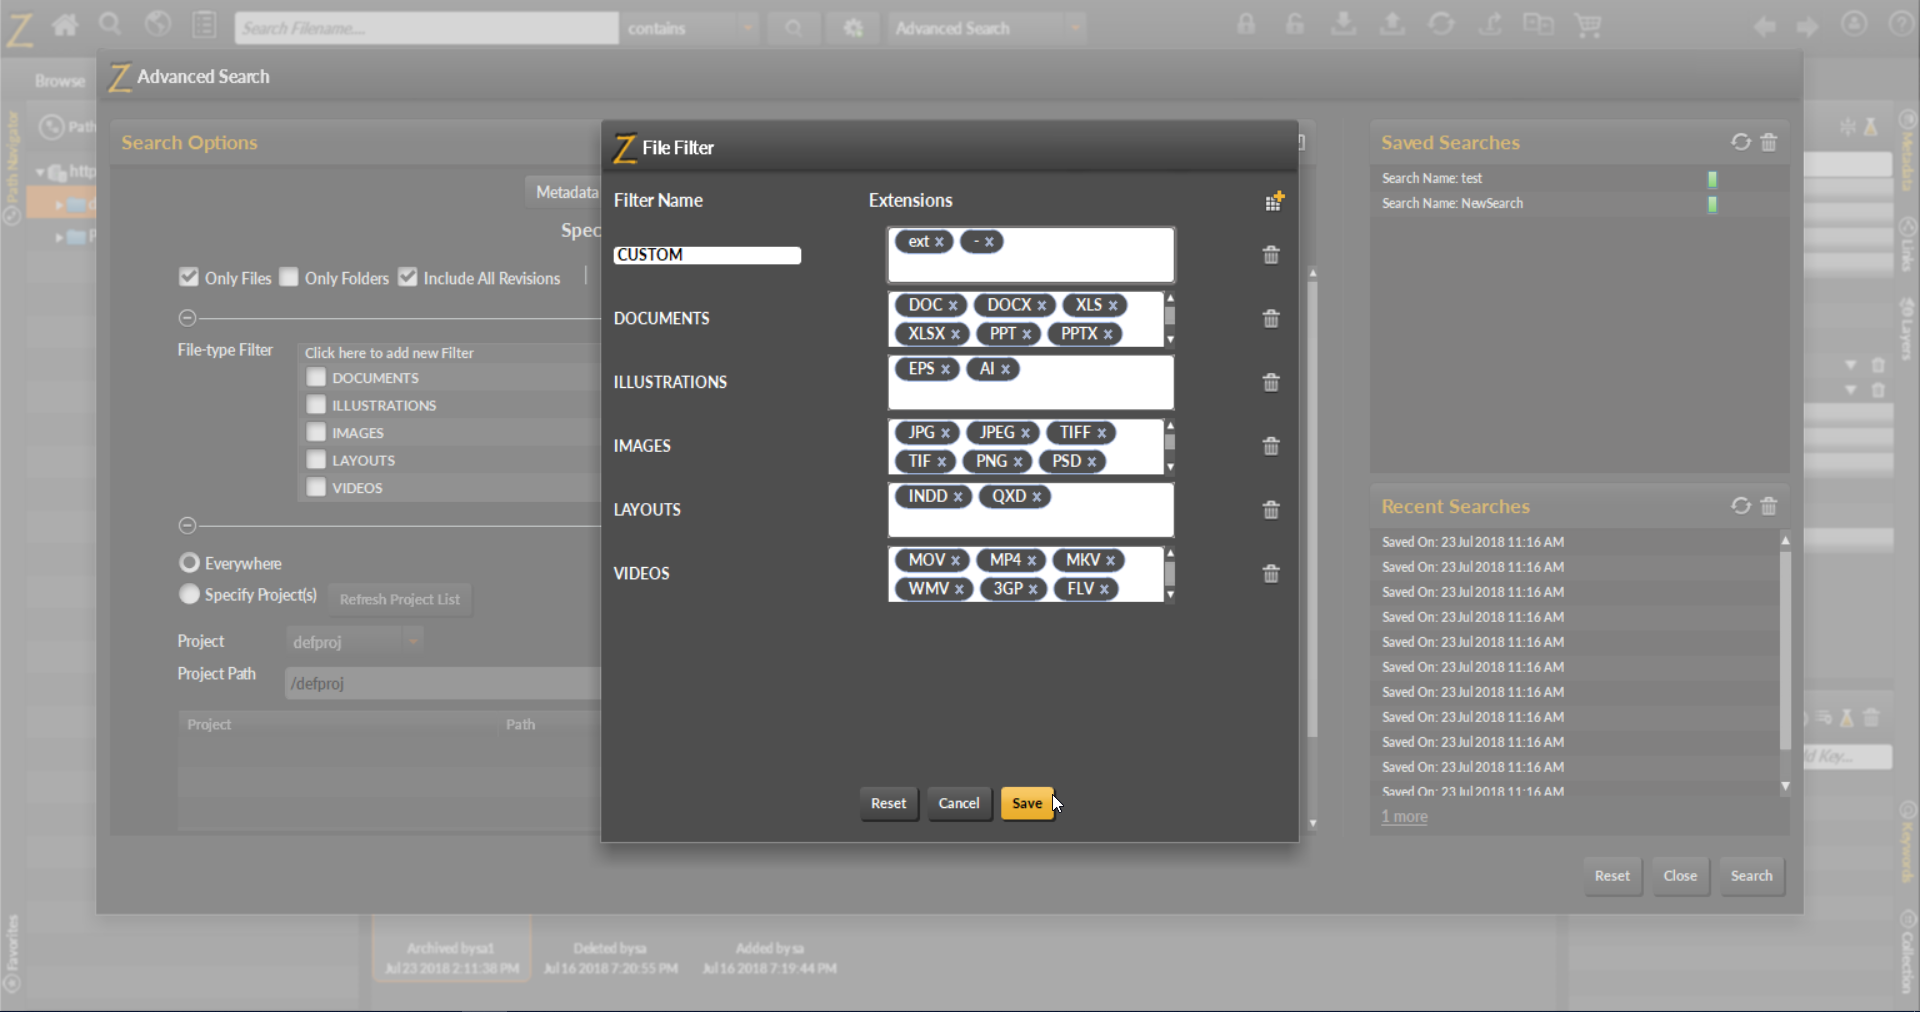
- Click Save to save the new file-type filter.
Modifying a File-type filter
- In the File Filter window, add extensions to a filter by typing in the extension name in the Extensions box and pressing tab after each extension name.
- Remove extensions by clicking on the
 icon next to the extension name.
 - After making the desired changes, click Save.
Deleting a File-type filter
- In the File Filter window, click the
 button next to the Filter you would like to delete. The file filter will appear grayed out.
 - Click Save.
Using a File-type filter
- In the Asset Browser, click the Search in the top-left corner.
- Click Advanced Options.
- Set your search parameters.
- Click on the Search Scope tab.
- Under File-type Filter, check the filters you would like to use.
- Click Search.
Content Search – “Search File Contents”
Content search restricts search for the input string to only the contents of assets in the repository. Thus, this search works on text-based assets like txt, rtf, pdf, docx files. Content search is disabled by default, please ask your administrator for help in configuring content search.
Searching inside text-based files
- In the Asset Browser, click Search in the top-left corner.
- Select the Search File Contents option from the Search type drop down.
- In the Search field, enter an input term, for example, “bluebird” and press Enter.

- The search results show the files that contain this input string.

- If you hover over any asset thumbnail in the results, an
 icon will be shown near the upper right corner of the asset thumbnail.

- Click on this information icon to see the excerpt of the text where the search string was found in the asset.

- If the search string appears multiple times, then you can use the arrows to scroll over to view excerpts for other instances of the search text.


Browse in Tab
When searching for assets in Zoom, you may want to see assets in the context of which folder they are located in. By using the Browse in Tab function, Zoom will open a new tab showing the asset in the folder in which it is located inside Zoom.
- Select an asset in Asset Browser.
- Right-click on the asset and select Browse in Tab.
Working with Assets
Now that we have finally learned how to bring assets into Zoom, move them around and add metadata, it is time learn how to manipulate assets by using the Checkin and Checkout functions in Zoom. The next guides help you learn how to checkin, checkout, and update assets in Zoom.
One of the unique abilities of Zoom is the ability to check files in and out as you are working on them. The following instructions will explain how to check out a file from Zoom using the Asset Browser. Before doing so, it is important to understand the different file-statuses that exist in Zoom.
| Status | Name | Description |
|---|---|---|
 |
Up to Date | There is a working copy of the file on your computer that is currently up to date and the latest version from the Zoom Server. |
 |
Modified | There is a working copy of the file on your computer that is currently modified and is a newer version than the one on the Zoom Server. This file needs to be checked in to the Zoom Server. |
 |
Need to Update | There is a working copy of the file on your computer and there is a newer version on the Zoom Server. You need to update |
 |
Conflict | There is a working copy on your computer that was modified based on an older version of the file and there is a newer revision on the server. Zoom does not know which version is the correct version. |
 |
Lock | The file is locked on the server. Only the user that has the file locked can edit the file. |
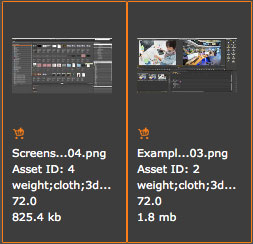
Within the Asset Browser, it is easy to see the status of the file below the thumbnail of the asset. You will see the different icon indicators indicating the status of the file. If you do not see an indicator next to the file, this tells you that you do not currently have a working copy on your computer.
Locks is a feature in Zoom that allows you to restrict who is working at a file at one time. This helps communicate to users which files have been delegated to which users at a time. When a file is locked, other users in Zoom are not able to commit a new version of the file until you have released the lock on the file.
When a file is locked, an indicator is shown below the asset thumbnail. When you hover over this icon with your cursor, you can see additional information regarding who has this file.
When you checkout files from Zoom, by default it will lock the file. It is important to release the lock once you have completed your work on the file. You can also have the Asset Browser prompt you when you checkout a file to determine whether you want to lock the file or not.
Lock File During Checkout
If Ask to Lock Before Checkout is enabled, you will be prompted to lock the file during checkout. Please follow the following instructions to lock the file during checkout:
- Select an item in Asset Browser.
- Right-click on the asset and select Checkout.
- When asked whether you want lock this file/folder for editing, click Yes.
Lock Working Copy
If you already have a working copy on your computer, you can lock that file by doing the following:
Via Button
- Select an item in Asset Browser.
- Click the
 Get Lock button.
Via Contextual Menu
- Select an item in Asset Browser.
- Right-click on the asset and select Get Lock.
Release Lock
Via Button
- Select an item in Asset Browser.
- Click the
 Release Lock button.
Via Contextual Menu
- Select an item in Asset Browser.
- Right-click on the asset and Select Release Lock.
Configuring Locks During Checkout
It is configurable as to whether you would like to be prompted whether to be prompted when checking out a file as to whether you want to be asked to lock or not. If you disable this, files will be locked automatically.
You can configure this setting by doing the following:
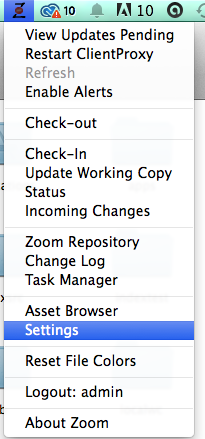
- In the top-right corner, click the
 User menu and Select Settings.
 - Check or uncheck the option Ask to Lock Before Checkout.
Checkout Assets
When you checkout assets, the assets are downloaded to your computer so that you can modify them locally. This files is called working copies. Any changes to the working copy will not affect the file on the Zoom Server until the file is checked in. When the file is checked in, it is stored as a new of the asset.

When you checkout a file from Zoom, the file is downloaded to the working copy folder. The files are stored in the same folder path as located in Zoom. For example, if your file is located in /defproj/My Folder/file.jpg, it will be located in /defproj/My Folder/file.jpg on your computer in the working copy folder.
By default, working copies are downloaded to [Home Directory]/Documents/Evolphin Zoom. This is configurable by changing the setting by going to Z-menu > Settings, clicking on Server/WC Settings and changing the Default Checkout Location setting.
Via Button
- Select an item in Asset Browser.
- Click the
 Checkout button.
Via Contextual Menu
- Select an item in Asset Browser.
- Right-click on the asset and select Checkout.

- You may be prompted as to whether you would like to lock the file.
See Locks
Via Keyboard
- Select an item in Asset Browser.
- On your keyboard, hit:
- Mac: COMMAND + O
- Windows: CTRL + O
The following instructions describe how to checkin assets using Asset Brwoser. When you have made changes to your files, you should see a RED indicator telling you that your has been modified and you need to checkin that file to the server. When you checkin that file to the server, Zoom will analyze the changes you made to your files and send only the changes to the Zoom Server and create a new version.
After you have checked in your file, a working copy remains on your computer until you delink it. Keeping a working copy on your computer allows you to download updates and checkin changes faster as Zoom only has to send the changes in the files back and forth to the server. To remove the working copies from you computer, see Delink Assets
Via Button
- Select an item in Asset Browser.
- Click the
 Checkin button.
Via Contextual Menu
- Select an item in Asset Browser.
- Right-click on the asset and Select Checkin.

Checkin with Links
With Zoom, you can checkin assets that are linked to the asset you have open at that same time you are checking in your asset.
- In your Creative App, click the Checkin button in the Creative App.
- Check the checkbox With Linked Assets.
- Click Checkin.
For additional information, also look at the guides for applications such as Adobe InDesign and Adobe After Effects for more examples.
Checkin and Convert to Working Copy
When checking in a file, Convert to Working Copy copies the file and converts to a working copy in your default working copy folder to continue working on the asset.
- In your Creative App, click the Checkin button in the Creative App.
- Check the checkbox Convert to Working Copy.
- Click Checkin.
Checkin Parent Directory
When importing InDesign, After Effects, or Premiere projects, often you need to import multiple related files at the same time. With Zoom 5.1, you can now Checkin the parent directory of a file from within Creative Apps.
- In your Creative App, click the Checkin button in the Creative App.
- Check the checkbox Parent directory.
- Click Checkin.
Assets can also be checked in via other locations as well:
Once you have completed your project and you no longer need to have working copies on your computer, you can delink them. This will remove the files from your computer. If you need work on them at another time, you can check the files out again.
- Select an item in Asset Browser.
- Right-click on the asset and Select Delink.
Every file inside of Zoom can have multiple revisions or versions of a file. Every time that you commit a new version of a file it creates a new Revision of that file. Any of these different revisions can be accessed at any time.
The different revisions of a file are easily accessible in Asset Browser through the Matched Revisions panel. These are visible by clicking the Revisions button.
There are multiple actions you can do with a revision. These are accessible by doing the following:
- Select an item in Asset Browser.
- Click the
 Revisions button to ensure that the Matched Revisions panel is visible.
 - Click to select a revision in the Matched Revisions panel.
- Right-click the revision.
Revert to an Older Revision
While working, you may realize that you need to revert to an older version of the file. This is possible using the Make Current function in Zoom. When you make an older version current, it will take that original version and create a new revision based on that older version. That way, you can still preserve each of the versions you made.
To revert to an older version, do the following:
- Select an item in Asset Browser.
- Click the
 Revisions button to ensure that the Matched Revisions panel is visible.
 - Click to select a revision in the Matched Revisions panel.
- Right-click the revision.

- Select Make Current.
Compare
One of main issues that creatives have to figure out when they make multiple revisions of a file is what changed between the versions. Zoom has the ability to compare different revisions of a file or two different assets in Zoom so that you can see what exactly changed between versions.
The compare tool allows you to fade between two different files or revisions to analyze the differences between files. You can increase the speed of the fade between versions, decrease the speed of the fade between versions, or zoom in to compare the versions.
Comparing Two Different Revisions of the Same Asset
- Select an item in Asset Browser.
- Click the
 Revisions button to ensure that the Revisions panel is visible.
 - While holding the Shift button, select two of the revisions you would like to compare in the Matched Revisions panel.
- Click the
 Compare button.
Comparing Two Different Assets
- Select two item in Asset Browser using the Command or Shift keys.
- Click the
 Compare button.
Working with Creative Apps
The following items are guides for specific Creative Apps for you to work with the integrated plugins Zoom has for these Apps:

Launch the Zoom Panel
Since Adobe Premiere Pro, unlike other Adobe apps, does not allow third-party plugins to be opened without a project, click on any recent project or create a default project in Premiere.
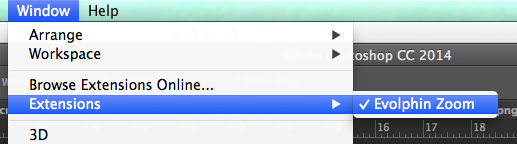
Open the Zoom panel using Windows > Extensions > Evolphin Zoom option in Premiere.
Install Adobe Extension
If you do not see an Evolphin Zoom panel under Window > Extensions > Evolphin Zoom, install the plugin manually using Installing Creative App Plugin.
Start a New Project
Please review the article here on a new project workflow in Premiere. Once a project is opened and appropriate subfolders for collaboration checked out, you are ready to start editing.
Browse for Footage or Graphics
Zoom 7.0 to 7.2
Click on Browse tab then All to browse through the Zoom repository similar to how you would browse a file system.

Switch to various views using the  button.

Search for Footage or Graphics

Depending upon the defaults set up by your administrators, Search via configured Filters such as File Type, Brand etc may show up in the default search view.
Search via Filters
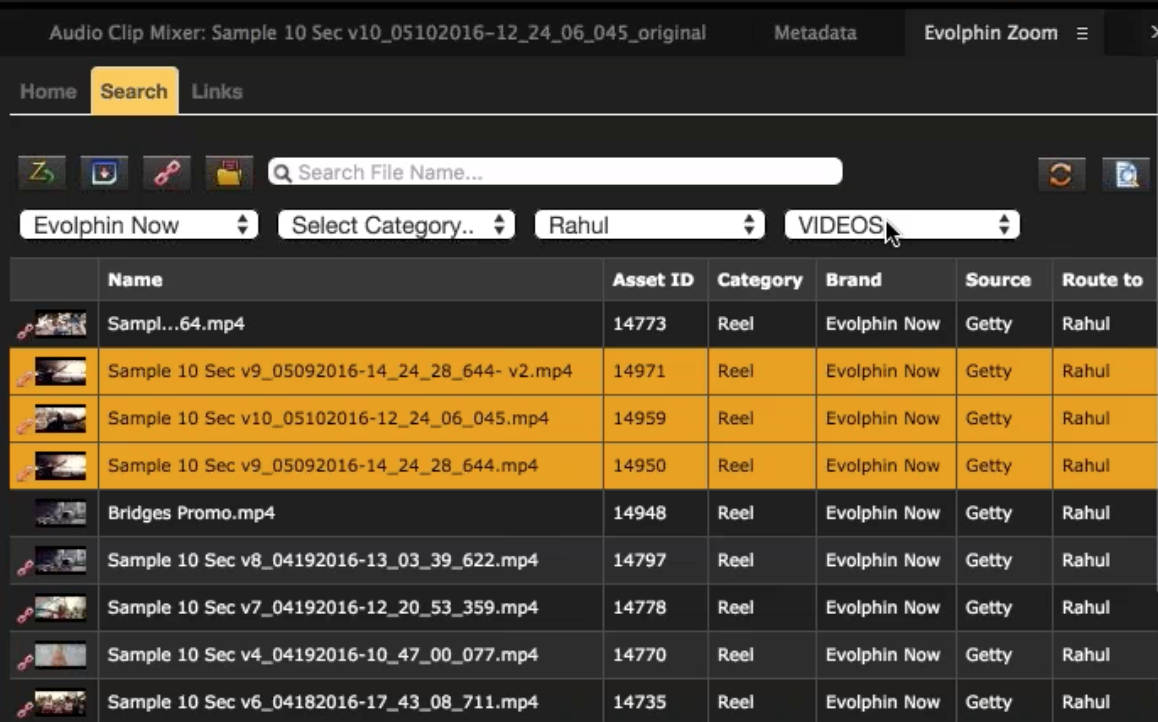
Click on Search tab on the panel, find footage to edit using the drop down filters or by typing in part of a file or folder name and then applying a filter. The filters are customizable by your administrators.
Search via Filename
Type part of the file or folder name in the search box to start the search
Zoom 7.3 onwards
Click on Browse tab then All to browse through the Zoom repository similar to how you would browse a file system.

Switch to various views using the  button on the upper right corner of the plugin window.

Search for Footage or Graphics

Depending upon the defaults set up by your administrators, Search via configured Filters such as File Type, Brand etc may show up in the default search view.
Click on Search button on the All tab, find footage to edit using the drop down filters, by typing in part of a file or folder name, or combining text search with filters. The filters are customizable by your administrators.
Links
Zoom 7.0 to 7.2
The footages that are linkable will show up without a cloud icon  in the search results. These can be drag-n-dropped into Premiere bin or the sequence timeline for editing. If the cloud icon does appear, the element needs to be first checked-out in your working copy using the checkout/download cloud button:

Switching Proxies
Use the Linked Files tab to browse assets that have been linked to the project.
If mid-res or low-res proxies have been generated by the transcoding layer, you can switch between proxies.
If a specific proxy doesn’t exist, switching from the links panel will not have any effect. The project will continue to stay linked to the initial resolution.
Switching specific links
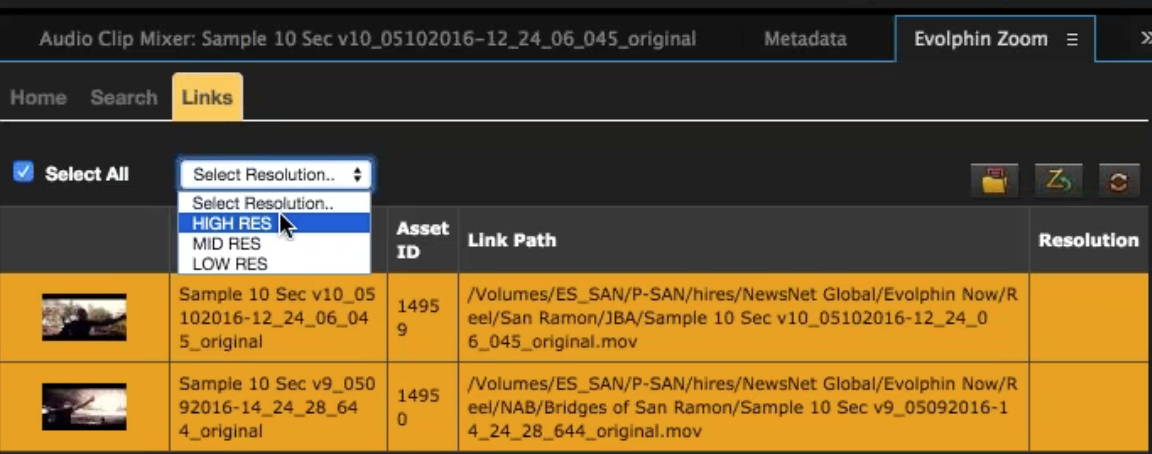
Use the Resolution button to change:

Switching all links
From the right fly-out menu control -> Select All

Then choose the resolution from the buttons below. The specific resolution must be available in order to switch the resolution of selected files. If that resolution is not available, the link for that file will stay the same resolution.
Confirm the resolution of each individual file by switching to list view and checking the resolution column.

Links in Premiere Pro
In Premiere Pro, assets can be placed into the project. The assets that are added to compositions are checked into Zoom as linked assets. A parent-child relationship can be viewed in the Asset Browser Links Panel.
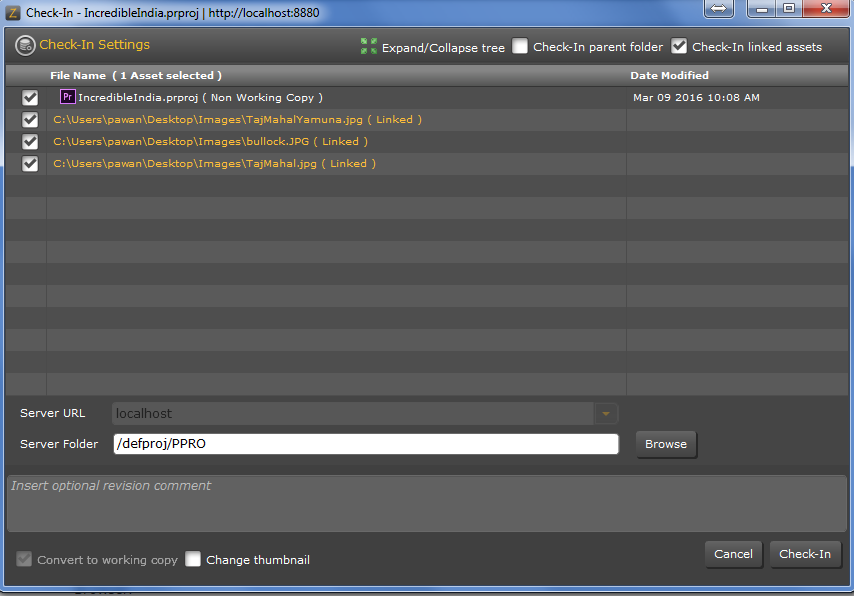
While checking in an asset, check on the Check-in linked assets checkbox (if not selected by default) to check in the linked files along with the PPRO project.

The links will get checked in along with the Premiere Pro project. The links will appear in the Links panel in the Asset Browser.

If you wish to check-in other files such as exports (unless you use the Exports tab), graphic elements under the parent folder of the Premiere project make sure to select the “Check-in parent folder” option in the check-in dialog.
Zoom 7.3 onwards
You can be drag-n-drop any asset into Premiere bin or the sequence timeline for linking and editing. You can also select one or more assets and click the Make Link button at the bottom of the plugin window to link the selected assets. Those assets that cannot be linked will return an error message.
Switching Proxies
Use the Linked Files tab to browse assets that have been linked to the project. Now, you can also search within your linked files if the number of linked files is more than 10.
If mid-res or low-res proxies have been generated by the transcoding layer, you can switch between proxies.
If a specific proxy doesn’t exist, switching from the links panel will not have any effect. The project will continue to stay linked to the previous resolution.
Use the Resolution button to change between different proxies.

Switching all links
From the right fly-out menu control -> Select All

Then choose the resolution from the buttons below. Please note the specific resolution must be available in order to switch the resolution of selected files. If that resolution is not available, the link for that file will stay the same resolution.
Confirm the resolution of each individual file by switching to list view and checking the resolution column. Direct ingest files do not have any resolution proxy.

Links in Premiere Pro
In Premiere Pro, assets can be placed into the project. The assets that are added to compositions are checked into Zoom as linked assets. A parent-child relationship can be viewed in the Asset Browser Links Panel.
While checking in an asset, check on the Check-in linked assets checkbox (if not selected by default) to check in the linked files along with the PPRO project.
The links will get checked in along with the Premiere Pro project. The links will appear in the Links panel in the Asset Browser.
If you wish to check-in other files such as exports (unless you use the Exports tab), graphic elements under the parent folder of the Premiere project make sure to select the “Check-in parent folder” option in the check-in dialog.
Exporting from Premiere Pro
From Zoom 7.0 onwards, Zoom Export will use the underlying Adobe media encoder (AME) to export the video from a sequence or a clip with specific in/out markers. The exported videos can be automatically synced to the MAM server.

Before using Export, please ensure your administrator had added the media encoding preset file for Premiere (epr) to the MAM server. The epr file can be created using the steps listed here.
The exported file will have the same name as the sequence. Multiple versions will be synced as a single Zoom deduplicated file saving storage & network bandwidth.
Checkin Assets
There are a variety of different ways assets can be checked into Zoom. Assets can be checked into Zoom directly from within a Creative App without having to depend on the Asset Browser. For additional information on how to Check-in, see Check-in Assets .
Check-in Unversioned File
- Save your current document.
- Open the Evolphin Zoom panel by navigating to Window > Extensions > Evolphin Zoom.
- Zoom 7.0: Click Sync.
Zoom 6.0 or below: Click Check-in
- Choose Server URL if prompted.
Check-in Versioned File
In order to check-in existing assets into Zoom via the Creative App panel, your file must already be saved on your computer.
- Save your current document.
- Open the Evolphin Zoom panel by navigating to Window > Extensions > Evolphin Zoom.
- Zoom 7.0: Click Sync.
Zoom 6.0 or below: Click Check-in.
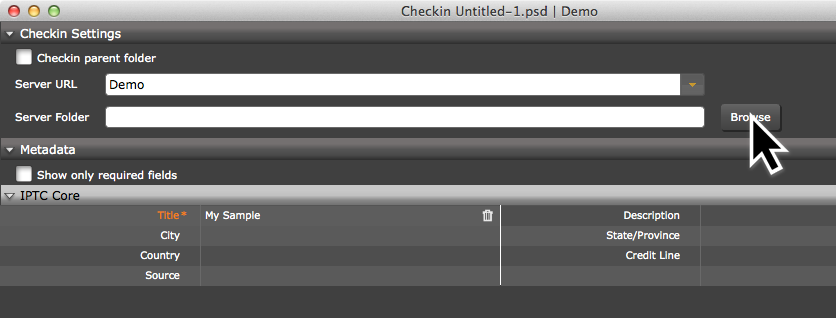
- Fill out any required metadata or keyword values.
- Click Check-in.
Check-in Options
| Option | Description |
|---|---|
| Expand/Collapse tree | Click to toggle between viewing expanded or collapsed folders in the check-in window. By default, folders are viewed as expanded. |
| Show unversioned | Click to toggle between viewing only the project/document files or all unversioned files in the parent folder. |
| Check-in Parent Folder | Checks in the folder that contains the current document. |
| Check-in linked assets | Click to toggle between checking-in linked assets along with the project/document check-in. |
| Exclusive only | Click to toggle between checking-in only the project/document and their linked files but not any other unversioned files. |
| Convert to working copy | Copies the file from its current location to its location in the default working copy folder on your computer. |
| Metadata selection | If enabled, choose/enter values for mandatory metadata fields or select from a preset from the preset drop-down. |
| Keep files locked | Zoom automatically unlocks assets when performing a Check-in. Enabling this will keep the asset locked after check-in. |
| Change thumbnail | Zoom will search for a _tb file in the same directory as the asset. |
Quick Checkin*
*Not available in Zoom 7.0+
Assets can also be checked into Zoom using the Quick Checkin button in the Creative App panel as described here:
Quick Checkin allows users to quickly check-in assets to a specified location in Zoom. This will also forego any required metadata dialogs. This is useful particularly in environments such as news organizations that need to quickly import items into Zoom and perform organization later. Quick Checkin must be configured in order to work properly.
Quick Checkin
Prerequisites:
- Open Settings dialog from Z-Icon in the system tray.

Settings Dialog - Set default zoom server and make sure to select Always Use Default.

Default Server - Open zoom.properties file from $HOME/.zm
For Example: /Users/joe/.zm/zoom.properties
- Add default Quick Checkin destination folder.
Syntax: QUICK_CHECKIN_DEST=/defproj
/defproj is the path on zoom server where Quick Checkin files will go to. - The Quick Checkin dialog will not appear by default. Add SHOW_QUICK_CHECKIN property in zoom.properties file, if you want to the Quick Checkin dialog to appear.
Syntax: SHOW_QUICK_CHECKIN=TRUE
- If mandatory metadata is enabled on zoom server, make sure to save the default metadata template from checkin dialog
- Open Checkin dialog.
- Fill all the mandatory metadata fields.
- Click the save button


Launch Quick Checkin:
-
- Save your current document.
- Open the Evolphin Zoom panel by navigating to Window > Extensions > Evolphin Zoom.

- Click Quick Checkin.

- Click Checkin in the Quick Checkin dialog.
The Quick Checkin dialog will not appear if SILENT_QUICK_CHECKIN is set to TRUE in zoom.properties file.
Smart Copy/Clone Project
Within Zoom, creating copies of files is easy using Smart Copy. Unlike conventional copying of files which takes up additional data, creating a Smart Copy allows a file to be copied and edited without having to duplicate data on the server. You can create smart copies of a file or an entire folder. For additional information on Smart Copy, see Smart Copy Assets .
- Save your current document.
- Open the Evolphin Zoom panel by navigating to Window > Extensions > Evolphin Zoom.
Window > Extensions > Evolphin Zoom - Zoom 7.0: Click Fly-out menu > Clone Project

Zoom 6.0 or below: Click Smart Copy.
- Choose Server URL.
Check Browse – Checkin Dialog - Click Browse to choose the location in Zoom to checkin the asset.
- Fill out any required metadata or keyword values.
- Enable or disable Convert to working copy.
- Click Smart Copy.
Lock/Unlock
Lock is a feature in Zoom that allows you to restrict who is working at a file at one time. This helps communicate to users which files have been delegated to which users at a time. When a file is locked, other users in Zoom are not able to commit a new version of the file until you have released the lock on the file.
When you Checkin an asset, the asset is automatically unlocked unless you explicitly check Keep files locked in the Checkin dialog.
Lock
- Save your current document.
- Open the Evolphin Zoom panel by navigating to Window > Extensions > Evolphin Zoom.
Window > Extensions > Evolphin Zoom - Zoom 7.0: Toggle Lock

Zoom 6.0 or below: Click Lock/Unlock and select Get Lock.
- Choose Server URL.
Check Browse – Checkin Dialog
Release Lock
- Save your current document.
- Open the Evolphin Zoom panel by navigating to Window > Extensions > Evolphin Zoom.
Window > Extensions > Evolphin Zoom - Zoom 7.0:

Zoom 6.0 or below: Click Lock/Unlock and select Release Lock.
- Choose Server URL.
Check Browse – Checkin Dialog
Revert/Revert Project
When editing an asset inside of Zoom, Revert allows you to revert back to the last revision checked out from the Zoom Server. This will remove any of the modifications that were applied to the asset.
Revert Changes
- Open the Evolphin Zoom panel by navigating to Window > Extensions > Evolphin Zoom.
Window > Extensions > Evolphin Zoom - Zoom 7.0: Click Revert Project from the fly-out menu

Zoom 6.0 or lower: Click Revert. In the drop-down, select Revert Changes.

- Click OK.
Update/Sync
When a file is changed on the Zoom Server, for example a new version is created, the file on your computer now is older than the latest version on the server and needs to be updated. Updating the files will update the file if there is a newer version or move it if it was moved on the Zoom Server.
Update Asset
- Open the Evolphin Zoom panel by navigating to Window > Extensions > Evolphin Zoom.
Window > Extensions > Evolphin Zoom - Zoom 7.0: Click Sync. Sync will determine if update from or check-in to server is needed.

Zoom 6.0 or lower: Click Update.

- Click OK.
Task Manager
The Task Manager allows users who have the Workflow module to accept and submit tasks assigned to them within a Workflow Job. The Task Manager can be launched directly from with the Creative App Plugin.
- Open the Evolphin Zoom panel by navigating to Window > Extensions > Evolphin Zoom.
Window > Extensions > Evolphin Zoom - Click Task Manager.
- Click OK.
Show in Asset Browser/View in Zoom
The Show in Asset Browser button in the Creative App Plugin allows users to navigate to the asset they have open in the Creative App within Asset Browser.
Show Current Asset in Asset Browser
- Open the Evolphin Zoom panel by navigating to Window > Extensions > Evolphin Zoom.
Window > Extensions > Evolphin Zoom - Zoom 7.0: Click

or from any view, select a file:

Zoom 6.0 or below: Click Show in Asset Browser.

- Click OK.
Status
The Status button shows the detailed current status of a working copy on your computer locally and on the Zoom Server. This includes information such as File Status, Size, Modification Date, etc.
View Asset Status
- Open the Evolphin Zoom panel by navigating to Window > Extensions > Evolphin Zoom.
Window > Extensions > Evolphin Zoom - Click Status.
Reveal/View in Explorer/Finder
Reveal in Explorer / Reveal in Finder button in the Creative App Plugin navigates to the working copy within Windows Explorer or the Apple Finder on your computer.
Reveal in Windows Explorer or Apple Finder
- Open the Evolphin Zoom panel by navigating to Window > Extensions > Evolphin Zoom.
- Zoom 7.0:

or from any file that can be accessed without the cloud icon:

Zoom 6.0 or below: Click Reveal in Explorer.

Resolve Links
Resolve Links functionality, available in the Creative app panel can be used to replace broken/unversioned links in the main with the links in the working copy. It works on a file that was checked into Zoom Server along with all its links. Resolve links will not work properly if the links have been re-ordered. So, if there is a need to re-order the links in the main file, make sure to issue Resolve Links before re-ordering.
- Open the file for which you need to Resolve Links in the appropriate Creative App.
- Open the Evolphin Zoom panel by navigating to Window > Extensions > Evolphin Zoom.
- Make sure that the linked files are also checked out in your machine.
- Zoom 7.0: Via the fly-out menu, Click Resolve Links.

Zoom 6.0 or below: Click Resolve Links.

Resolve Links best practices:
- Scenario – There is a PhotoShop file Main.psd. It has links to ~/Desktop/links/Link1.jpg and ~/Desktop/links/Link2.jpg. Main.psd is checked-in to Zoom along-with the links and with Convert to WC checked. In this case, Main.psd, Link1.jpg, and Link2.jpg will all get checked into Zoom Server and the versioned copy of Main.psd would open up in PhotoShop. After check-in, resolve links will automatically run so that the links of Main.psd get updated to the versioned copies of Link1.jpg and Link2.jpg instead of the original link files in ~/Desktop/links. If it fails in any case, make sure to click on Resolve Links manually.
- Resolve links would look for files in the order – third party mount points, auto-checkout mount points, working copy. This means if you want to resolve paths only from the working copy, make sure auto-checkout mount point and third party mount points do not have copies of your linked files. For high-res files, by default the links will be resolved in the order of high-res, mid-res, low-res(auto-checkout mount point, working copy).

Launch the Zoom Panel
Since Adobe Premiere, unlike other Adobe apps, does not allow third-party plugins to be opened without a project, click on any recent project or create a default project in Premiere.
Open the Zoom panel using Windows > Extensions > Evolphin Zoom option in Premiere
Install Adobe Extension
If you do not see an Evolphin Zoom panel under Window > Extensions > Evolphin Zoom, install the plugin manually using Installing Creative App Plugin.
Starting a New Project
Please review the article here on a new project workflow in Premiere. Once a project is opened and appropriate subfolders for collaboration checked out, you are ready to start editing.
Search for Footage or Graphics
Depending upon the defaults set up by your administrators, Search via Filters or Metadata may show up in the default search view.
Search via Filters
Click on Search tab on the panel, find footage to edit using the drop down filters or by typing in part of a file or folder name and then applying a filter. The filters are customizable by your administrators.
Search via Metadata
Click on the ![]() icon to switch to search everywhere mode. This allows you to do a global search that can match any metadata or file name automatically.
icon to switch to search everywhere mode. This allows you to do a global search that can match any metadata or file name automatically.
Linking
The footages that are linkable will show up with a link icon ![]() in the search results. These can be drag-n-dropped into Premiere bin or the sequence timeline for editing. If the link icon does not appear the element needs to be checked-out in your working copy using the checkout button
in the search results. These can be drag-n-dropped into Premiere bin or the sequence timeline for editing. If the link icon does not appear the element needs to be checked-out in your working copy using the checkout button ![]()
Switching Proxies
Use the Links tab to browse assets that have been linked to the project.
If mid-res or low-res proxies have been generated by the transcoding layer, you can switch between proxies.
If a specific proxy doesn’t exist then switching from the links panel will not have any effect, the project will continue to stay linked to the initial resolution.
To switch a specific link to a low-res proxy make sure you check-out/download the low-res proxy first by clicking on the checkout button on the toolbar.
Switching specific links
Use the Resolution drop down to change:

Switching all links
Links in Premiere Pro
In Premiere Pro, assets can be placed into the project. The assets that are added to compositions are checked into Zoom as linked assets.
While checking in an asset, check on the Check-in linked assets checkbox to check-in the linked files along with the PPRO project.
The links will get checked in along with the Premiere Pro project. The links will appear in the Links panel in the Asset Browser.
If you wish to check-in other files such as exports, graphic elements under the parent folder of the Premiere project make sure to select the “Check-in parent folder” option in the check-in dialog.
Checkin Assets
There are a variety of different ways assets can be checked into Zoom. Assets can be checked into Zoom directly from within a Creative App without having to depend on the Asset Browser. For additional information on how to Check-in, see Check-in Assets .
Check-in Unversioned File
- Save your current document.
- Open the Evolphin Zoom panel by navigating to Window > Extensions > Evolphin Zoom.
- Zoom 7.0: Click Sync.
Zoom 6.0 or below: Click Check-in
- Choose Server URL if prompted.
Check-in Versioned File
In order to check-in existing assets into Zoom via the Creative App panel, your file must already be saved on your computer.
- Save your current document.
- Open the Evolphin Zoom panel by navigating to Window > Extensions > Evolphin Zoom.
- Zoom 7.0: Click Sync.
Zoom 6.0 or below: Click Check-in.
- Fill out any required metadata or keyword values.
- Click Check-in.
Check-in Options
| Option | Description |
|---|---|
| Expand/Collapse tree | Click to toggle between viewing expanded or collapsed folders in the check-in window. By default, folders are viewed as expanded. |
| Show unversioned | Click to toggle between viewing only the project/document files or all unversioned files in the parent folder. |
| Check-in Parent Folder | Checks in the folder that contains the current document. |
| Check-in linked assets | Click to toggle between checking-in linked assets along with the project/document check-in. |
| Exclusive only | Click to toggle between checking-in only the project/document and their linked files but not any other unversioned files. |
| Convert to working copy | Copies the file from its current location to its location in the default working copy folder on your computer. |
| Metadata selection | If enabled, choose/enter values for mandatory metadata fields or select from a preset from the preset drop-down. |
| Keep files locked | Zoom automatically unlocks assets when performing a Check-in. Enabling this will keep the asset locked after check-in. |
| Change thumbnail | Zoom will search for a _tb file in the same directory as the asset. |
Quick Checkin*
*Not available in Zoom 7.0+
Assets can also be checked into Zoom using the Quick Checkin button in the Creative App panel as described here:
Quick Checkin allows users to quickly check-in assets to a specified location in Zoom. This will also forego any required metadata dialogs. This is useful particularly in environments such as news organizations that need to quickly import items into Zoom and perform organization later. Quick Checkin must be configured in order to work properly.
Quick Checkin
Prerequisites:
- Open Settings dialog from Z-Icon in the system tray.
Settings Dialog - Set default zoom server and make sure to select Always Use Default.
Default Server - Open zoom.properties file from $HOME/.zm
For Example: /Users/joe/.zm/zoom.properties
- Add default Quick Checkin destination folder.
Syntax: QUICK_CHECKIN_DEST=/defproj
/defproj is the path on zoom server where Quick Checkin files will go to. - The Quick Checkin dialog will not appear by default. Add SHOW_QUICK_CHECKIN property in zoom.properties file, if you want to the Quick Checkin dialog to appear.
Syntax: SHOW_QUICK_CHECKIN=TRUE
- If mandatory metadata is enabled on zoom server, make sure to save the default metadata template from checkin dialog
- Open Checkin dialog.
- Fill all the mandatory metadata fields.
- Click the save button
Launch Quick Checkin:
-
- Save your current document.
- Open the Evolphin Zoom panel by navigating to Window > Extensions > Evolphin Zoom.
- Click Quick Checkin.
- Click Checkin in the Quick Checkin dialog.
The Quick Checkin dialog will not appear if SILENT_QUICK_CHECKIN is set to TRUE in zoom.properties file.
Smart Copy
Within Zoom, creating copies of files is easy using Smart Copy. Unlike conventional copying of files which takes up additional data, creating a Smart Copy allows a file to be copied and edited without having to duplicate data on the server. You can create smart copies of a file or an entire folder. For additional information on Smart Copy, see Smart Copy Assets .
- Save your current document.
- Open the Evolphin Zoom panel by navigating to Window > Extensions > Evolphin Zoom.
Window > Extensions > Evolphin Zoom - Zoom 7.0: Click Fly-out menu > Clone Project
Zoom 6.0 or below: Click Smart Copy.
- Choose Server URL.
Check Browse – Checkin Dialog - Click Browse to choose the location in Zoom to checkin the asset.
- Fill out any required metadata or keyword values.
- Enable or disable Convert to working copy.
- Click Smart Copy.
Lock/Unlock
Lock is a feature in Zoom that allows you to restrict who is working at a file at one time. This helps communicate to users which files have been delegated to which users at a time. When a file is locked, other users in Zoom are not able to commit a new version of the file until you have released the lock on the file.
When you Checkin an asset, the asset is automatically unlocked unless you explicitly check Keep files locked in the Checkin dialog.
Lock
- Save your current document.
- Open the Evolphin Zoom panel by navigating to Window > Extensions > Evolphin Zoom.
Window > Extensions > Evolphin Zoom - Zoom 7.0: Toggle Lock
Zoom 6.0 or below: Click Lock/Unlock and select Get Lock.
- Choose Server URL.
Check Browse – Checkin Dialog
Release Lock
- Save your current document.
- Open the Evolphin Zoom panel by navigating to Window > Extensions > Evolphin Zoom.
Window > Extensions > Evolphin Zoom - Zoom 7.0:
Zoom 6.0 or below: Click Lock/Unlock and select Release Lock.
- Choose Server URL.
Check Browse – Checkin Dialog
Revert
When editing an asset inside of Zoom, Revert allows you to revert back to the last revision checked out from the Zoom Server. This will remove any of the modifications that were applied to the asset.
Revert Changes
- Open the Evolphin Zoom panel by navigating to Window > Extensions > Evolphin Zoom.
Window > Extensions > Evolphin Zoom - Zoom 7.0: Click Revert Project from the fly-out menu
Zoom 6.0 or lower: Click Revert. In the drop-down, select Revert Changes.
- Click OK.
Update
When a file is changed on the Zoom Server, for example a new version is created, the file on your computer now is older than the latest version on the server and needs to be updated. Updating the files will update the file if there is a newer version or move it if it was moved on the Zoom Server.
Update Asset
- Open the Evolphin Zoom panel by navigating to Window > Extensions > Evolphin Zoom.
Window > Extensions > Evolphin Zoom - Zoom 7.0: Click Sync. Sync will determine if update from or check-in to server is needed.
Zoom 6.0 or lower: Click Update.
- Click OK.
Task Manager
The Task Manager allows users who have the Workflow module to accept and submit tasks assigned to them within a Workflow Job. The Task Manager can be launched directly from with the Creative App Plugin.
- Open the Evolphin Zoom panel by navigating to Window > Extensions > Evolphin Zoom.
Window > Extensions > Evolphin Zoom - Click Task Manager.
- Click OK.
Show in Asset Browser
The Show in Asset Browser button in the Creative App Plugin allows users to navigate to the asset they have open in the Creative App within Asset Browser.
Show Current Asset in Asset Browser
- Open the Evolphin Zoom panel by navigating to Window > Extensions > Evolphin Zoom.
Window > Extensions > Evolphin Zoom - Zoom 7.0: Click
or from any view, select a file:
Zoom 6.0 or below: Click Show in Asset Browser.
- Click OK.
Status
The Status button shows the detailed current status of a working copy on your computer locally and on the Zoom Server. This includes information such as File Status, Size, Modification Date, etc.
View Asset Status
- Open the Evolphin Zoom panel by navigating to Window > Extensions > Evolphin Zoom.
Window > Extensions > Evolphin Zoom - Click Status.
Reveal in Explorer
Reveal in Explorer / Reveal in Finder button in the Creative App Plugin navigates to the working copy within Windows Explorer or the Apple Finder on your computer.
Reveal in Windows Explorer or Apple Finder
- Open the Evolphin Zoom panel by navigating to Window > Extensions > Evolphin Zoom.
- Zoom 7.0:
or from any file that can be accessed without the cloud icon:
Zoom 6.0 or below: Click Reveal in Explorer.
Resolve Links
Resolve Links functionality, available in the Creative app panel can be used to replace broken/unversioned links in the main with the links in the working copy. It works on a file that was checked into Zoom Server along with all its links. Resolve links will not work properly if the links have been re-ordered. So, if there is a need to re-order the links in the main file, make sure to issue Resolve Links before re-ordering.
- Open the file for which you need to Resolve Links in the appropriate Creative App.
- Open the Evolphin Zoom panel by navigating to Window > Extensions > Evolphin Zoom.
- Make sure that the linked files are also checked out in your machine.
- Zoom 7.0: Via the fly-out menu, Click Resolve Links.
Zoom 6.0 or below: Click Resolve Links.
Resolve Links best practices:
- Scenario – There is a PhotoShop file Main.psd. It has links to ~/Desktop/links/Link1.jpg and ~/Desktop/links/Link2.jpg. Main.psd is checked-in to Zoom along-with the links and with Convert to WC checked. In this case, Main.psd, Link1.jpg, and Link2.jpg will all get checked into Zoom Server and the versioned copy of Main.psd would open up in PhotoShop. After check-in, resolve links will automatically run so that the links of Main.psd get updated to the versioned copies of Link1.jpg and Link2.jpg instead of the original link files in ~/Desktop/links. If it fails in any case, make sure to click on Resolve Links manually.
- Resolve links would look for files in the order – third party mount points, auto-checkout mount points, working copy. This means if you want to resolve paths only from the working copy, make sure auto-checkout mount point and third party mount points do not have copies of your linked files. For high-res files, by default the links will be resolved in the order of high-res, mid-res, low-res(auto-checkout mount point, working copy).
Install Adobe Extension
If you do not see an Evolphin Zoom panel under Window > Extensions > Evolphin Zoom, install the plugin manually using Installing Creative App Plugin .
Structuring Folders
Evolphin Zoom is able to handle assets that are both individual assets and entire folders. Within Photoshop, most Photoshop documents are composed of one individual PSD file. However, there are also instances where a Photoshop file may be composed of multiple assets.
In Photoshop CC, Adobe introduced the Generate Assets feature that allowed users of Photoshop to generate multiple sub-images that are automatically created when the Photoshop document is updated. When this occurs, you may want to check-in your assets next to the Photoshop document as well as the Photoshop document.
In instances such as these, it is suggested to store your Photoshop document and related assets in an individual folder.
Layers in Photoshop
In Zoom 5.1 and greater, Zoom can read all of the layers inside a Photoshop document automatically. This allows you to view the Layers within Zoom without even having to have Photoshop installed or open.
In order for Zoom to properly read the layers in a Photoshop document, you MUST check-in the Photoshop asset using the Creative App Plugin in Photoshop CC or greater. The reason for this is that Zoom depends on Photoshop to read the information about the asset layers. It does not matter whether the asset is a new asset or a new revision of an asset already in Zoom; as long as the graphic is checked in using Photoshop, Zoom will read the layers.
Links in Photoshop
In Photoshop CC, Adobe introduced the concept of linked assets in Photoshop. Similar to InDesign, Illustrator, and other Adobe applications, this meant that assets could be placed into Photoshop and maintain a link to the original asset. If the original asset was updated, then the Photoshop document would be updated.
In Zoom 5.1 and greater, Zoom can read the linked assets inside of a Photoshop document automatically based on which layers. Assets are automatically linked in Zoom so you can see which assets derivatives there are of that original asset.
Link Assets in Photoshop
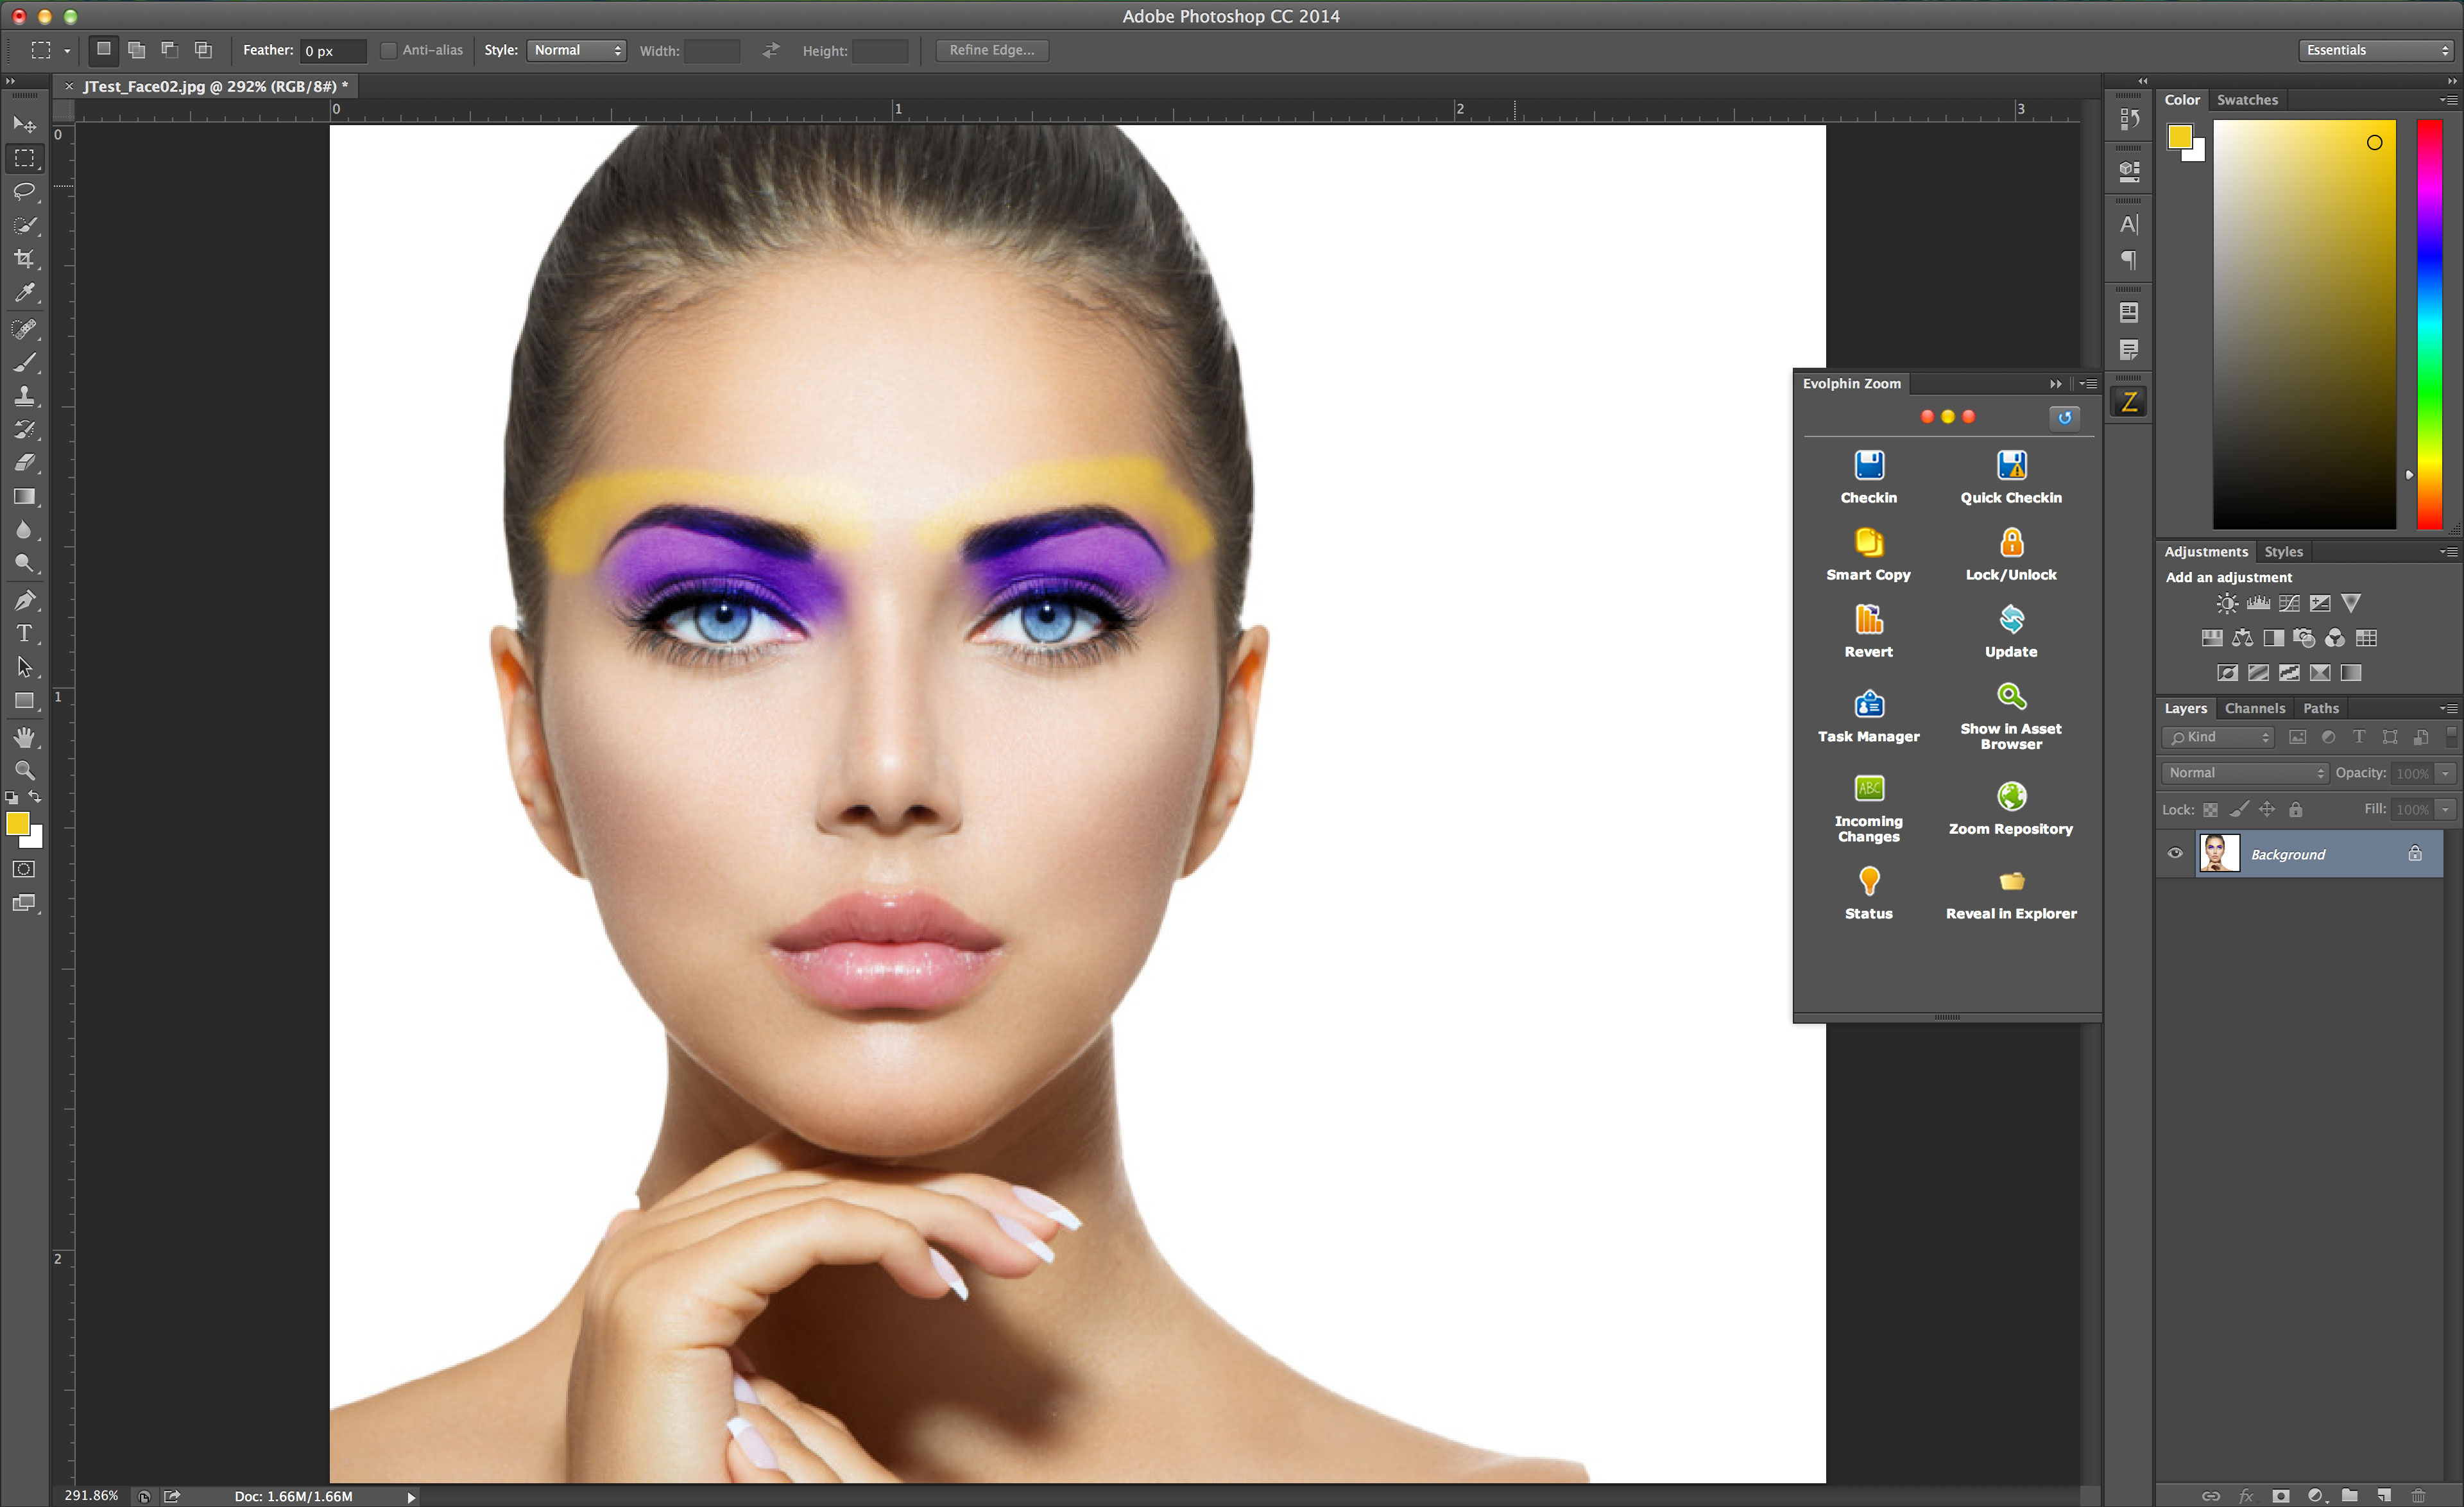
In order to link assets in Photoshop, you must use the Place function in Photoshop. Drag-and-dropping into Photoshop does not place the image; it will embed the image into the Photoshop document. In order to link the asset, you must do the following:
- Open your Photoshop document.
- Go to File > Place Linked…

Place Linked… – Adobe Photoshop - Navigate to the asset you have checked out in your Working Copy folder.
- Click Place.

When you check-in your asset, the layer containing your linked asset will have an image link. You can then click the Visit ![]() Parent Asset button to navigate to that asset in Asset Browser. Your asset will also be linked in the Links panel.
Parent Asset button to navigate to that asset in Asset Browser. Your asset will also be linked in the Links panel.
Checkin Assets
There are a variety of different ways assets can be checked into Zoom. Assets can be checked into Zoom directly from within a Creative App without having to depend on the Asset Browser. For additional information on how to Check-in, see Check-in Assets .
Check-in Unversioned File
- Save your current document.
- Open the Evolphin Zoom panel by navigating to Window > Extensions > Evolphin Zoom.
- Zoom 7.0: Click Sync.
Zoom 6.0 or below: Click Check-in
- Choose Server URL if prompted.
Check-in Versioned File
In order to check-in existing assets into Zoom via the Creative App panel, your file must already be saved on your computer.
- Save your current document.
- Open the Evolphin Zoom panel by navigating to Window > Extensions > Evolphin Zoom.
- Zoom 7.0: Click Sync.
Zoom 6.0 or below: Click Check-in.
- Fill out any required metadata or keyword values.
- Click Check-in.
Check-in Options
| Option | Description |
|---|---|
| Expand/Collapse tree | Click to toggle between viewing expanded or collapsed folders in the check-in window. By default, folders are viewed as expanded. |
| Show unversioned | Click to toggle between viewing only the project/document files or all unversioned files in the parent folder. |
| Check-in Parent Folder | Checks in the folder that contains the current document. |
| Check-in linked assets | Click to toggle between checking-in linked assets along with the project/document check-in. |
| Exclusive only | Click to toggle between checking-in only the project/document and their linked files but not any other unversioned files. |
| Convert to working copy | Copies the file from its current location to its location in the default working copy folder on your computer. |
| Metadata selection | If enabled, choose/enter values for mandatory metadata fields or select from a preset from the preset drop-down. |
| Keep files locked | Zoom automatically unlocks assets when performing a Check-in. Enabling this will keep the asset locked after check-in. |
| Change thumbnail | Zoom will search for a _tb file in the same directory as the asset. |
Quick Checkin*
*Not available in Zoom 7.0+
Assets can also be checked into Zoom using the Quick Checkin button in the Creative App panel as described here:
Quick Checkin allows users to quickly check-in assets to a specified location in Zoom. This will also forego any required metadata dialogs. This is useful particularly in environments such as news organizations that need to quickly import items into Zoom and perform organization later. Quick Checkin must be configured in order to work properly.
Quick Checkin
Prerequisites:
- Open Settings dialog from Z-Icon in the system tray.
Settings Dialog - Set default zoom server and make sure to select Always Use Default.
Default Server - Open zoom.properties file from $HOME/.zm
For Example: /Users/joe/.zm/zoom.properties
- Add default Quick Checkin destination folder.
Syntax: QUICK_CHECKIN_DEST=/defproj
/defproj is the path on zoom server where Quick Checkin files will go to. - The Quick Checkin dialog will not appear by default. Add SHOW_QUICK_CHECKIN property in zoom.properties file, if you want to the Quick Checkin dialog to appear.
Syntax: SHOW_QUICK_CHECKIN=TRUE
- If mandatory metadata is enabled on zoom server, make sure to save the default metadata template from checkin dialog
- Open Checkin dialog.
- Fill all the mandatory metadata fields.
- Click the save button
Launch Quick Checkin:
-
- Save your current document.
- Open the Evolphin Zoom panel by navigating to Window > Extensions > Evolphin Zoom.
- Click Quick Checkin.
- Click Checkin in the Quick Checkin dialog.
The Quick Checkin dialog will not appear if SILENT_QUICK_CHECKIN is set to TRUE in zoom.properties file.
Smart Copy/Clone Project
Within Zoom, creating copies of files is easy using Smart Copy. Unlike conventional copying of files which takes up additional data, creating a Smart Copy allows a file to be copied and edited without having to duplicate data on the server. You can create smart copies of a file or an entire folder. For additional information on Smart Copy, see Smart Copy Assets .
- Save your current document.
- Open the Evolphin Zoom panel by navigating to Window > Extensions > Evolphin Zoom.
Window > Extensions > Evolphin Zoom - Zoom 7.0: Click Fly-out menu > Clone Project
Zoom 6.0 or below: Click Smart Copy.
- Choose Server URL.
Check Browse – Checkin Dialog - Click Browse to choose the location in Zoom to checkin the asset.
- Fill out any required metadata or keyword values.
- Enable or disable Convert to working copy.
- Click Smart Copy.
Lock/Unlock
Lock is a feature in Zoom that allows you to restrict who is working at a file at one time. This helps communicate to users which files have been delegated to which users at a time. When a file is locked, other users in Zoom are not able to commit a new version of the file until you have released the lock on the file.
When you Checkin an asset, the asset is automatically unlocked unless you explicitly check Keep files locked in the Checkin dialog.
Lock
- Save your current document.
- Open the Evolphin Zoom panel by navigating to Window > Extensions > Evolphin Zoom.
Window > Extensions > Evolphin Zoom - Zoom 7.0: Toggle Lock
Zoom 6.0 or below: Click Lock/Unlock and select Get Lock.
- Choose Server URL.
Check Browse – Checkin Dialog
Release Lock
- Save your current document.
- Open the Evolphin Zoom panel by navigating to Window > Extensions > Evolphin Zoom.
Window > Extensions > Evolphin Zoom - Zoom 7.0:
Zoom 6.0 or below: Click Lock/Unlock and select Release Lock.
- Choose Server URL.
Check Browse – Checkin Dialog
Revert
When editing an asset inside of Zoom, Revert allows you to revert back to the last revision checked out from the Zoom Server. This will remove any of the modifications that were applied to the asset.
Revert Changes
- Open the Evolphin Zoom panel by navigating to Window > Extensions > Evolphin Zoom.
Window > Extensions > Evolphin Zoom - Zoom 7.0: Click Revert Project from the fly-out menu
Zoom 6.0 or lower: Click Revert. In the drop-down, select Revert Changes.
- Click OK.
Update/Sync
When a file is changed on the Zoom Server, for example a new version is created, the file on your computer now is older than the latest version on the server and needs to be updated. Updating the files will update the file if there is a newer version or move it if it was moved on the Zoom Server.
Update Asset
- Open the Evolphin Zoom panel by navigating to Window > Extensions > Evolphin Zoom.
Window > Extensions > Evolphin Zoom - Zoom 7.0: Click Sync. Sync will determine if update from or check-in to server is needed.
Zoom 6.0 or lower: Click Update.
- Click OK.
Task Manager
The Task Manager allows users who have the Workflow module to accept and submit tasks assigned to them within a Workflow Job. The Task Manager can be launched directly from with the Creative App Plugin.
- Open the Evolphin Zoom panel by navigating to Window > Extensions > Evolphin Zoom.
Window > Extensions > Evolphin Zoom - Click Task Manager.
- Click OK.
Show in Asset Browser/View in Zoom
The Show in Asset Browser button in the Creative App Plugin allows users to navigate to the asset they have open in the Creative App within Asset Browser.
Show Current Asset in Asset Browser
- Open the Evolphin Zoom panel by navigating to Window > Extensions > Evolphin Zoom.
Window > Extensions > Evolphin Zoom - Zoom 7.0: Click
or from any view, select a file:
Zoom 6.0 or below: Click Show in Asset Browser.
- Click OK.
Incoming Changes
Incoming Changes allows you to view what working copies on your computer currently have never revisions on the Zoom Server. Accessing Incoming Changes is possible directly through the Creative App Panel.
Revert Changes
- Open the Evolphin Zoom panel by navigating to Window > Extensions > Evolphin Zoom.
Window > Extensions > Evolphin Zoom - Click Incoming Changes.

Zoom Repository
The Zoom Repository button in the Creative App Plugin will allow you to launch the Zoom Repository from directly within your Creative App.
Launching Zoom Repository
- Open the Evolphin Zoom panel by navigating to Window > Extensions > Evolphin Zoom.
Window > Extensions > Evolphin Zoom - Click Zoom Repository.

Status
The Status button shows the detailed current status of a working copy on your computer locally and on the Zoom Server. This includes information such as File Status, Size, Modification Date, etc.
View Asset Status
- Open the Evolphin Zoom panel by navigating to Window > Extensions > Evolphin Zoom.
Window > Extensions > Evolphin Zoom - Click Status.
Reveal/View in Explorer/Finder
Reveal in Explorer / Reveal in Finder button in the Creative App Plugin navigates to the working copy within Windows Explorer or the Apple Finder on your computer.
Reveal in Windows Explorer or Apple Finder
- Open the Evolphin Zoom panel by navigating to Window > Extensions > Evolphin Zoom.
- Zoom 7.0:
or from any file that can be accessed without the cloud icon:
Zoom 6.0 or below: Click Reveal in Explorer.

Install Adobe Extension
If you do not see an Evolphin Zoom panel under Window > Extensions > Evolphin Zoom, install the plugin manually using Installing Creative App Plugin .
Structuring Folders
Evolphin Zoom is able to handle assets that are both individual assets and entire folders. In InDesign, layouts can encompass a variety of different images or other documents that are linked. Links that are contained within a sub-folder next to the INDD folder will perform a relative link. As a result, it is suggested that when possible to contain InDesign projects as a folder.
When checking out an InDesign document, it is suggested to check-out the containing folder. That way, all of the related assets could be checked out at the same time.
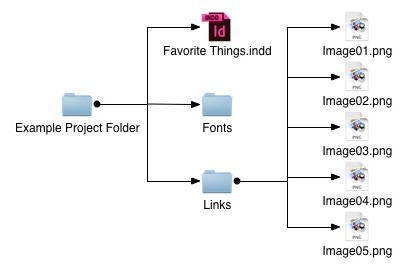
When you are checking an InDesign document, it is then advised to Checkin parent directory.
Links in InDesign
In InDesign, layouts can encompass a variety of different images or other documents that are linked. When that linked file is modified, InDesign notifies that user that the link has been updated. Zoom can read the linked assets inside of an InDesign document automatically. Assets are automatically linked in Zoom so you can see which assets derivatives there are of that original asset.
Link Assets in InDesign
An asset can be linked by dragging and dropping into InDesign.
- In Asset Browser, search for the asset you would like to place into your InDesign document.
- Check-out the asset.
- Drag-and-drop the asset from Asset Browser to the appropriate place in your InDesign layout.
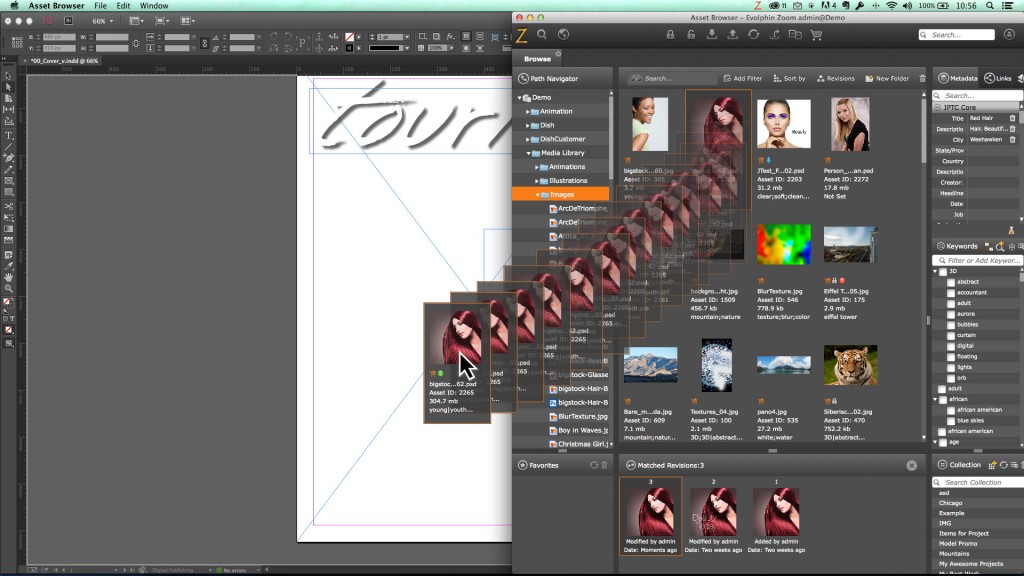
Drag-and-drop to InDesign
When you check-in your asset, you can then see the links in the Links Panel in Asset Browser.

Checkin Assets
There are a variety of different ways assets can be checked into Zoom. Assets can be checked into Zoom directly from within a Creative App without having to depend on the Asset Browser. For additional information on how to Check-in, see Check-in Assets .
Check-in Unversioned File
- Save your current document.
- Open the Evolphin Zoom panel by navigating to Window > Extensions > Evolphin Zoom.
- Zoom 7.0: Click Sync.
Zoom 6.0 or below: Click Check-in
- Choose Server URL if prompted.
Check-in Versioned File
In order to check-in existing assets into Zoom via the Creative App panel, your file must already be saved on your computer.
- Save your current document.
- Open the Evolphin Zoom panel by navigating to Window > Extensions > Evolphin Zoom.
- Zoom 7.0: Click Sync.
Zoom 6.0 or below: Click Check-in.
- Fill out any required metadata or keyword values.
- Click Check-in.
Check-in Options
| Option | Description |
|---|---|
| Expand/Collapse tree | Click to toggle between viewing expanded or collapsed folders in the check-in window. By default, folders are viewed as expanded. |
| Show unversioned | Click to toggle between viewing only the project/document files or all unversioned files in the parent folder. |
| Check-in Parent Folder | Checks in the folder that contains the current document. |
| Check-in linked assets | Click to toggle between checking-in linked assets along with the project/document check-in. |
| Exclusive only | Click to toggle between checking-in only the project/document and their linked files but not any other unversioned files. |
| Convert to working copy | Copies the file from its current location to its location in the default working copy folder on your computer. |
| Metadata selection | If enabled, choose/enter values for mandatory metadata fields or select from a preset from the preset drop-down. |
| Keep files locked | Zoom automatically unlocks assets when performing a Check-in. Enabling this will keep the asset locked after check-in. |
| Change thumbnail | Zoom will search for a _tb file in the same directory as the asset. |
Quick Checkin*
*Not available in Zoom 7.0+
Assets can also be checked into Zoom using the Quick Checkin button in the Creative App panel as described here:
Quick Checkin allows users to quickly check-in assets to a specified location in Zoom. This will also forego any required metadata dialogs. This is useful particularly in environments such as news organizations that need to quickly import items into Zoom and perform organization later. Quick Checkin must be configured in order to work properly.
Quick Checkin
Prerequisites:
- Open Settings dialog from Z-Icon in the system tray.
Settings Dialog - Set default zoom server and make sure to select Always Use Default.
Default Server - Open zoom.properties file from $HOME/.zm
For Example: /Users/joe/.zm/zoom.properties
- Add default Quick Checkin destination folder.
Syntax: QUICK_CHECKIN_DEST=/defproj
/defproj is the path on zoom server where Quick Checkin files will go to. - The Quick Checkin dialog will not appear by default. Add SHOW_QUICK_CHECKIN property in zoom.properties file, if you want to the Quick Checkin dialog to appear.
Syntax: SHOW_QUICK_CHECKIN=TRUE
- If mandatory metadata is enabled on zoom server, make sure to save the default metadata template from checkin dialog
- Open Checkin dialog.
- Fill all the mandatory metadata fields.
- Click the save button
Launch Quick Checkin:
-
- Save your current document.
- Open the Evolphin Zoom panel by navigating to Window > Extensions > Evolphin Zoom.
- Click Quick Checkin.
- Click Checkin in the Quick Checkin dialog.
The Quick Checkin dialog will not appear if SILENT_QUICK_CHECKIN is set to TRUE in zoom.properties file.
Smart Copy/Clone Project
Within Zoom, creating copies of files is easy using Smart Copy. Unlike conventional copying of files which takes up additional data, creating a Smart Copy allows a file to be copied and edited without having to duplicate data on the server. You can create smart copies of a file or an entire folder. For additional information on Smart Copy, see Smart Copy Assets .
- Save your current document.
- Open the Evolphin Zoom panel by navigating to Window > Extensions > Evolphin Zoom.
Window > Extensions > Evolphin Zoom - Zoom 7.0: Click Fly-out menu > Clone Project
Zoom 6.0 or below: Click Smart Copy.
- Choose Server URL.
Check Browse – Checkin Dialog - Click Browse to choose the location in Zoom to checkin the asset.
- Fill out any required metadata or keyword values.
- Enable or disable Convert to working copy.
- Click Smart Copy.
Lock/Unlock
Lock is a feature in Zoom that allows you to restrict who is working at a file at one time. This helps communicate to users which files have been delegated to which users at a time. When a file is locked, other users in Zoom are not able to commit a new version of the file until you have released the lock on the file.
When you Checkin an asset, the asset is automatically unlocked unless you explicitly check Keep files locked in the Checkin dialog.
Lock
- Save your current document.
- Open the Evolphin Zoom panel by navigating to Window > Extensions > Evolphin Zoom.
Window > Extensions > Evolphin Zoom - Zoom 7.0: Toggle Lock
Zoom 6.0 or below: Click Lock/Unlock and select Get Lock.
- Choose Server URL.
Check Browse – Checkin Dialog
Release Lock
- Save your current document.
- Open the Evolphin Zoom panel by navigating to Window > Extensions > Evolphin Zoom.
Window > Extensions > Evolphin Zoom - Zoom 7.0:
Zoom 6.0 or below: Click Lock/Unlock and select Release Lock.
- Choose Server URL.
Check Browse – Checkin Dialog
Revert/Revert Project
When editing an asset inside of Zoom, Revert allows you to revert back to the last revision checked out from the Zoom Server. This will remove any of the modifications that were applied to the asset.
Revert Changes
- Open the Evolphin Zoom panel by navigating to Window > Extensions > Evolphin Zoom.
Window > Extensions > Evolphin Zoom - Zoom 7.0: Click Revert Project from the fly-out menu
Zoom 6.0 or lower: Click Revert. In the drop-down, select Revert Changes.
- Click OK.
Update/Sync
When a file is changed on the Zoom Server, for example a new version is created, the file on your computer now is older than the latest version on the server and needs to be updated. Updating the files will update the file if there is a newer version or move it if it was moved on the Zoom Server.
Update Asset
- Open the Evolphin Zoom panel by navigating to Window > Extensions > Evolphin Zoom.
Window > Extensions > Evolphin Zoom - Zoom 7.0: Click Sync. Sync will determine if update from or check-in to server is needed.
Zoom 6.0 or lower: Click Update.
- Click OK.
Task Manager
The Task Manager allows users who have the Workflow module to accept and submit tasks assigned to them within a Workflow Job. The Task Manager can be launched directly from with the Creative App Plugin.
- Open the Evolphin Zoom panel by navigating to Window > Extensions > Evolphin Zoom.
Window > Extensions > Evolphin Zoom - Click Task Manager.
- Click OK.
Show in Asset Browser/View in Zoom
The Show in Asset Browser button in the Creative App Plugin allows users to navigate to the asset they have open in the Creative App within Asset Browser.
Show Current Asset in Asset Browser
- Open the Evolphin Zoom panel by navigating to Window > Extensions > Evolphin Zoom.
Window > Extensions > Evolphin Zoom - Zoom 7.0: Click
or from any view, select a file:
Zoom 6.0 or below: Click Show in Asset Browser.
- Click OK.
Incoming Changes
Incoming Changes allows you to view what working copies on your computer currently have never revisions on the Zoom Server. Accessing Incoming Changes is possible directly through the Creative App Panel.
Revert Changes
- Open the Evolphin Zoom panel by navigating to Window > Extensions > Evolphin Zoom.
Window > Extensions > Evolphin Zoom - Click Incoming Changes.
Zoom Repository
The Zoom Repository button in the Creative App Plugin will allow you to launch the Zoom Repository from directly within your Creative App.
Launching Zoom Repository
- Open the Evolphin Zoom panel by navigating to Window > Extensions > Evolphin Zoom.
Window > Extensions > Evolphin Zoom - Click Zoom Repository.
Status
The Status button shows the detailed current status of a working copy on your computer locally and on the Zoom Server. This includes information such as File Status, Size, Modification Date, etc.
View Asset Status
- Open the Evolphin Zoom panel by navigating to Window > Extensions > Evolphin Zoom.
Window > Extensions > Evolphin Zoom - Click Status.
Reveal/View in Explorer/Finder
Reveal in Explorer / Reveal in Finder button in the Creative App Plugin navigates to the working copy within Windows Explorer or the Apple Finder on your computer.
Reveal in Windows Explorer or Apple Finder
- Open the Evolphin Zoom panel by navigating to Window > Extensions > Evolphin Zoom.
- Zoom 7.0:
or from any file that can be accessed without the cloud icon:
Zoom 6.0 or below: Click Reveal in Explorer.

Install Adobe Extension
If you do not see an Evolphin Zoom panel under Window > Extensions > Evolphin Zoom, install the plugin manually using Installing Creative App Plugin .
Checkin Assets
There are a variety of different ways assets can be checked into Zoom. Assets can be checked into Zoom directly from within a Creative App without having to depend on the Asset Browser. For additional information on how to Check-in, see Check-in Assets .
Check-in Unversioned File
- Save your current document.
- Open the Evolphin Zoom panel by navigating to Window > Extensions > Evolphin Zoom.
- Zoom 7.0: Click Sync.
Zoom 6.0 or below: Click Check-in
- Choose Server URL if prompted.
Check-in Versioned File
In order to check-in existing assets into Zoom via the Creative App panel, your file must already be saved on your computer.
- Save your current document.
- Open the Evolphin Zoom panel by navigating to Window > Extensions > Evolphin Zoom.
- Zoom 7.0: Click Sync.
Zoom 6.0 or below: Click Check-in.
- Fill out any required metadata or keyword values.
- Click Check-in.
Check-in Options
| Option | Description |
|---|---|
| Expand/Collapse tree | Click to toggle between viewing expanded or collapsed folders in the check-in window. By default, folders are viewed as expanded. |
| Show unversioned | Click to toggle between viewing only the project/document files or all unversioned files in the parent folder. |
| Check-in Parent Folder | Checks in the folder that contains the current document. |
| Check-in linked assets | Click to toggle between checking-in linked assets along with the project/document check-in. |
| Exclusive only | Click to toggle between checking-in only the project/document and their linked files but not any other unversioned files. |
| Convert to working copy | Copies the file from its current location to its location in the default working copy folder on your computer. |
| Metadata selection | If enabled, choose/enter values for mandatory metadata fields or select from a preset from the preset drop-down. |
| Keep files locked | Zoom automatically unlocks assets when performing a Check-in. Enabling this will keep the asset locked after check-in. |
| Change thumbnail | Zoom will search for a _tb file in the same directory as the asset. |
Quick Checkin*
*Not available in Zoom 7.0+
Assets can also be checked into Zoom using the Quick Checkin button in the Creative App panel as described here:
Quick Checkin allows users to quickly check-in assets to a specified location in Zoom. This will also forego any required metadata dialogs. This is useful particularly in environments such as news organizations that need to quickly import items into Zoom and perform organization later. Quick Checkin must be configured in order to work properly.
Quick Checkin
Prerequisites:
- Open Settings dialog from Z-Icon in the system tray.
Settings Dialog - Set default zoom server and make sure to select Always Use Default.
Default Server - Open zoom.properties file from $HOME/.zm
For Example: /Users/joe/.zm/zoom.properties
- Add default Quick Checkin destination folder.
Syntax: QUICK_CHECKIN_DEST=/defproj
/defproj is the path on zoom server where Quick Checkin files will go to. - The Quick Checkin dialog will not appear by default. Add SHOW_QUICK_CHECKIN property in zoom.properties file, if you want to the Quick Checkin dialog to appear.
Syntax: SHOW_QUICK_CHECKIN=TRUE
- If mandatory metadata is enabled on zoom server, make sure to save the default metadata template from checkin dialog
- Open Checkin dialog.
- Fill all the mandatory metadata fields.
- Click the save button
Launch Quick Checkin:
-
- Save your current document.
- Open the Evolphin Zoom panel by navigating to Window > Extensions > Evolphin Zoom.
- Click Quick Checkin.
- Click Checkin in the Quick Checkin dialog.
The Quick Checkin dialog will not appear if SILENT_QUICK_CHECKIN is set to TRUE in zoom.properties file.
Smart Copy/Clone Project
Within Zoom, creating copies of files is easy using Smart Copy. Unlike conventional copying of files which takes up additional data, creating a Smart Copy allows a file to be copied and edited without having to duplicate data on the server. You can create smart copies of a file or an entire folder. For additional information on Smart Copy, see Smart Copy Assets .
- Save your current document.
- Open the Evolphin Zoom panel by navigating to Window > Extensions > Evolphin Zoom.
Window > Extensions > Evolphin Zoom - Zoom 7.0: Click Fly-out menu > Clone Project
Zoom 6.0 or below: Click Smart Copy.
- Choose Server URL.
Check Browse – Checkin Dialog - Click Browse to choose the location in Zoom to checkin the asset.
- Fill out any required metadata or keyword values.
- Enable or disable Convert to working copy.
- Click Smart Copy.
Lock/Unlock
Lock is a feature in Zoom that allows you to restrict who is working at a file at one time. This helps communicate to users which files have been delegated to which users at a time. When a file is locked, other users in Zoom are not able to commit a new version of the file until you have released the lock on the file.
When you Checkin an asset, the asset is automatically unlocked unless you explicitly check Keep files locked in the Checkin dialog.
Lock
- Save your current document.
- Open the Evolphin Zoom panel by navigating to Window > Extensions > Evolphin Zoom.
Window > Extensions > Evolphin Zoom - Zoom 7.0: Toggle Lock
Zoom 6.0 or below: Click Lock/Unlock and select Get Lock.
- Choose Server URL.
Check Browse – Checkin Dialog
Release Lock
- Save your current document.
- Open the Evolphin Zoom panel by navigating to Window > Extensions > Evolphin Zoom.
Window > Extensions > Evolphin Zoom - Zoom 7.0:
Zoom 6.0 or below: Click Lock/Unlock and select Release Lock.
- Choose Server URL.
Check Browse – Checkin Dialog
Revert/Revert Project
When editing an asset inside of Zoom, Revert allows you to revert back to the last revision checked out from the Zoom Server. This will remove any of the modifications that were applied to the asset.
Revert Changes
- Open the Evolphin Zoom panel by navigating to Window > Extensions > Evolphin Zoom.
Window > Extensions > Evolphin Zoom - Zoom 7.0: Click Revert Project from the fly-out menu
Zoom 6.0 or lower: Click Revert. In the drop-down, select Revert Changes.
- Click OK.
Update/Sync
When a file is changed on the Zoom Server, for example a new version is created, the file on your computer now is older than the latest version on the server and needs to be updated. Updating the files will update the file if there is a newer version or move it if it was moved on the Zoom Server.
Update Asset
- Open the Evolphin Zoom panel by navigating to Window > Extensions > Evolphin Zoom.
Window > Extensions > Evolphin Zoom - Zoom 7.0: Click Sync. Sync will determine if update from or check-in to server is needed.
Zoom 6.0 or lower: Click Update.
- Click OK.
Task Manager
The Task Manager allows users who have the Workflow module to accept and submit tasks assigned to them within a Workflow Job. The Task Manager can be launched directly from with the Creative App Plugin.
- Open the Evolphin Zoom panel by navigating to Window > Extensions > Evolphin Zoom.
Window > Extensions > Evolphin Zoom - Click Task Manager.
- Click OK.
Show in Asset Browser/View in Zoom
The Show in Asset Browser button in the Creative App Plugin allows users to navigate to the asset they have open in the Creative App within Asset Browser.
Show Current Asset in Asset Browser
- Open the Evolphin Zoom panel by navigating to Window > Extensions > Evolphin Zoom.
Window > Extensions > Evolphin Zoom - Zoom 7.0: Click
or from any view, select a file:
Zoom 6.0 or below: Click Show in Asset Browser.
- Click OK.
Incoming Changes
Incoming Changes allows you to view what working copies on your computer currently have never revisions on the Zoom Server. Accessing Incoming Changes is possible directly through the Creative App Panel.
Revert Changes
- Open the Evolphin Zoom panel by navigating to Window > Extensions > Evolphin Zoom.
Window > Extensions > Evolphin Zoom - Click Incoming Changes.
Zoom Repository
The Zoom Repository button in the Creative App Plugin will allow you to launch the Zoom Repository from directly within your Creative App.
Launching Zoom Repository
- Open the Evolphin Zoom panel by navigating to Window > Extensions > Evolphin Zoom.
Window > Extensions > Evolphin Zoom - Click Zoom Repository.
Status
The Status button shows the detailed current status of a working copy on your computer locally and on the Zoom Server. This includes information such as File Status, Size, Modification Date, etc.
View Asset Status
- Open the Evolphin Zoom panel by navigating to Window > Extensions > Evolphin Zoom.
Window > Extensions > Evolphin Zoom - Click Status.
Reveal/View in Explorer/Finder
Reveal in Explorer / Reveal in Finder button in the Creative App Plugin navigates to the working copy within Windows Explorer or the Apple Finder on your computer.
Reveal in Windows Explorer or Apple Finder
- Open the Evolphin Zoom panel by navigating to Window > Extensions > Evolphin Zoom.
- Zoom 7.0:
or from any file that can be accessed without the cloud icon:
Zoom 6.0 or below: Click Reveal in Explorer.
Collaboration
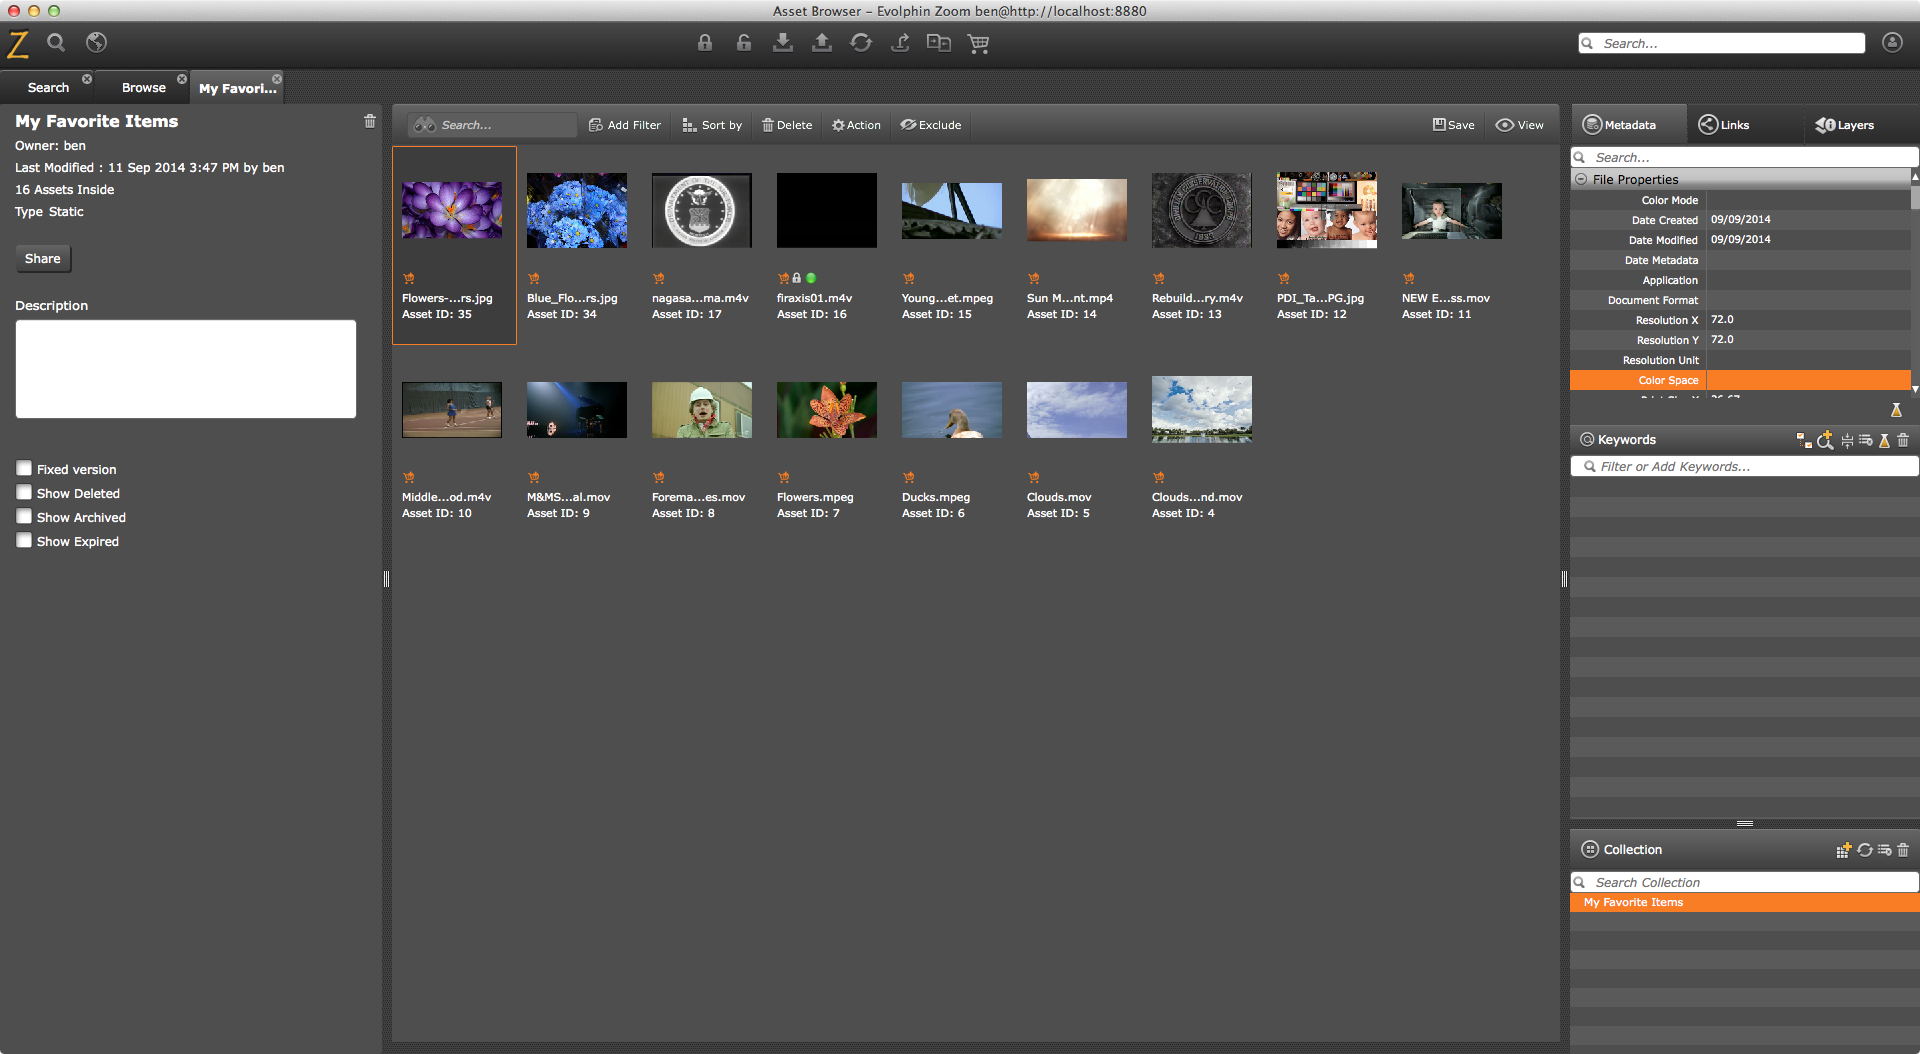
Collections are a way to group assets in one place even when they are located in different projects or locations. For example, you might use these for viewing all of the assets related to a specific category or share a specific set of related assets.
There are two types of collections:
| Type | Description |
|---|---|
| Static Collection | A collection where the user explicitly adds assets. Assets can be drag-and-dropped into this collection. |
| Dynamic Collection | A collection that is created dynamically using search criteria. For example, a collection for all assets that have the keyword presidents. |
Collections also have the option of being Fixed. Fixed means assets that are added to the collection will stay at that specific revision even if newer revisions of that asset are created. This option is only available for static collections.
These collections can also be shared with others using the Web Client. Static collections can be shared with Zoom users as well as external users. Collection admins can share with external users by inviting over email or sharing a public web link. Dynamic collections cannot be shared with external users, but only with Zoom users.
Collections can also have sub-collections. For example, if you had a collection that found all of the assets with the keyword Presidents and wanted to narrow it down to specific presidents, such Barack Obama, a sub-collection can be a subset of its parent collection.
These collections are accessible from the Asset Browser as well as the Web Client. Let us look at working with collections in the Asset Browser.
Creating a Dynamic Collection
- In the Asset Browser, click the
 Search button in the top-left corner.
 - Click the Advanced Options button.
- Set your search parameters.
- Click the Search button.
- After your results appear, click the
 Save button in the top-right corner.
 - Enter the name you would like to name the collection in the Name field.
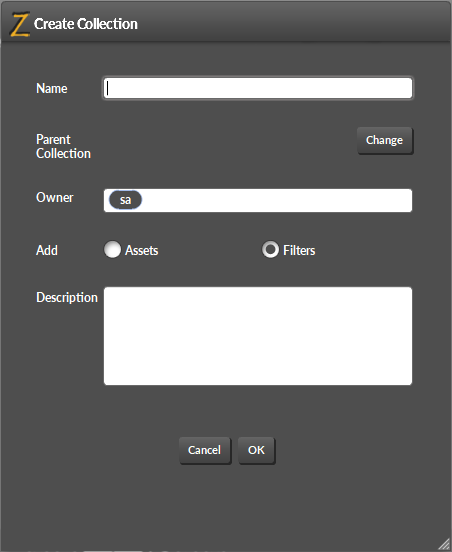
- Under Add, Select Filters.
- Click OK.
- In the Collections panel, you will see your new collection appear. Double-click the collection to open.
Creating a Static Collection
- In the Collections panel, click the
 Add Collection button.
 - Enter the name you would like to name the collection in the Name field.

- Click OK.
- From your Browse or Search view, drag-and-drop an item onto your collection.
- To view the collection, double-click your collection in the Collection panel.
Creating a Fixed Collection
By default when you create a collection, assets in a collection will update with newer versions of the file when newer revisions are created. However, sometimes there are needs for someone to save a collection at the specific revisions that do not change. In this event, you need to set your Collection to Fixed.
Create a New Fixed Collection
- In the Collections panel, click the
 Add Collection button.
 - Enter the name you would like to name the collection in the Name field.
- Check the checkbox called Fixed Version.
- Click OK.
Set a Current Collection to Fixed
- Open your collection by double-clicking on it in the Collections panel.
- In the left sidebar, click the Fixed version checkbox.
Sharing a Collection
Collections can be shared with a specific user, a specific role, or members of a specific project.
- Open your collection.
- In the left sidebar, click the Share button.
- Choose which category you would like to share with (User, Role, Project).
- To add a role, begin to type the name of the role. The system will automatically complete the name.
- Select the value.
- Click Save.
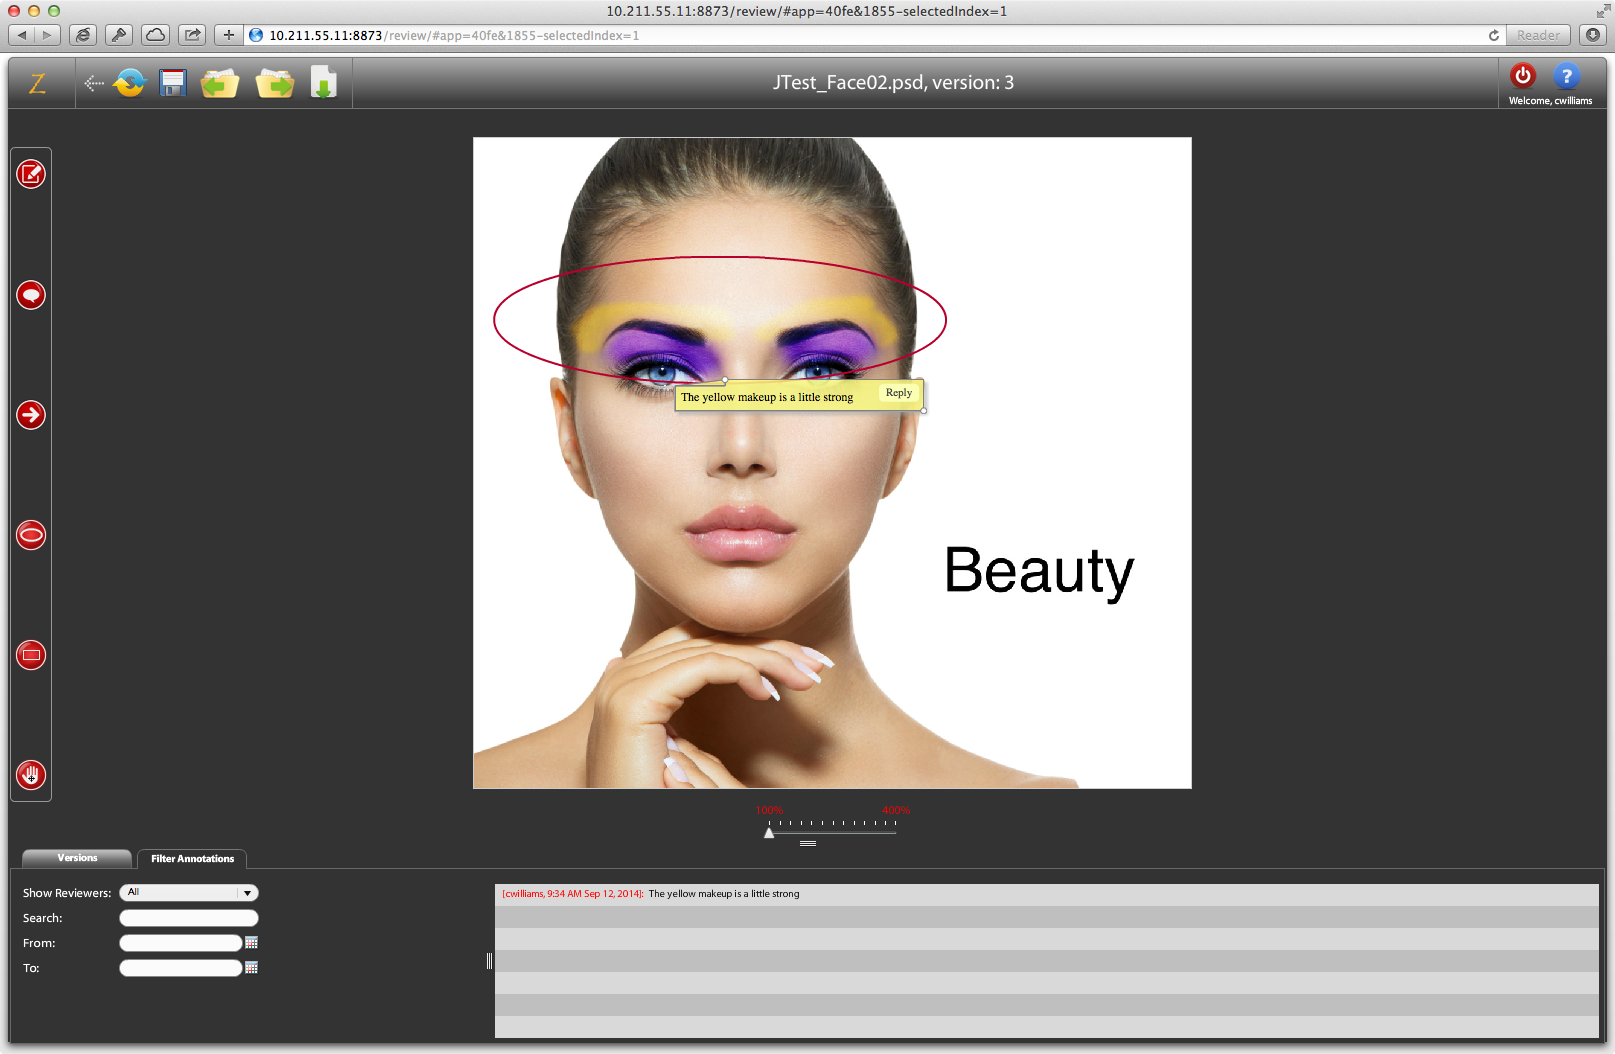
About
A lightbox is a feature in Zoom that allows users to share and annotate assets within their web browser. Users can overlay notes, circles, rectangles, etc. over graphics to communicate modifications to another user. Assets are accessible through the Web Approval interface (http://[ZoomServer:8873/review). Annotations can be applied to images, photos, videos, PDFs, and more.
When used along with the Zoom Workflow module, a lightbox can also be used for approving and rejecting assets.
Permissions for Web Approval
In order to have access to the Web Approval, a user must be a member of the webapprover role. For additional information on how to add users to webapprover, see Managing Users, Roles & Permissions (Zoom 6.0 and below) .
Users who have access to the Web Approval interface do not necessarily have to have access to the Asset Browser interface. Therefore, these can be used by external clients or users that only should see assets in Zoom that are shared with them.
In order for users to receive email notification of new lightboxes, email notifications must be properly setup in Zoom. For additional information regarding configuring email notifications, see Configuring SMTP for Email Notifications .
Creating a Lightbox
Lightboxes can be created using the Cart feature in Asset Browser.
- Add assets to your Cart.
For information on how to add assets to a Cart, see Cart .
- Click on the Cart menu and select Create Lightbox.

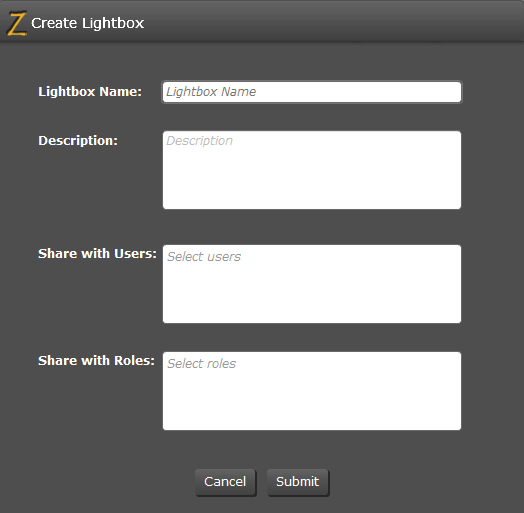
- Enter your Lightbox Name.
- Enter your Description (optional).
- Enter your usernames or roles to share the lightbox with.
- Click Submit.
An email is then sent to the recipients with a link to the web based lightbox.
Viewing a Lightbox
Once a lightbox is created and shared by a user, the recipients and creator can then view it by clicking the link in their email.
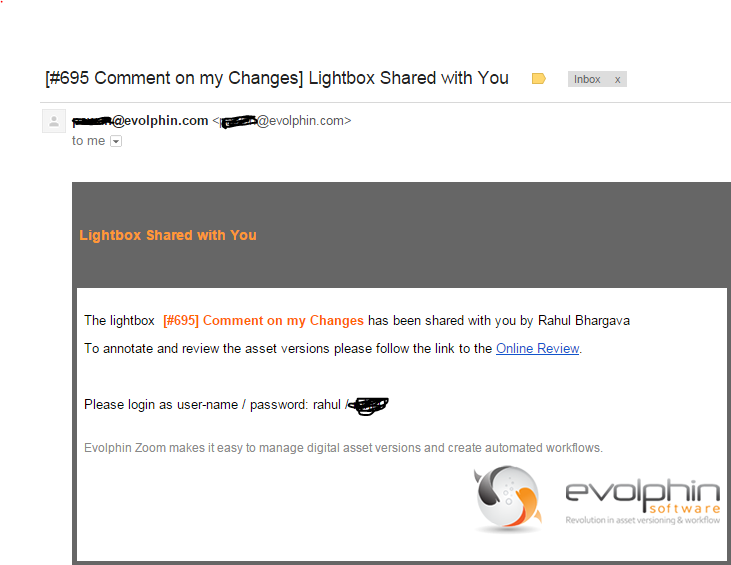
Logging In
- Navigate to Web Approval http://[YourZoomServer]:8873/review in your preferred web browser.
- Login using your Zoom credentials.
- Select your lightbox in the sidebar.
Asset View
All the assets that belong to a lightbox are shown along with their thumbnail, metadata and revisions (with Zoom Workflow only):
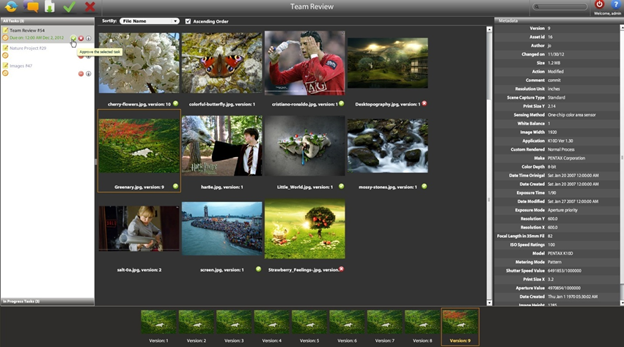
Sorting the Assets
You can sort the assets of a task based on several criteria like the name, rating, asset ID etc.
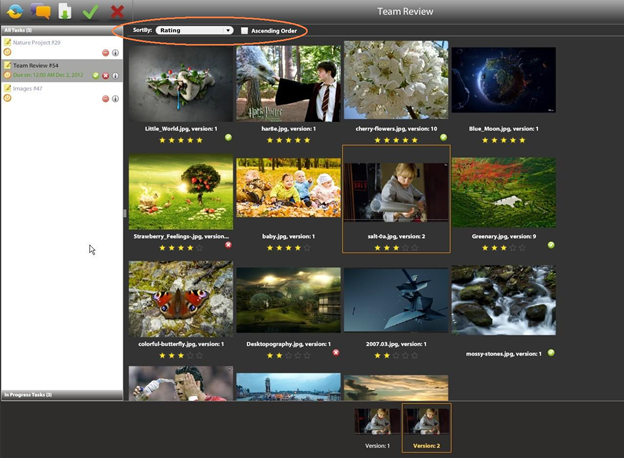
Viewing Preview of Asset
- Login to Web Approval.
- Select an asset.
- Click the
 Annotate button or double-click.
In addition to viewing the asset, there are also other controls for viewing assets:
| Icon | Name | Description |
|---|---|---|
| Note Tool | Adds a note you can drag to the appropriate size and add a comment. | |
| Speech Bubble Tool | Adds a note with a speech bubble. | |
| Rectangle Tool | Draws a rectangle. | |
| Arrow Tool | Draws an arrow to point to a location. | |
| Ellipsis Tool | Draw a circle. | |
| Hand Tool | Allows you to pan when zoomed in. |
Adding Annotations
With Web Approval, you can annotate assets, allowing you to communicate visually on the changes that need to be made to a document. Annotations are visible to all participants of the lightbox.
There are a variety of different tools available for creating annotations:
| Icon | Name | Description |
|---|---|---|
| Note Tool | Adds a note you can drag to the appropriate size and add a comment. | |
| Speech Bubble Tool | Adds a note with a speech bubble. | |
| Rectangle Tool | Draws a rectangle. | |
| Arrow Tool | Draws an arrow to point to a location. | |
| Ellipsis Tool | Draw a circle. | |
| Hand Tool | Allows you to pan when zoomed in. |
Add Annotation
- Login to Web Approval.
- Select an asset.
- Click the Annotate button or double-click.
- On left-side, click one of the following tools to add an annotation to your asset.
- Click and drag to place your annotation over your graphic.
- Click Save.
Each text annotation can be viewed in the grid below the annotation edit as well as within the callouts. The callouts are also color-coded for different users. You can also delete conversations from the view if they are no longer required or relevant.
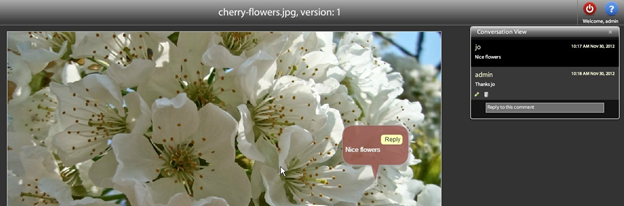
Reply to Comment
You can reply to a comment that exists in a lightbox.
- Login to Web Approval.
- Select an asset.
- Click the Annotate button or double-click.
- Click the Reply button on the comment.
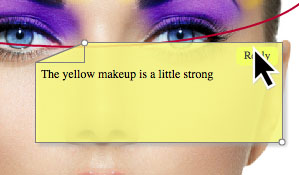
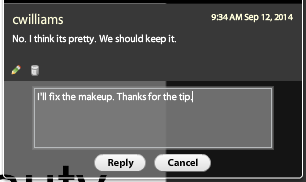
Filtering Comments
When there are multiple reviewers in a lightbox, it may be appropriate to filter assets to a specific reviewer. There are the following options:
| Name | Description |
|---|---|
| Show Reviewer | Filter to a specific review. |
| Search | Search for a specific comment. |
| From / To | Filter assets based on Date create. |
Approving and Rejecting Assets or Tasks
The Lightbox app is also used for review and approval by the Zoom Workflow system. Unlike a lightbox created from the Asset Browser, a review task will have the approve/reject buttons  enabled next to it. In addition the approve/review buttons
  on the top toolbar are enabled for assets that are part of a formal workflow review.
Select any asset in the review task and you can see the various revisions of that asset at the bottom panel. You can double-click on the image to launch the annotation editor. You can approve or reject an asset using the green tick and the red cross mark icons at the top menu bar.
It has to be noted that Visual Approval is the only tool that lets you approve or reject individual assets. The task manager will only let you approve/reject the task in its entirety.
Only the approved assets can be routed to the next task in the workflow job if the Approved Assets From Previous Task policy is set on the next task, in this case the rejected assets are filtered out and not routed to the next task.
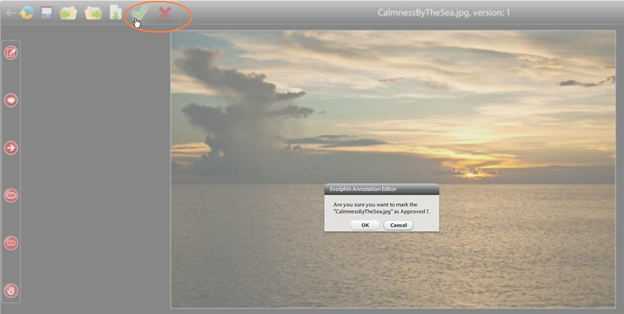
Similarly, using the same icons from the main page or the ones next to the task name itself, you can approve or reject the selected task on the whole too.
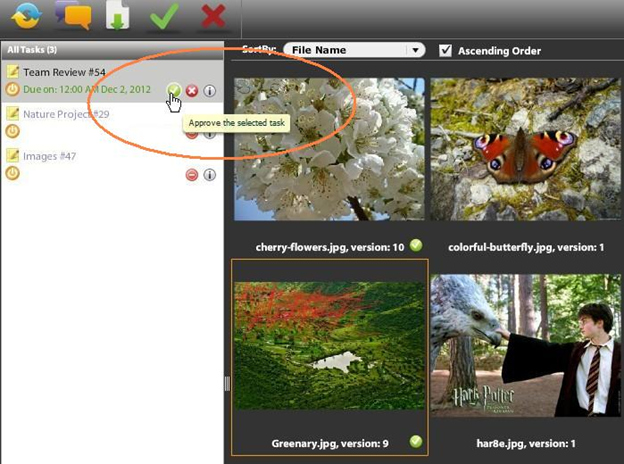
More Tools
About Conflicts
When using Zoom, there are instances where you may run into an issue where you are not able to check-in your asset because there is a newer version of an asset on your computer. This state is called “Conflict”. This is when you have a working copy of an asset on your computer that you have modified, however, there is a newer revision of that asset on the Zoom Server. Zoom now does not know whether the asset on your computer or the one on the Zoom Server is the latest revision of the asset.
If a resource has undergone dissimilar namespace changes on the repository and in the working copy, and if the modifications can coexist, they are auto-merged. For example, a renamed resource on the repository can coexist with a move modification of the same resource in the working copy. After auto-merge the resource will have a new name and will be in a new location, factoring in both the rename and the move operations executed on it. Similar namespace changes cannot be merged. For example, if a resource gets renamed both on the repository and in the working copy, no auto-merge will be attempted. Also if one of the modifications is a deletion action, auto-merge will not be attempted.
To avoid conflicts, it is best to use Locks whenever checking out assets in Zoom. That way, there is no confusion of who currently has the rights to create a new revision of an asset.
Types of Conflicts
There are several types of conflicts that could occur inside of Zoom.
| Type | Description |
|---|---|
| Content conflict or data conflict | Whenever the contents of a text file are modified by both the repository and the working copy in such a way that both changes cannot coexist. |
| Namespace conflict | Whenever a resource (a file or a folder) undergoes a namespace modification on both sides, there is a possibility of namespace conflict. Specifically, when there are similar namespace modifications on both sides, like renames on both ends or moves on both ends, there will be a conflict. Also if on any one side the resource is deleted and on the other end if there has been a content modification or a move/rename, then that will be a conflict too. |
| Dependency Conflict | Sometimes a resource is not conflicted content-wise or namespace-wise directly, but it could still be conflicted indirectly. This occurs when a resource is renamed at one end but its parent folder is deleted on the other end. There are a few ways to resolve this conflict so the end-user must choose from a set of alternatives supplied by Zoom. |
Resolving Conflicts
You will likely encounter a conflict when you try to checkin an asset and you get an “up-to-date” failure. The first thing that you need to do is perform and Update on that asset. Zoom provides an easy-to-use conflict resolution system that will
- Instruct you on what to do
- Allows you to choose which revision to keep
- Rechecks if the conflict has indeed been resolved
The following are the best practices for resolving conflicts when you have tried to checkin an asset and you have received an up-to-date error on a non-text based asset (Photoshop file, InDesign, Video, etc.).

In Asset Browser
- If the Up-to-date error dialog is still active, click OK.
- Select the asset.
- Right-click and select Update.
- You will be prompted to open the Conflict Resolver. Click OK.
- Select the asset that is conflicted in the list.
- Right-click and select Accept Theirs or Accept Mine.
Accept Theirs will accept the revision on the Zoom Server as the latest revision and replace your revision.
Accept Mine will create a new revision on the Zoom Server with your revision.

In Mac OS X Finder
- Select the asset in Finder.
- Right-click and select Evolphin Zoom > Update.
- Click Resolve Conflicts button.
- Select the asset that is conflicted in the list.
- Right-click and select Accept Theirs or Accept Mine.
Accept Theirs will accept the revision on the Zoom Server as the latest revision and replace your revision.
Accept Mine will create a new revision on the Zoom Server with your revision. - Click OK.
- Checkin your asset.
In Windows Explorer
- Select the asset in Finder.
- Right-click and select Evolphin Zoom > Update.
- Click Resolve Conflicts button.
- Select the asset that is conflicted in the list.
- Right-click and select Accept Theirs or Accept Mine.
Accept Theirs will accept the revision on the Zoom Server as the latest revision and replace your revision.
Accept Mine will create a new revision on the Zoom Server with your revision. - Click OK.
- Checkin your asset.
Within Zoom, creating copies of files is easy using Smart Copy. Unlike conventional copying of files which takes up additional data, creating a Smart Copy allows a file to be copied and edited without having to duplicate data on the server. You can create smart copies of a file or an entire folder.
Using Contextual Menu
- Select an item in Asset Browser.
- Right-click on the asset and Select Smart Copy.
- Type in the path of the location you would like the Smart Copy to be created in.
- Click OK.
Using Keyboard
- Select an item in Asset Browser.
- On your keyboard, hit:
- Mac: Command ? + Option ? + C
- Windows: Ctrl + Alt + C
Bulk Smart Copy Using Cart
- Select items in Asset Browser.
- Click the Cart button to add the items to the cart.
- Click on the Cart and Select Smart Copy.
- Choose whether you would like your smart copy to be in the current folder or in a different folder. If you click Save to other folder, click the Browse… button to navigate to the appropriate folder in Zoom.
- Under New Filenames, set whether you would like to keep the same filename or rename the files.