Zoom does not by default provide previews of Microsoft Office documents like Word, Excel, PowerPoint, etc. But with the custom format mechanism available in Zoom 5.2 or greater, there is a way to resolve this gap nicely. This post covers the steps needed to accomplish this exercise.
Note: With version 8.0 or higher, we have made it easier to setup the office previews. Make sure you pay attention to the version specific guide for the office preview setup.
Setting up Office Previews on v8.0 or Higher
With v8.0, setting office file previews becomes easier. In most cases just the installation of LibreOffice is required without setting of any Perl file.
Note: On, Microsoft Windows, not need to setup Strawberry Perl. On Linux no need to edit and setup the soffice.pl perl file.
Steps to setup the office previews
- Go to the Preview Server machine where it is installed.
- Download and install long term supported version of the LibreOffice from their Website.
- You can also install the LibreOffice from official OS specific application repository. For example, on Centos, you can use YUM Command to install the LibreOffice.
- Preview Server looks for the typical LibreOffice installation at various paths based on the operating system it is are running on.
- On Windows:
C:\Program Files\LibreOffice\program\soffice - On Linux:
/opt/libreofficeX.Y/program/soffice- This is the typical LibreOffice installation path when installed via rpm command. Note: Version number for you might be different.
If more than one LibreOffices are installed at the same path, higher version number is picked up.
- This is the typical LibreOffice installation path when installed via rpm command. Note: Version number for you might be different.
- UM command typically installs it at:
/usr/bin/soffice - On Mac: /
Applications/LibreOffice.app/Contents/MacOS/soffice
- On Windows:
- A warning message will logged in the Preview Server logs if it is not able to locate the soffice executable. In that case, admins can edit the preview-server.xml and provide the soffice executable path by hand. See the section below for the details.
- Open Zoom Web Management Console.
- Goto
System -> Media Converter -> Default Converters - Set “System – Zoom Office Document Converter” as default converter for various office file formats like: DOC, DOCX, TXT, XLS, PPT etc…
- Note: Don’t use “Zoom Office Document Converter”, that is deprecated in v8.0.
- Note: If you are upgrading to v8.0, you still need to change the default media converter to “System – Zoom Office Document Converter“.
- Save the settings in Webmin.
- Now try to preview the Office file previews in the Zoom Desktop or Webclient app.
- If you are not able to see the office previews, check the preview server logs and see if there is any error in running the LibreOffice soffice executable.
How to set LibreOffice executable path in the preview-server.xml?
- Edit preview-server.xml file
- Locate section: <mediaConverterConstants>. If this section is not present, add the section like:
<previewserverspec>
  ...
  ...
  <mediaConverterConstants>
    <entry>
      <string>LIBREOFFICE_EXECUTABLE</string>
      <string>Specify LibreOffice's soffice executable path.</string>
    </entry>
  </mediaConverterConstants>
</previewserverspec>- Specify the LibreOffice path up-to full soffice executable.
- Save the file and restart the Preview Server.
Office Preview Setup for v7.x or Lower
Follow the steps below, if Preview Server is running on Linux operating system(like Centos 6.x/7.x, Fedora, RedHat, etc).
Install LibreOffice dependent libraries on Linux:
On the command line, run:
yum install -y libXrender libXext libSM libICE libGLU fontconfig cups-libs cairo mesa-libGL
Install LibreOffice on Linux:
- Download the long term support version of the LibreOffice from their webclient. Make sure you download and install the platform specific version.
- Make sure to check LibreOffice System Requirements. LibreOffice system requirement links: https://www.libreoffice.org/get-help/system-requirements.
- Make sure you uninstall any older version of LibreOffice before installing the newer version.
- On a RedHat/Centos system, LibreOffice gets installed at path: /opt/libreoffice6.3. For you version number might be different.
- Once installed try running the command:
soffice --version
It will print LibreOffice version on the system, like LibreOffice 6.3… 410(Build:2)If the command, soffice –version, does not print LibreOffice version then download it and install the latest version. - Install LibreOffice on the Preview Server:
- untar the downloaded libre office tar file.
tar -xvf LibreOffice_4.3.3_Linux_x86-64_rpm.tar.gz - Make a directory named LibreOfficeInstallation. We are going to use this directory for installation.
e.g mkdir LibreOfficeInstallation
- Goto the extracted LibreOffice directory.
cd LibreOffice_4.3.4.1_Linux_x86-64_rpm - Run install script, and it will display help. To install the LibreOffice in the directory created above, run the following command:
./install -a RPMS <path to LibreOfficeInstallation directory, which we created above in step 2> - Now LibreOffice is installed in the directory which we created in step 2 above. Run the following command to verify the version:
/program/soffice --version(#Note: Two dashes before version – -version) - Great Work!. Now LibreOffice is installed.
- untar the downloaded libre office tar file.
- Follow the steps given below to enable MS Office file types’ preview in Zoom Asset Browser.
- Go to the Preview Server installation directory or Zoom Server installation directory, if both are running on the same machine.
- Go to the bin directory inside that
- Open and edit soffice.pl
- Search for text soffice in this file. Replace text soffice with path:
<Path of LibreOffice InstallationDirectory>/opt/libreoffice4.3/program/soffice
Save the file. And check for execute permission on it. If execute permission is missing, then set execute permission on soffice.pl.
To set execute permission use the chmod command.
Note: Another option is to append the “/opt/libreoffice4.3/program” on the PATH environment variable of the Preview Server users.
Note: If Multiple Preview Servers are deployed, then all the above steps have to be performed on all Preview Servers. Zoom Server won’t install LibreOffice automatically on any of the Preview Servers. - Now open the Zoom Server web admin console at http://<zoom-server>:8443. Go to Custom formats and set default custom format for MS Office File types. See Set Default Custom Format Section. See the images below for more details.

This is all for enabling MS Office Previews in the Zoom Asset Browser.
Windows Preview Server
Follow the steps below on your Windows Server where your Preview Server is configured to run.
Install Strawberry Perl on Windows:
- Download 64-bit Strawberry Perl from http://strawberryperl.com/ and install it.
Install LibreOffice on Windows:
- Download LibreOffice from https://downloadarchive.documentfoundation.org/libreoffice/old/4.2.4.1/win/x86/
- Install LibreOffice on the Preview Server.
Follow the steps given below to enable MS Office file types preview in Zoom
- Go to https://evolphin.com/help/download/MSofficePrev/soffice.zip and download the soffice.zip file.
- Unzip the soffice.zip file and extract the contents to file to a directory of your preference. The file should contain the following files:
- soffice.pl
- soffice1.bat
- Go to the Zoom installation directory (<ZoomInstallDir>\DAM\bin), on the machine that is running your Preview Server.
- Copy/Replace the soffice.pl and soffice1.bat files.
- Now open the Zoom Server web admin console at http://<zoom-server>:8443. Go to Manage Formats and then click on Add Format to add the Zoom Office Document Converter Format.
NOTE: For Zoom version 5.5+ higher “Manage Formats” has been replaced by the “Media Converters” menu in the Web Management Console. The Zoom office document converter has been provided out of the box and does not need to be created. You will only need to edit the executable path to the soffice script, as described in step #2 below.
- Set the “Format Name field” to “Zoom Office Document Converter” Set the “Description” field to “Zoom documents converter for previewing MS Doc, Excel, PowerPoint previews.”
- Set the Executable Path text to the location of the soffice1.bat script that was used in step 4. In our example, it is “C:\Program Files (x86)\Evolphin\DAM\bin\soffice1.bat”
- Set the Input Formats field to “XLSX, XLS, DOCX, DOC, XLT, PPT, PPTX”
- Set the Output Formats field to “JPEG”
- Check Can Generate Multiple Output Files
- Click Add arguments and input the following arguments one by one:
- InputArg: Editable by user box remains unchecked, Label: InputArg, Tooltip field remains empty, Parameters: -i
- InputFile: Editable by user box remains unchecked, Label: InputFile, Tooltip field remains empty, Parameters: <%InputFile%>

- OutputArg: Editable by user box remains unchecked, Label: OutputArg, Tooltip field remains empty, Parameters: -o
- OutputFile: Editable by user box remains unchecked, Label: OutputFile, Tooltip field remains empty, Parameters: <%OutputFile%>

- DPI: Editable by user box remains unchecked, Label: DPI, Tooltip field remains empty, Parameters: –dpi 200
- PrintSize: Editable by user box remains unchecked, Label: PrintSize, Tooltip field remains empty, Parameters: –printSize 2100.

- Save and close the “Zoom Office Document Converter” format page. In the Manage formats page, you should now see the newly creates “Zoom Office Document Converter” custom format and you can verify the above configuration by expanding the format by clicking on the “+” icon.

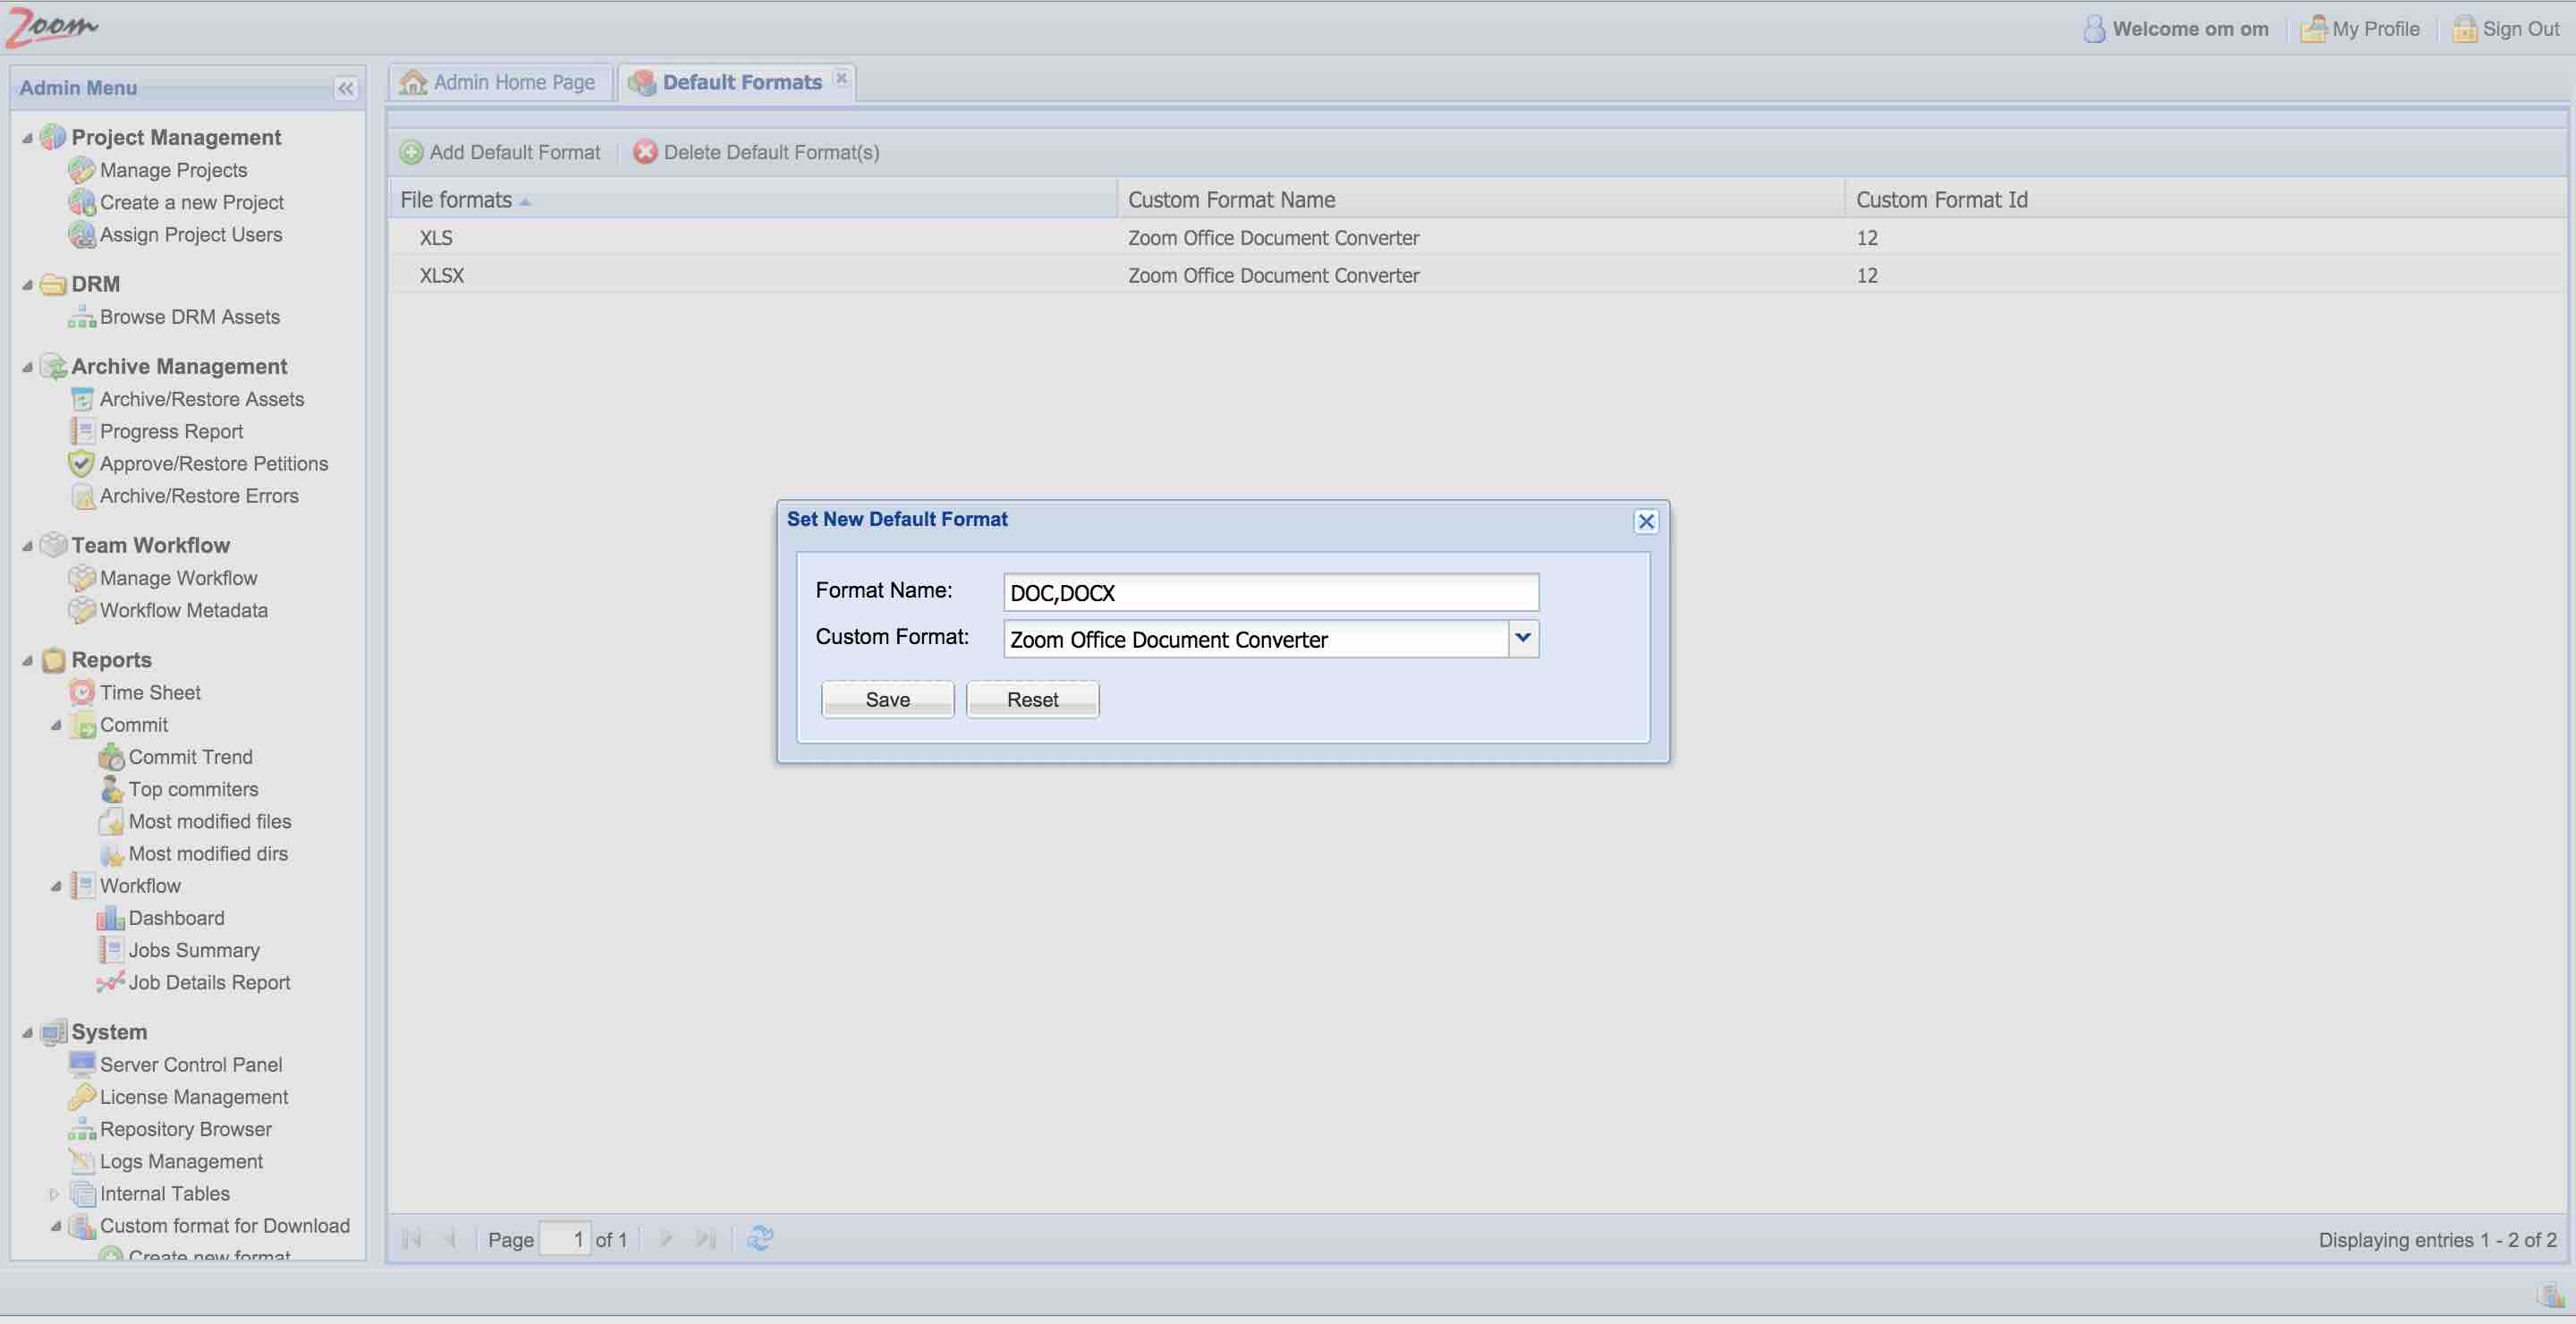
- Go to Custom Formats (default converters for Zoom version 5.5 and higher) and set default custom formats for each MS Office File Types one by one. See the image below for more details:

- Go to the Zoom Server installation directory. In the Zoom Server installation directory, go to the conf directory (<ZoomInstallDir>\DAM\conf).
- Edit multipagetype.properties, in the conf directory, add MS Office file types. In the multipage.properties, add the MS Office file types like DOC,DOCX,PPT,PPTX,XLS,XLSX.
NOTE: One file type per line
Save the file after adding these file types. All file types are in capital letters without a dot in them.
- Edit thumbfiletypes.properties and add the file formats which you added in the above step.
NOTE: One file type per line
Save this file.
- Now Zoom and Preview Servers are ready to display MS Office file types preview.
- Restart the Asset Browser to see previews of MS Office file types.
