You can ingest high-res media from your Zoom Client machine to the AWS S3 storage using the AWS S3 Client Connector with Zoom.
Prerequisites
- Evolphin Zoom Hub, also called AWS S3 Connector, is set up on your desktop. Check here to set it up first.
- A third party mount point (TPM) is set up on your desktop to store your high-res media on your personal storage (External Store). Check with your admin to set up your TPM path.
Ingesting high-res media
You can ingest high-res media through:
- Drag-n-drop into a folder in the Zoom Visual Asset Browser (VAB).
- Sync button within the Adobe Zoom Plugin for supported creative apps such as Adobe CC.
- Check-In menu option in the macOS Finder or Windows Explorer.
With any of these options, the preferred way to ingest high-res media is to:
- First, copy the files under the folder configured as the Zoom high-res media store, also referred to as the Third-Party Mount point (TPM), on your desktop. For example, if your admin has set up a TPM folder such as: /Volumes/SSD 2TB/Evolphin/ExternalStore, and say you need to ingest 350GB of clips from a USB camera card: /Volumes/USB Card/My Clips/, first copy the clips to an appropriate folder such as /Volumes/SSD 2TB/Evolphin/ExternalStore/<Zoom Project Vault>/<Show Name>/Season 1/Episode 29/Footage/. Note, these are just examples, please use your own folder naming schema to arrange the incoming media into an appropriate folder for your ingest workflow.
Next, launch the check-in app using any of the options listed above. Ensure that In-Place Ingest checkbox is selected.

- When you click “Check-in” button, any high-res media will be queued for copying to AWS S3 using the S3 Hub. Rest of the files that are not high-res such as images, design, project files will be checked-in into the Zoom database directly.
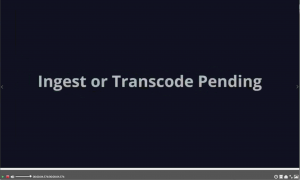
- As soon as the check-in completes, Zoom will create a placeholder file in the Zoom Media Asset Management (MAM) database, that would play back a message such as “Transcode or Ingest Pending“:
- Since high-res files are large, the S3 Hub may take seconds to hours to copy the entire file to S3, depending upon upload bandwidth available from your desktop to AWS S3. See sample upload times (hh::mm:ss) below:
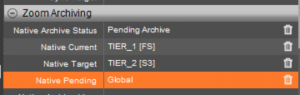
Upload Speed (Mbps) Upload Speed (Mbps) Upload Speed (Mbps) Upload Speed (Mbps) Upload Speed (Mbps) File Size/Time 5 10 50 100 1000 10.00 MB 0:00:16.12 0:00:08.12 0:00:02.12 0:00:01.12 0:00:00.12 50.00 MB 0:01:20.12 0:00:40.12 0:00:08.12 0:00:04.12 0:00:00.12 1.70 GB 0:45:20.12 0:22:40.12 0:04:32.12 0:02:16.12 0:00:14.12 83.00 GB 36:53:20.12 18:26:40.12 3:41:20.12 1:50:40.12 0:11:04.12 340.00 GB 151:06:40.01 75:33:20.01 15:06:40.12 7:33:20.12 0:45:20.12 - Using the VAB (Asset Browser) metadata panel, you can check the status of your file as following:
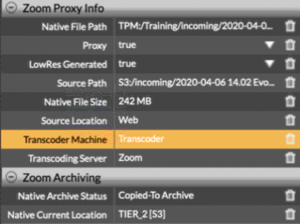
- Pending Archive: Upload to S3 from the desktop has not started
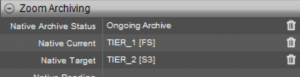
Ongoing Archive: Upload to S3 has started
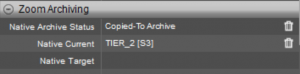
- Copied To Archive: Now the high-res file is in S3 and an optional low-res proxy can transcoded automatically if configured:
- Once the file is in S3, and successfully transcoded you will see in VAB, metadata group Zoom Proxy Info, LowRes Generated: true, you will also see an S3 URL in the Source Path field.
- You will also see the initial placeholder video in the MAM replace by an actual proxy of the high-res file. This will show up as version 2 or higher in the Revisions panel in VAB:

- At this point you can preview or download the proxy or if using an NLE like Adobe Premiere Pro, can link with the low-res proxy for editing directly in the Adobe CC panel.
- Pending Archive: Upload to S3 from the desktop has not started
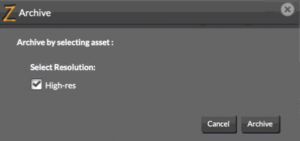
- Once you have confirmed the high-res media has made it to S3 and has been transcoder you can delete or cleanup the files from your local storage to free up disk space by running the Archive action from the VAB menu:

- Click on the Archive button to cleanup:
- If the asset is successfully deleted from your local media store, the S3 Hub can be used to confirm:

In your VAB, you can also see the link icon disappears to indicate the high-res media is no longer on the TPM path (External Store for your high-res media) and on the physical disk the high-res file should be gone:

You can track the progress of the high-res file uploads using S3 Hub on your desktop. Note this dashboard may have been updated in a new desktop app version if it looks different, but the same concepts apply.
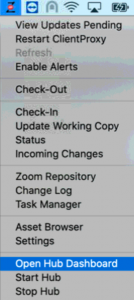
- Open the S3 Hub dashboard from the Z menu:
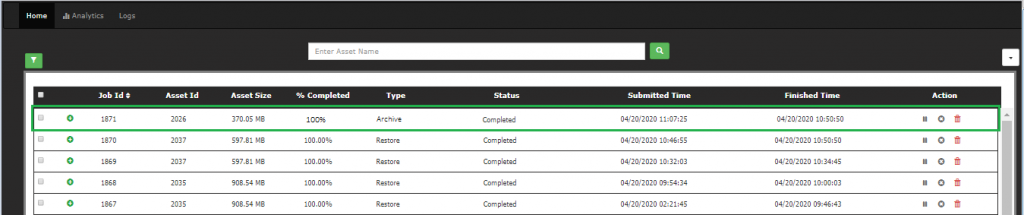
- In the dashboard find the asset to monitor by it’s asset id or file name:

- Once the S3 hub has copied the asset to S3, the progress will changed to completed:
- If you wish to pause/resume a transfer, you can do that from the dashboard using the Actions icons in the column on the far right of the screen:

- Pausing a transfer job, will change it’s status to Paused:

- If the S3 Upload fails the status will be updated in the dashboard as well as in the VAB metadata panel:

This can happen if the high-res file is moved or deleted from the TPM or External Store on your personal storage before the transfer is completed.
- If a upload fails you can trigger it again, if it doesn’t auto-resume, using the VAB menu option > Archive. Ensure you turn off the Cleanup option checkbox to keep the high-res on your external store after it’s copied to S3.
Download high-res media
If you do not have the high-res media on your personal storage or TPM/External Store, you can download it from S3 using the “Restore” menu option in VAB. You can confirm this by looking for the link icon in VAB below the asset thumbnail. Please refresh VAB from the toolbar if you have downloaded the high-res media and the link icon doesn’t show up immediately.

Note this is not the same “Check-out” of a low-res proxy or direct ingested asset such as a graphics or a project file. It is recommended that you try to check-out the low-res proxy from Adobe CC panel or VAB to perform rough cuts, while the high-res media is being restored to avoid waiting for the high-res media to download. And then using the Adobe CC plugin, switch from low-res to high-res media to finish your project.
- Select the assets you wish to download from S3, by selecting them in VAB and launching the restore dialog via right click > Restore menu option.

If there are large number of assets linked to a project such as Premiere Pro file, you can easily download all of them by going to the links panel in VAB and select all > click on Cart icon:

- From the cart menu on the toolbar > Restore

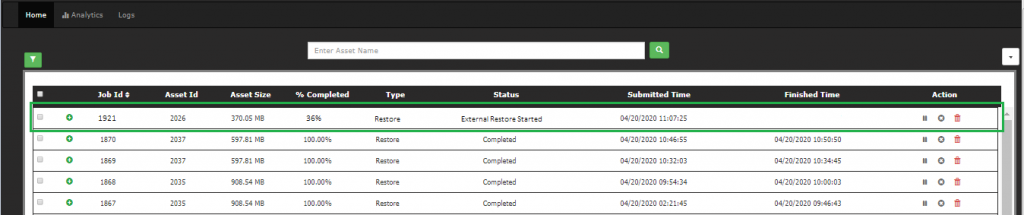
- This will queue a restore job in the S3 hub, to download the asset to your configured TPM/External Store. The hub can show the progress of restores:

- Once the download begins, the status will change to “External restore started” and the progress scan be seen from the dashboard:
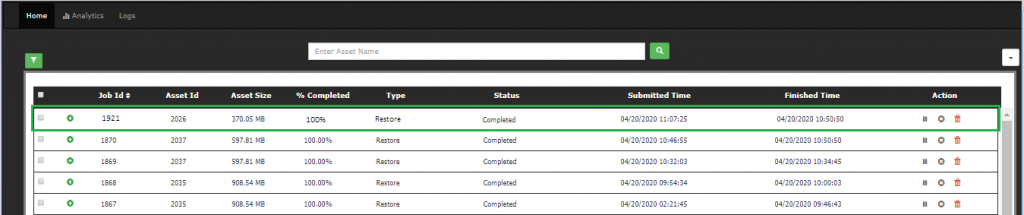
- Once the asset has been downloaded, the hub will show a completed status:
- Should the download fail due to internet outage or desktop was shutdown, the hub will try to auto-resume. If the restore never starts or complete a failed status will be shown in the dashboard:
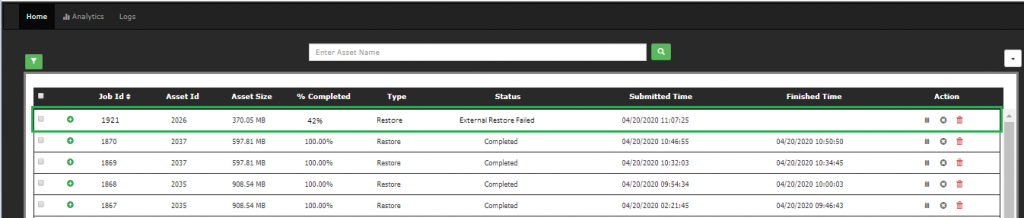
- Once the cause of failure has been resolved, you can restart the Restore from VAB menu > Restore again.
Email Alerts
Your admin can configure the S3 hub to send you email alerts about the status of your transfer. You could then be notified if a transfer failed or completed without needing to check the dashboard. Contact your admin to confirm if this is set up.