Zoom VideoFX is a proxy-based high-res asset management that works with a third party transcoding server, Telestream Vantage. It also supports external archives to be integrated into user-defined workflows. At the basic level, a VideoFX setup should have an Ingest Server and a third-party Vantage Transcoder. The Ingest Server runs a few hooks to redirect high-res and transcoded files in conjunction with the Zoom check-in app on the Zoom Client. The Vantage Server does the transcoding and generates low-res and mid-res versions of the high-res asset. The components and their interactions are shown below:
Components

In this diagram, the components are:
- Zoom User: an authenticated user of Zoom that intends to check-in a valid high-res file into the Zoom MAM repository.
- User Area: the Zoom User’s personal storage from where files are submitted for check-in. Also referred to as ‘USAN‘.
- Zoom Client: any one of Zoom desktop clients or Zoom app plugins that can invoke the Check-in App. Setup Zoom Client for VideoFX as shown here.
- Check-in App: the module in Zoom Client that handles the check-in of files into the Zoom repository.
- Ingest Server: an intermediate server that is responsible for ingesting high-res files into Zoom. Typically the Zoom Preview Server co-hosts the Ingest Service.
- Pre-check-in Hook: a Perl script running on the Ingest Server to validate the type of ingest as high-res or direct or deny check-in if the asset fails to be validated against these rules. If the high-res asset is validated then the script subsequently copies this high-res asset to the Protected Network Share.
- Post-check-in Hook: a Perl script running on the Ingest Server, which submits the high-res file to the Vantage Server for transcoding.
- Protected Network Share: a shared network mount location where all high-res files are stored. It also stores mid-res files from the Vantage Server. To know more about how to set up this protected network share, click here. Also referred to as ‘PSAN‘.
- Vantage Server: a server running third-party Telestream Vantage Transcoder that will convert the high-res file to lower resolution versions.
- Post-Vantage proxy-ingest Hook: a Perl script running on the Vantage Server, which ingests low-res proxy into the Zoom MAM Server after the Vantage Server generates low-res and mid-res files.
- Zoom Server: the Zoom MAM Server in this setup that holds the repository.
- Archive Hook: if the Archive module is enabled and configured, then an archive hook is triggered on ingest / user request.
- Restore Hook: if the Archive module is enabled and configured, then a restore hook is triggered on user request.
Prerequisites
|
|
Zoom MAM Server |
Ingest Server |
Vantage Server |
Zoom Client |
|
OS |
Linux (RHEL 7+) | Linux (RHEL 7+) | Windows Server 2012+ |
Windows 7+ macOS Sierra 10.12.6+ |
|
Perl | 5.24.1.1 | — | ||
|
Python (pip) * | 3.6.2+ | — | ||
|
AWS CLI * | 1.15.10+ | — | ||
|
User Area (USAN) | Write access | Read access | — | Write access |
|
Protected Shared Network | Write access (for Archive) | Write access | Write access | — |
* only when using the Archive module that uses AWS CLI for archiving to S3.
In addition to these requirements, also check for:
- VideoFX license: check if you have the necessary license for VideoFX. Check this section for details.
- Vantage license: set up your Vantage Server per Telestream’s instructions here.
- Plan out the metadata schema to be used as the folder structure for the high-res assets as well as New Project (Adobe CC plugins) parent folder. For e.g, you could use metadata fields ‘Show’, ‘Season’ and ‘Episode’ to save in the folder structure as shown below:

After fulfilling these requirements, follow these steps to continue:
Set up a shared network location
VideoFX needs high-capacity storage on a network location to store the high-res, and sometimes also the mid-res files. This location should be accessible from all other components of the VideoFX system. Click here to know how to set up a third-party mount as the shared location. Set up this mount location on all machines, including the Zoom MAM Server, the Ingest Server, the Vantage Server, and all Zoom Clients.
Environment setup on all servers
All servers in the VideoFX setup need to have Perl installed; all the required Perl modules used by the scripts must also be installed. In addition, the Ingest server and the Zoom MAM Server also require Python (pip) and AWS CLI.
- Perl: follow this article to install Perl and its required modules.
- If using Archiving using AWS S3, then you also need to install:
- Python (pip): install Python 3.6 from here. This will also automatically install the pip tool for installing Python packages. Remember to select the checkbox ‘Add Python 3.6 to PATH’ before beginning installation from the installer.
- AWS CLI: install AWS CLI from the AWS support page. Configure your AWS CLI with the AWS Access Key ID, AWS Secret Access Key, Default region name, and Default output format as per your AWS account, as described here.
- Python (pip): install Python 3.6 from here. This will also automatically install the pip tool for installing Python packages.
After setting up the environment on the servers, follow ahead to set up each server.
Set up your Zoom MAM Server
For your Zoom Server to be ready for VideoFX, it should have a VideoFX license and have several metadata properties set up. Make your Zoom Server ready for VideoFX by following these steps.
For VideoFX to be set up, firstly, it should be enabled for your Zoom license. Then, you need to define some new metadata fields for data-exchange between various servers in the VideoFX setup.
Next, you need to plan and implement a metadata schema to define the way high-res assets (and also optionally the proxy assets) will be stored.
Let us look at these in detail below.
Check VideoFX license
Check if VideoFX license is enabled in the Web Management Console.
In the Web Management Console, open the License Management node under System node in the Admin Menu sidebar. Open License Information page. Check that VideoFX is Enabled. If it is not enabled, then check with Evolphin Support on how to get your VideoFX license.

Define data-exchange metadata fields
A few new metadata fields are required to share common paths and status information between servers, 3rd party transcoders, and archive systems. To add the fields, follow these steps:
- Open metadataspec.xml for editing (Windows: [ZoomInstallDir]\Evolphin\DAM\conf; Linux: $home$/zoom/conf).
- Create a new metadata group to store the required fields. For example, create metadata group code ZPIG (for Zoom Proxy Info).
- Inside this new metadata group, create new fields for the following:
- Location of the high-res file. For example, NativeFilePath.
- Location of the mid-res file. For example, ProResFilePath.
- Location of the low-res file. For example, LowResFilePath.
- Status of low-res file generation. For example, LowRes.
- Status of proxy generation. For example, Proxy.
<mdgroup code=”ZPIG” label=”Zoom Proxy Info” editable=”true” appendable=”false” default=”false”>
<metadataFields>
<field ns=”zoom” name=”NativeFilePath” label=”Native File Path” keyType=”string” valueType=”string” multiline=”false” allowmultiple=”false” inheritedscheme=”none”/>
<field ns=”zoom” name=”ProResFilePath” label=”ProRes File Path” keyType=”string” valueType=”string” multiline=”false” allowmultiple=”false” inheritedscheme=”none”/>
<field ns=”zoom” name=”LowResFilePath” label=”LowRes File Path” keyType=”string” valueType=”string” multiline=”false” allowmultiple=”false” inheritedscheme=”none”/>
<field ns=”zoom” name=”LowResGenerated” label=”LowRes Generated” keyType=”string” valueType=”string” multiline=”false” allowmultiple=”false”>
<values>
<option key=”true” value=”true”/>
<option key=”false” value=”false”/>
</values>
</field>
<field ns=”zoom” name=”Proxy” label=”Proxy” keyType=”string” valueType=”string” editablekey=”” multiline=”false” allowmultiple=”false” projects=”” roles=”” type=”” default=”” linkedkey=”” linkedwith=”” restrict=””>
<values>
<option key=”true” value=”true”/>
<option key=”false” value=”false”/>
</values>
<field ns=”zoom” name=”ArchiveStatus” label=”Archive Status” keyType=”string” valueType=”string” editablekey=”” multiline=”false” allowmultiple=”false” projects=”” roles=”” type=”” default=”” linkedkey=”” linkedwith=”” restrict=””>
</field>
<values/>
</field>
</metadataFields>
</mdgroup>The metadata group or field names could be different from these. But, make sure to save the field names along with group codes so that these could be configured later on.If you will be using the Archive module with VideoFX, then also create these new fields:
- High-res asset’s archive status. For example, NativeArchiveStatus.
- Mid-res proxy’s archive status. For example, MidResArchiveStatus.
- Direct ingest asset’s archive status. For example, DirectArchiveStatus.
- Low-res proxy’s archive status. For example, LowResArchiveStatus.
The metadata group or field names could be different from these. But, make sure to save the field names along with group codes so that these could be configured later on.
- Save these field names to be used while configuring the script installers later. Save and close the file.
- Data-exchange metadata fields are now ready.
Define metadata schema
Based on how you want to organize high-res assets on the high-res mount location (also referred to as ‘PSAN’), your low-res assets in Zoom, and even your direct ingest assets in Zoom, select corresponding metadata properties as mandatory on the Zoom MAM Server.
For example, you want to organize your assets based on the name of the show and then by the name of the episode. In this case, you should configure two properties “Show” and “Episode_Title” under a new metadata group, say “CORP”. These metadata properties should be mandatory. The actual folder hierarchy to be set with these metadata properties is specified on Zoom Clients after this setup on the Zoom MAM Server is complete. This is done later while setting up Zoom Clients for VideoFX. Check for details here.
To create the mandatory metadata fields for your metadata schema, follow these steps:
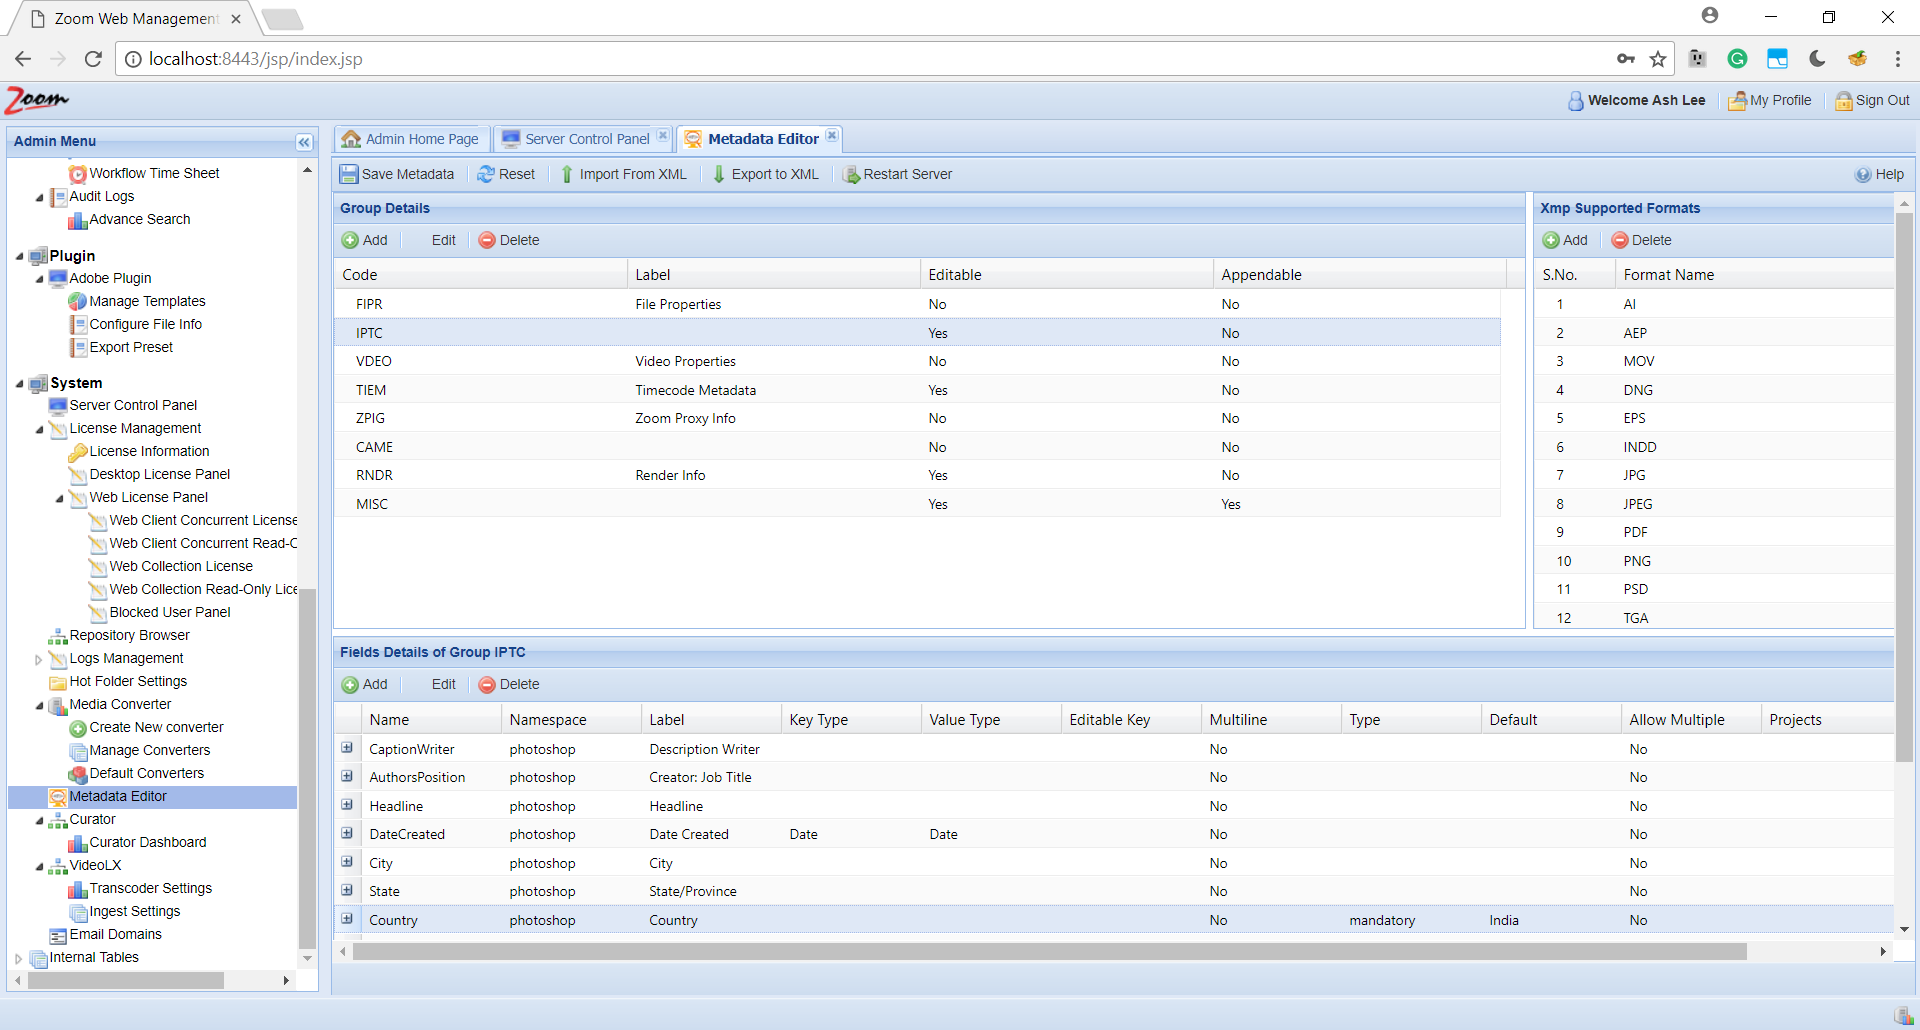
- In the Web Management Console, open Metadata Editor page under System node in the Admin Menu sidebar.
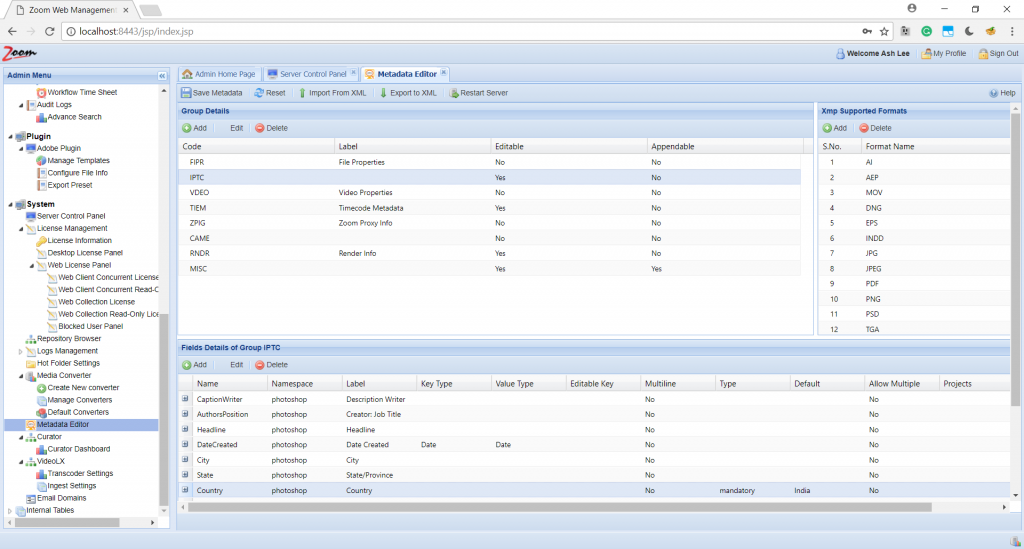
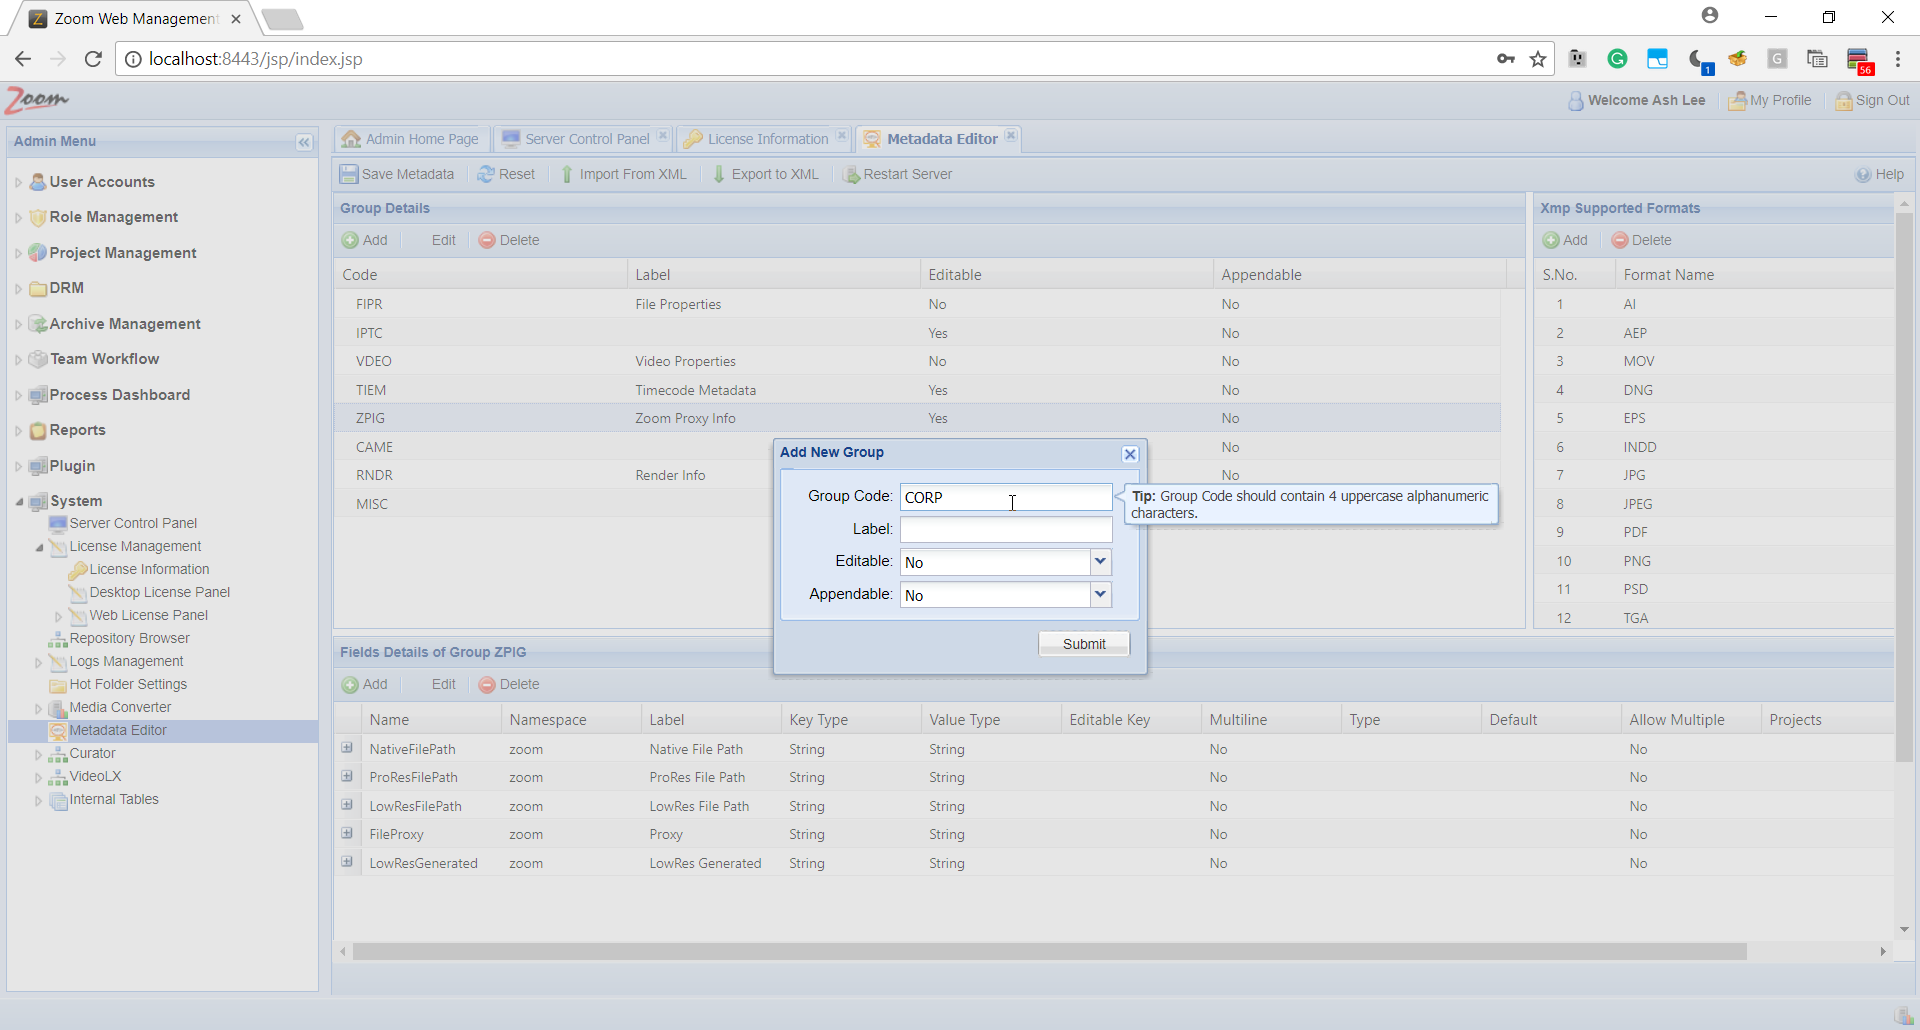
- Click Add to create a new metadata group as planned for your schema earlier.
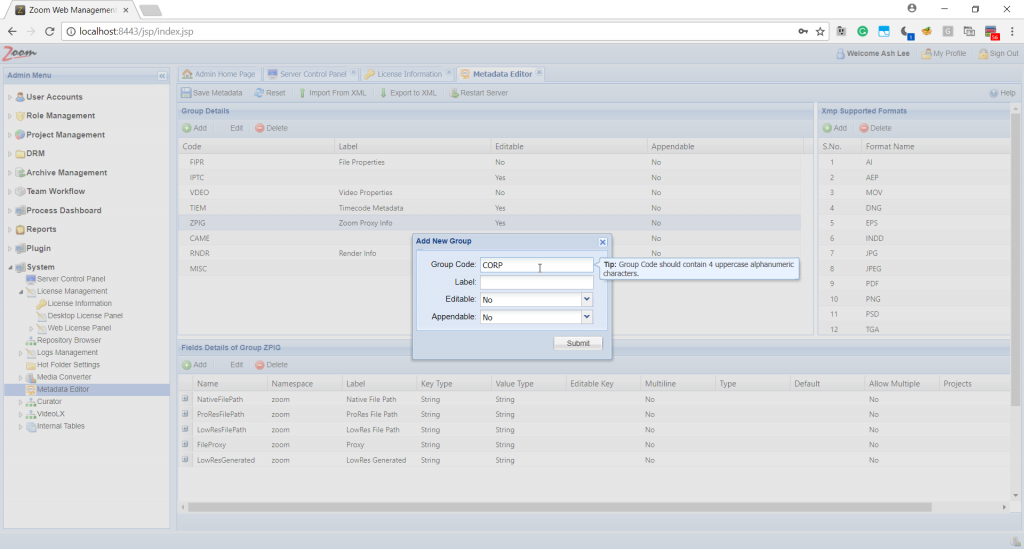
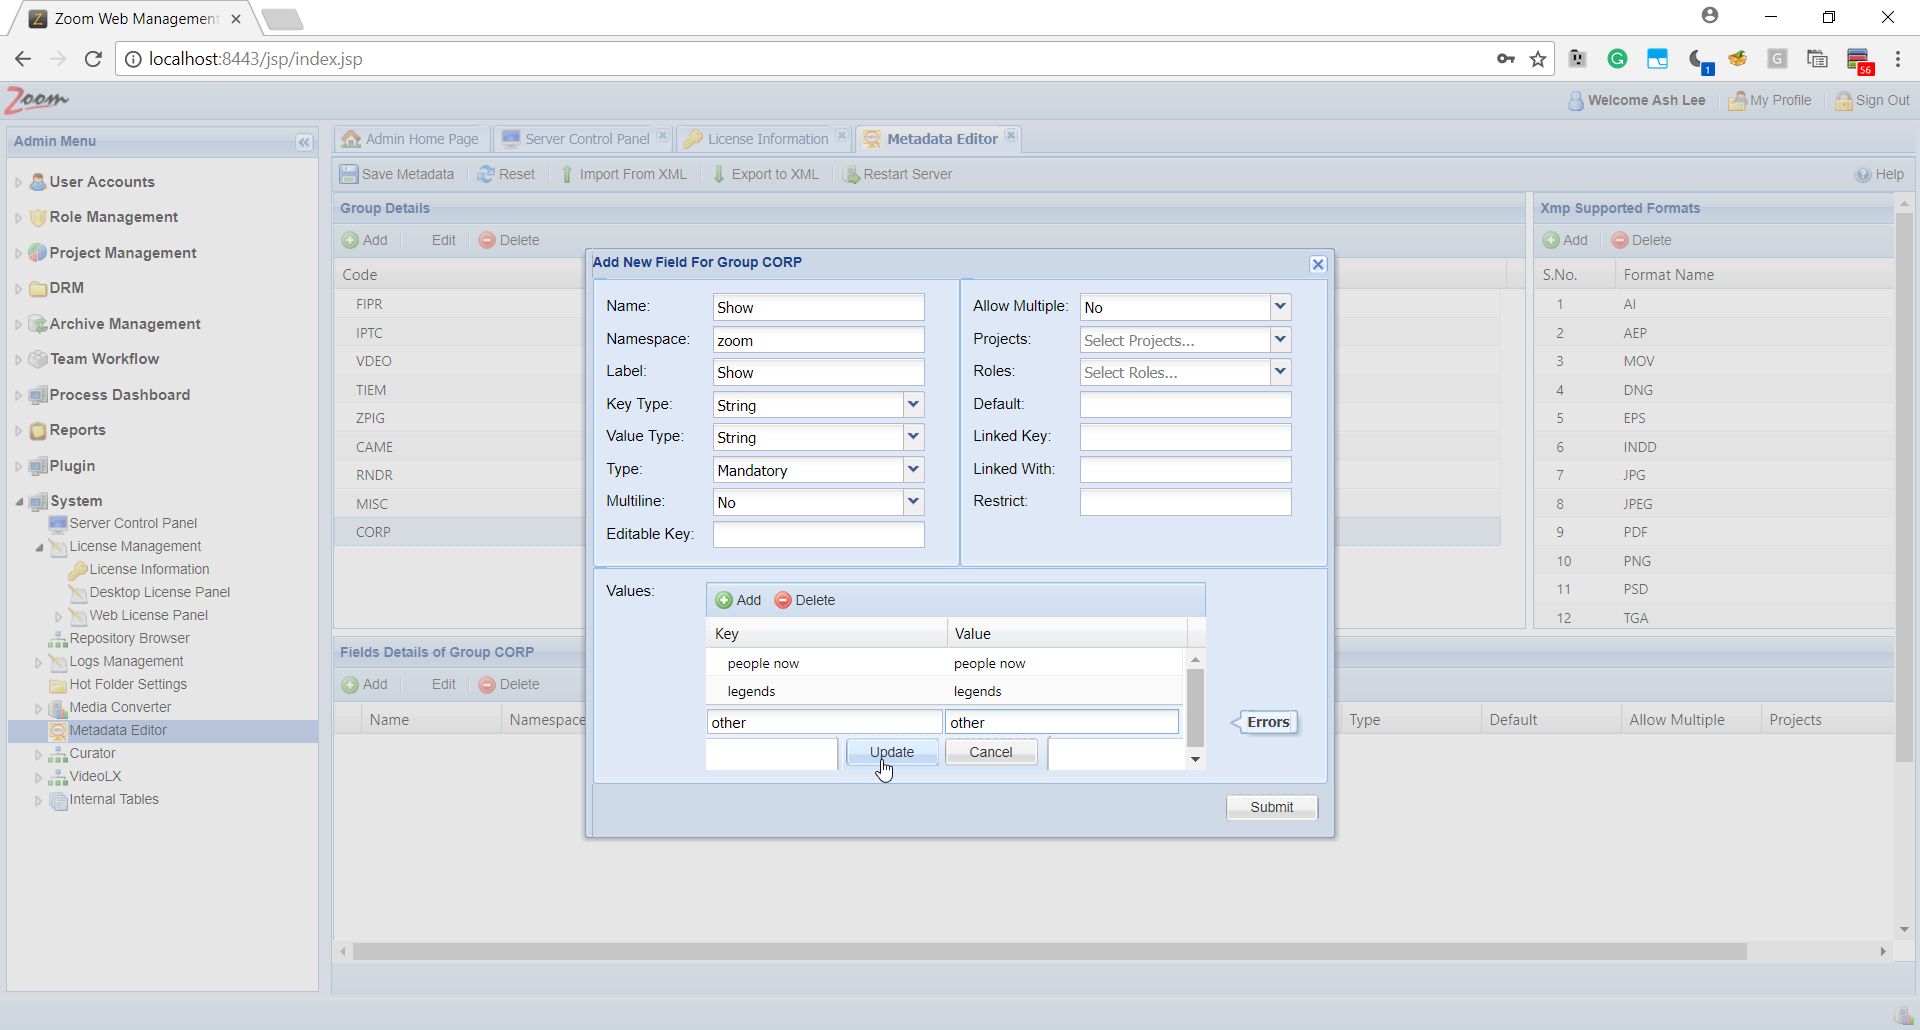
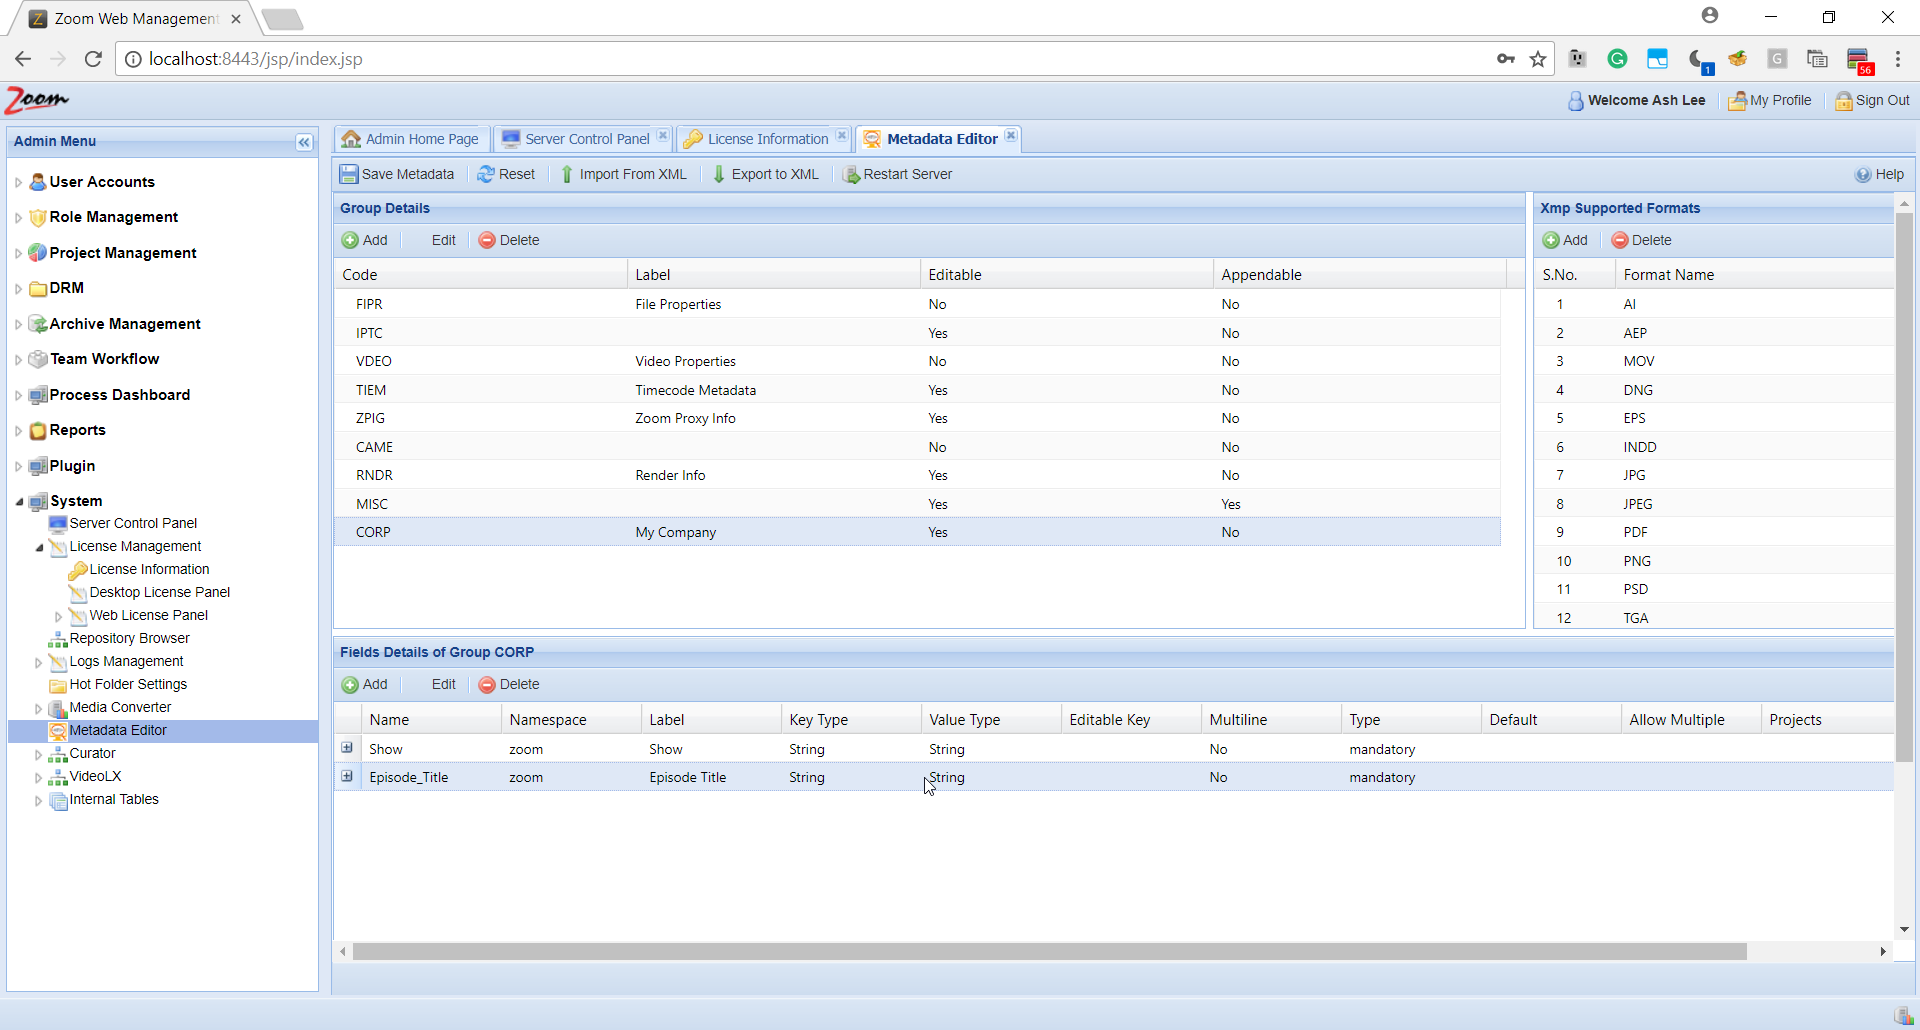
- As per our example above, enter Group Code as ‘CORP’ in all capitals and label as say ‘My Company’. Choose Editable as ‘yes’ and Appendable as ‘no’.
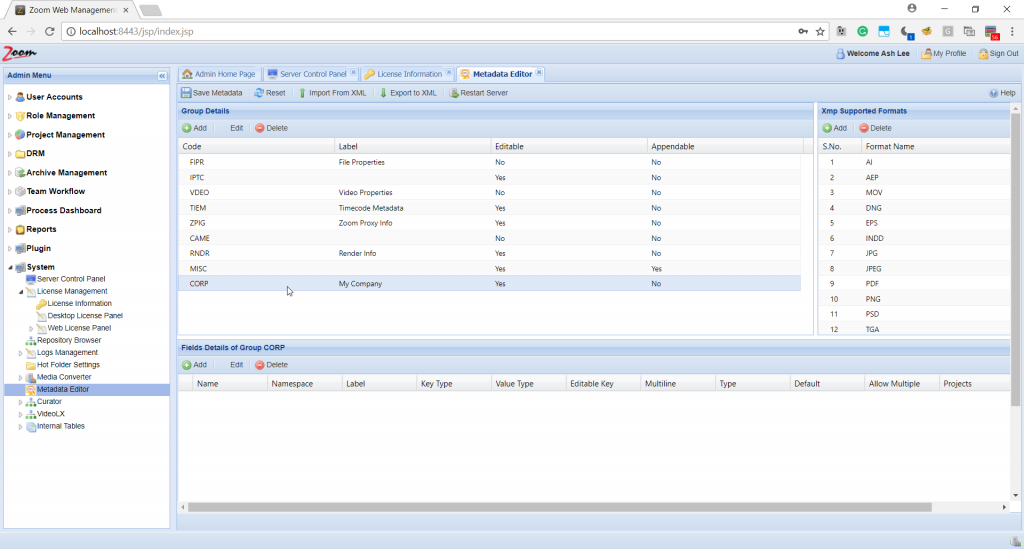
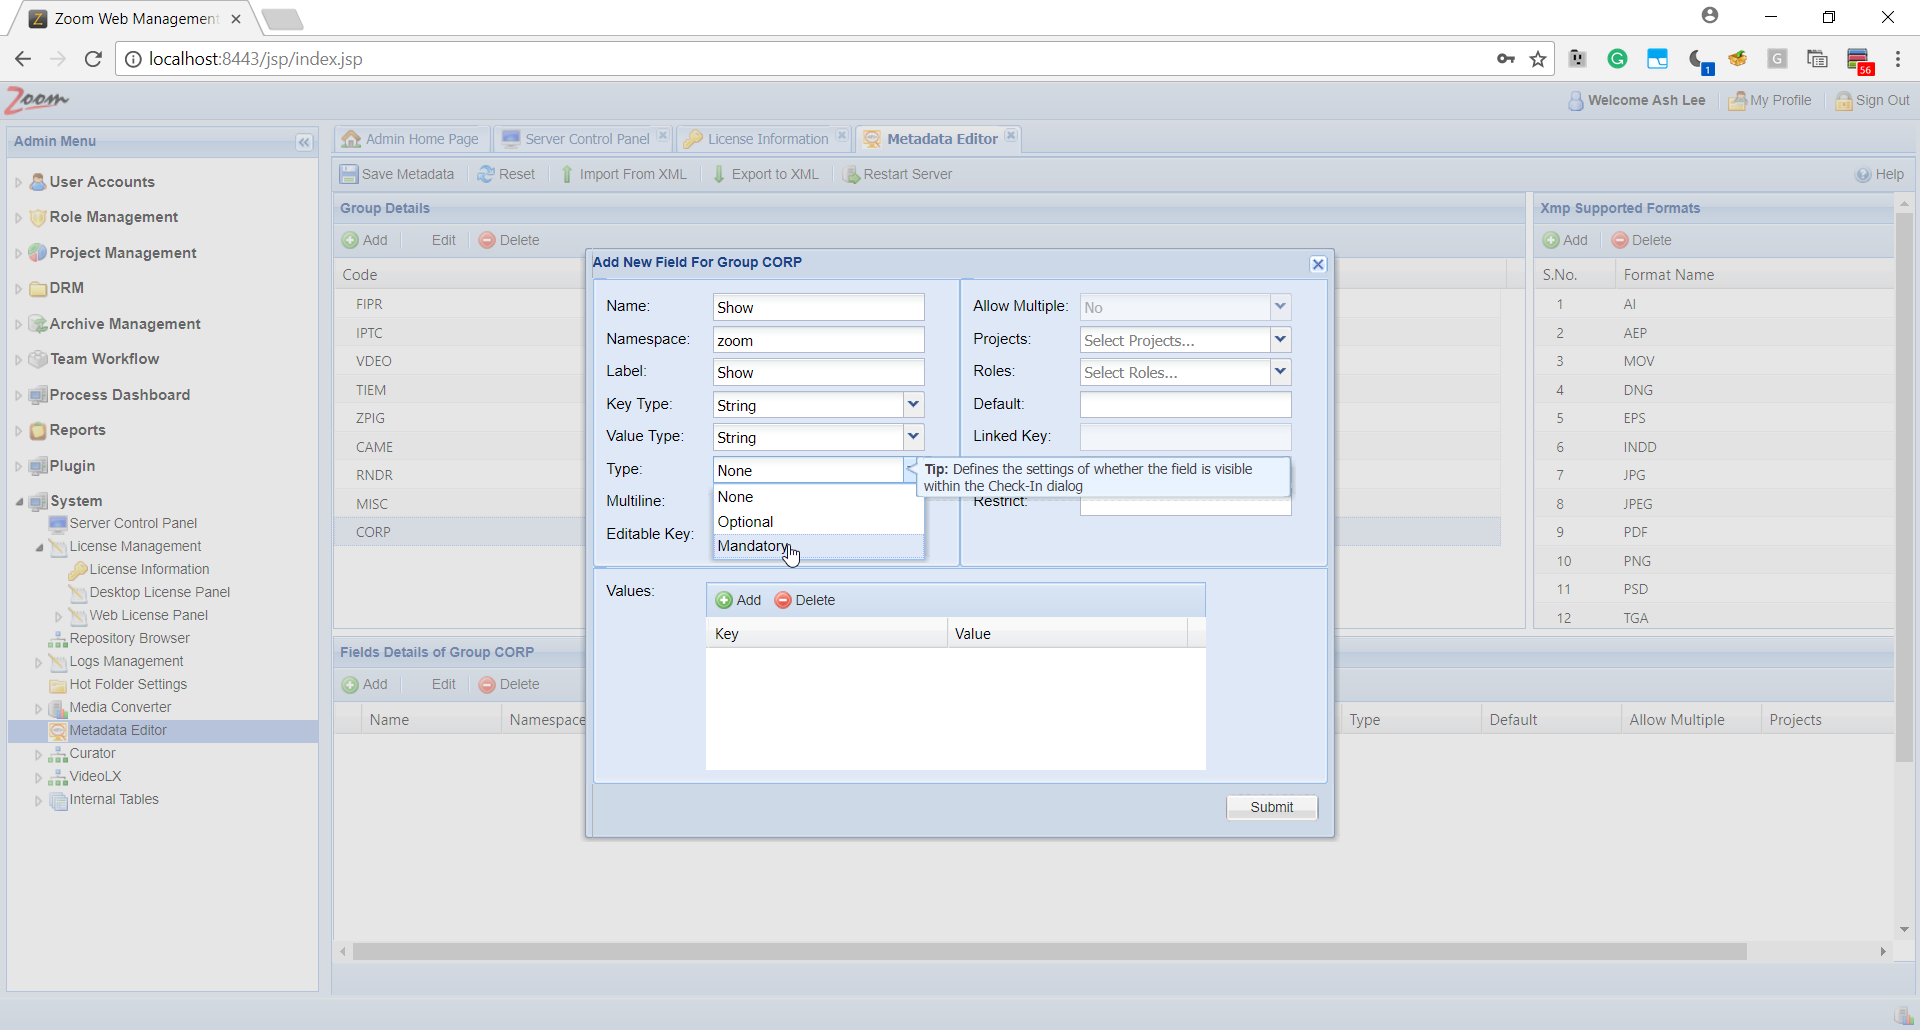
- Select the new group ‘CORP’ in the Group Details box. Now, click Add in the Field Details box below it.
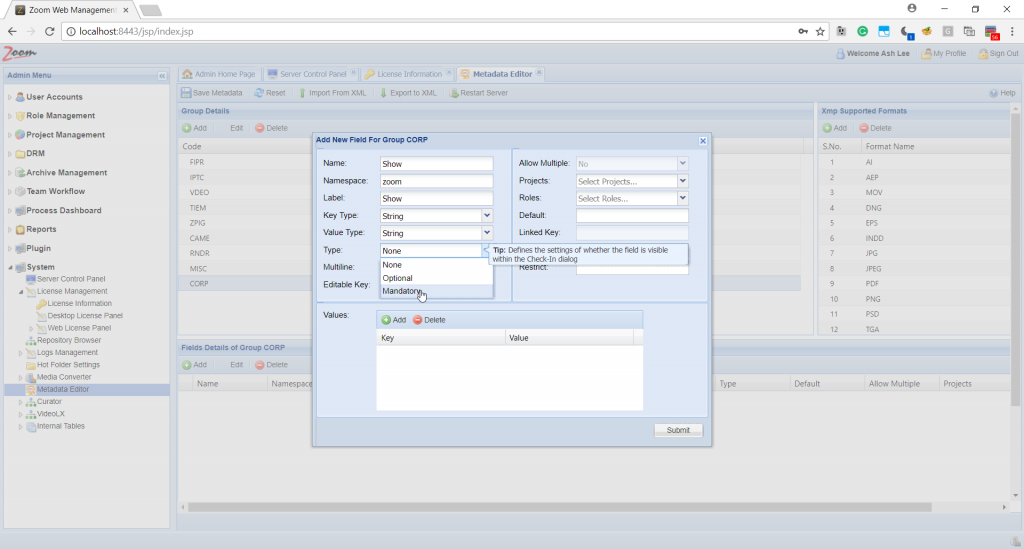
- Specify Name as ‘Show’ and Label as ‘Show’. Choose type as ‘Mandatory’. Add a few key values for the field.
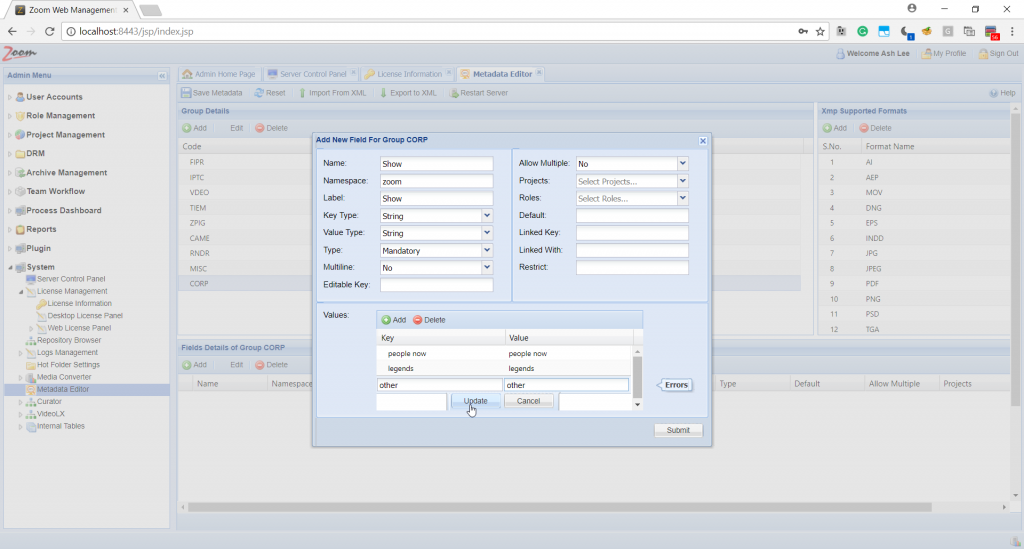
- Click Submit to add the field to the group CORP.
- Similarly, add the other field ‘Episode_Title’ and set a few values for it.

- Click Save Metadata. The fields for your metadata schema are now ready on the Zoom MAM Server.

Move on to setting up your Ingest Server by following the steps here.
Set up the Ingest Service
As described in the prerequisites, the Ingest Server should be running Linux RHEL. We need to install Zoom Preview Server on the newly setup Ingest Server. Typically, the Zoom Preview Server co-hosts the Ingest Service. If you are re-using the Zoom Preview Server to also co-host the Ingest Service, the steps below are not required.
Install Zoom Preview Server
Copy Zoom Server installer and install the Zoom Server (steps for Linux). Follow the instructions in the installer. This will install the service needed by the Ingest Server.
After installation, check that:
- You can ping your Zoom Server from this Ingest Server machine.

- Zoom Preview service is running and is also set to start after server startup.

Set up the Vantage Server
As described in the prerequisites, the Vantage Server should be running Windows Server. We need to install Zoom Client on the newly setup Vantage Server.
Copy the Zoom Client installer for Windows and run the installer. Follow the instructions in the installer. This will install the Zoom Client needed by the Vantage Server.
After you have set up shared network locations and environment on the Vantage Server, you need to create Vantage workflows and validate these as described here.
Run hook installer on Servers
Follow this post to install the required script files for hooks on each server.
Set up the Archive module
If you are using the archive module with VideoFX, then configure it as described here.
Set up your Zoom Clients
Follow ahead to set up Zoom Clients to make use of VideoFX.
Apart from setting up the servers, you also need to set up Zoom Clients to be able to use VideoFX flow.
Follow for your Zoom version:
From Zoom 7.3 onwards
As hook files are not required anymore while setting up VideoFX, so the configuration for Zoom Clients is also simpler.
Update zoom.properties
Each Zoom Client needs some properties added to their zoom.properties file. The easiest way to do this is to add these properties for the desired locations so these are propagated to all Zoom Clients in that location.
- Log into the Web Management Console as an admin.
- Open the Server Zoom Properties page under System node in the Admin Menu sidebar.

- Choose your desired location from the Locations dropdown and click Add. We need to add the properties THIRD_PARTY_MOUNT_POINT and USAN_POINTS for any location that is configured for VideoFX.
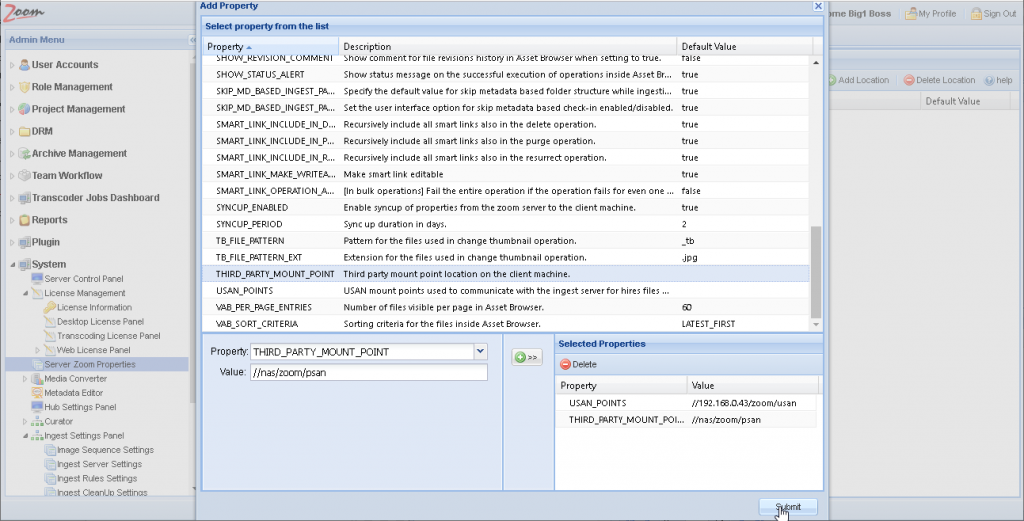
- Specify the paths designated for each of them and click Submit to add these properties for our selected location.
- The properties will now be pulled by the Zoom Clients during auto-sync or manual sync.

Alternatively, you can add zoom.properties file individually on each Zoom Client machine, but this will take longer.
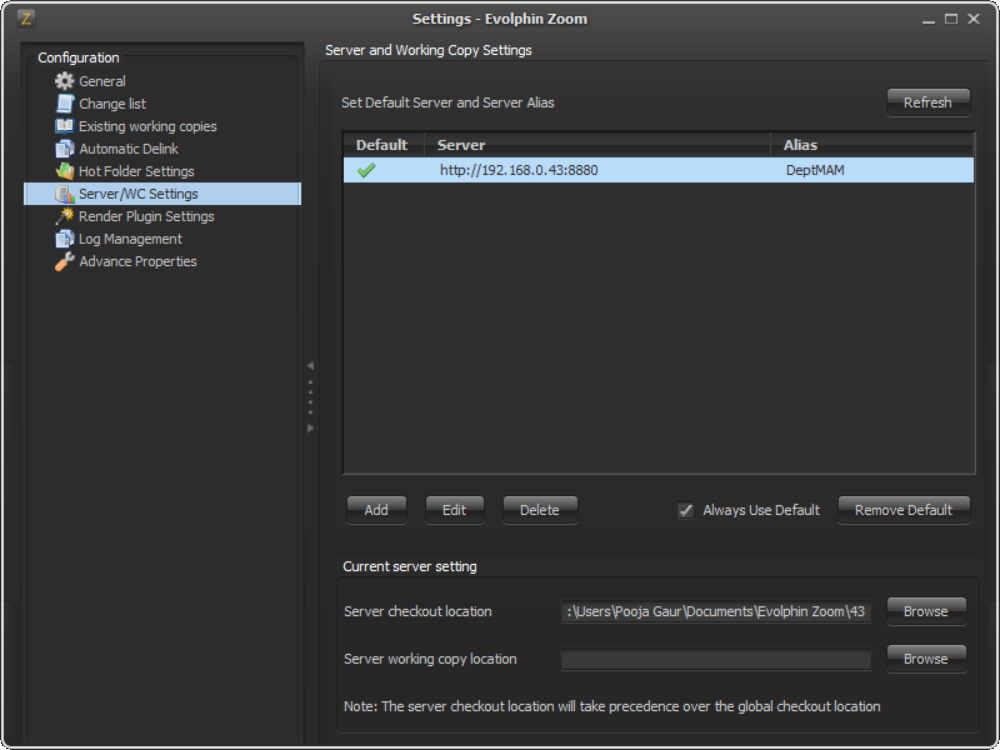
Z Settings
For the first-time set up of Zoom Clients after upgrading to/installing Zoom 7.3, you need to select the location where the Zoom Client is working in. If you do not choose this then by default Global location is set.
After launching Zoom ClientProxy, you will see a message to set up a default Zoom Server.
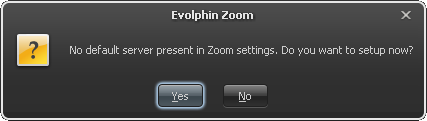
Click Yes to see the Z Settings window. Alternatively, right-click on the Z icon and choose Settings from the Z menu.
Select Server/WC Settings in the left sidebar.
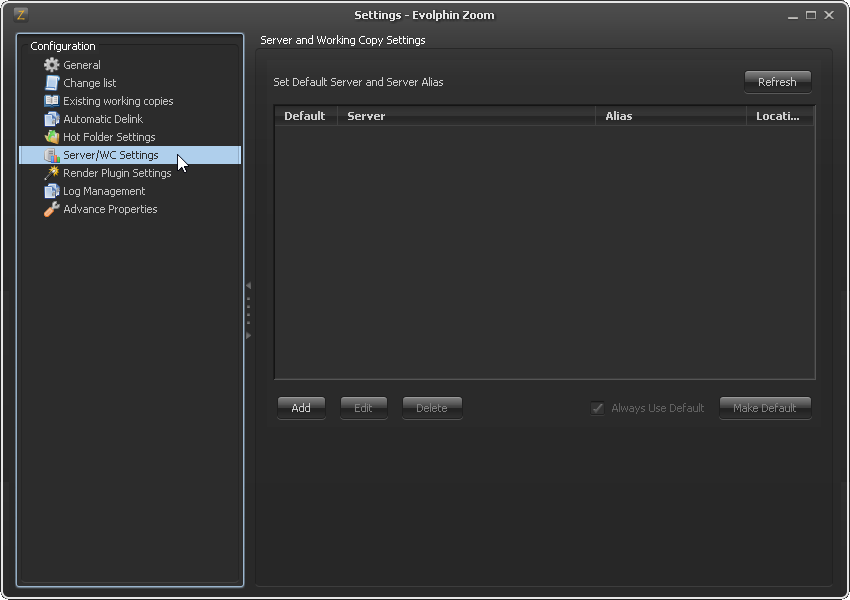
Click Add to see the Add Server Settings window. Notice that this popup window also has a Location drop-down now.
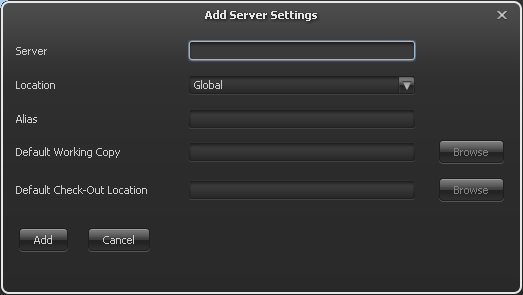
Specify the Server URL and press Tab to move to the next field. A Zoom Server Login window is shown.
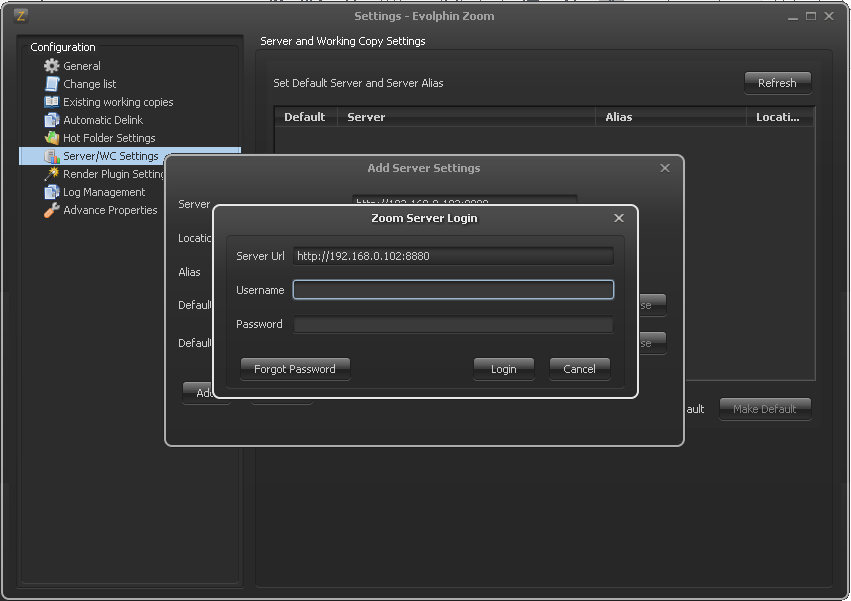
Specify your username and password to log into Zoom. After a successful login, the Add Server Settings window is shown again. Choose a location from the list. Specify an alias, default working copy and default check-out locations. Click Add to log in, validate, and add the server settings.
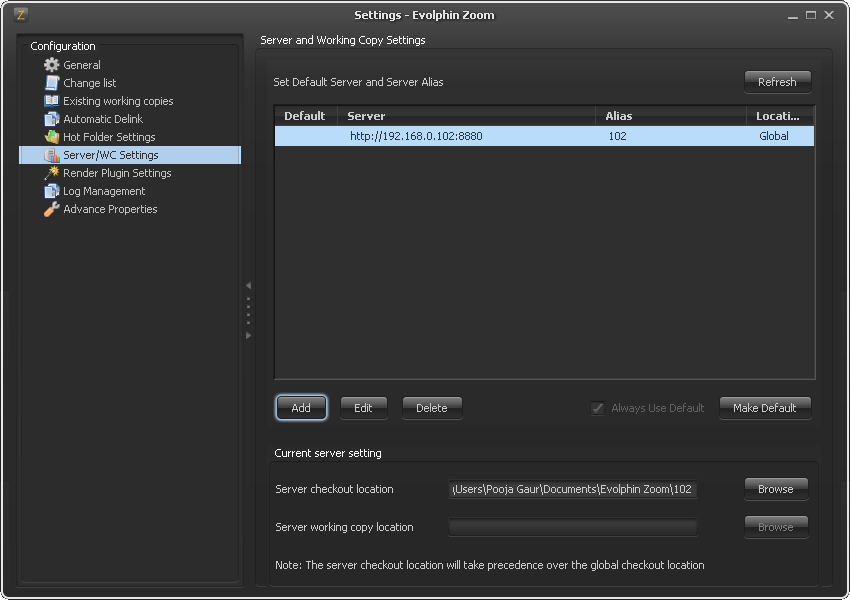
Click Make Default to make this Zoom Server as the default server. Also, select Always Use Default to make sure that this Zoom Client seamlessly connects to the default Zoom Server every time.
For Zoom versions up to 7.2
For Zoom versions before 7.3, follow the rest of the post to set up Zoom Client machines.
For each Zoom Client, a few settings are required in the property files, hook.properties and zoom.properties. These files reside in the user directory $HOME/.zm.
Create hook.properties
You could create a single hook.properties as shown below. Copy this file to a test client workstation and replace the paths and folder names as per that client’s settings. Once finalized, copy this file to the Zoom server for automatic push to all client workstations as described here.
| Property | Description |
| MD_BASED_INGEST_FORMAT |
This property holds the folder structure under which the high-res assets must be stored when they are ingested in the mount location. This structure will also be used for proxies and placeholders of the high-res assets on the Zoom Server. This pattern is based on the Zoom Metadata properties selected as mandatory in the section above. MD_BASED_INGEST_FORMAT = /#CORP_Show#/#CORP_Episode Title#/#OLD_NAME#_#TSTAMP#
|
| PRE_HOOK_SERVER_URL |
This specifies the ingest server aka script execution server’s URL. At present, Zoom houses the script execution engine within the Zoom Preview Server. Therefore this URL must point to a preview server host/port. PRE_HOOK_SERVER_URL = http\://192.168.0.99\:8873
Special characters like the “:” should be escaped using a preceding slash.
|
| PRE_HOOK_SCRIPT_PATH |
This specifies the path of the script on the Zoom ingest server that would be invoked prior to the actual check-in of assets to Zoom. This path exists on the machine where the scripts are executed, which is the script executor framework running off the Zoom Preview Server. Therefore this script must be located in the specified location within that machine. PRE_HOOK_SCRIPT_PATH = /home/evolphin/zoom-deploy/pre-hook/pre-checkin.pl
|
| POST_HOOK_SCRIPT_PATH |
This specifies the path of the script that would be invoked after running the check-in operation. Again, this is with respect to the Zoom Preview Server machine. POST_HOOK_SCRIPT_PATH = /home/evolphin/zoom-deploy/post-hook/post-checkin.pl
|
| ZOOM_PROXY_INOUT |
This is the path used to exchange data between the client machine and the script executor engine regarding the ingest operations. Both machines (the client and the preview server machines) must have sufficient access privileges to be able to read from / write to this location. For example, from a Mac client, a mounted network share that is accessible to both the client machine and the Linux preview server could look like this. The folder must be readable by the client and writable by the Zoom ingest server/script execution server. Same as PreHook#zmInOutPrefix Same as PostHook#zmInOutPrefix ZOOM_PROXY_INOUT = /Volumes/usan/.zoom-deploy/zoom-proxy-inout
|
| HI_RES_FOLDER | This specifies the path where the assets to be checked in are located. Check-in may be triggered by dragging assets from this location into the Asset Browser or from within the Zoom plugin panel inside the Adobe application. This path must be set to a location that is accessible from both the client and from the ingest server.
Same as PreHook#workspaceRoot HI_RES_FOLDER = /Volumes/usan/hires
|
| DELETE_INOUT_JSON_FILES |
DELETE_INOUT_JSON_FILES = true
|
| EXCLUDE_PROJ_IN_HIRES |
EXCLUDE_PROJ_IN_HIRES = defproj:Images
|
| SKIP_MD_BASED_INGEST_PATH |
SKIP_MD_BASED_INGEST_PATH = true
|
Update zoom.properties
Copy this file to a test client workstation and replace the paths and folder names as per that client’s settings. Once finalized, copy this file to the Zoom server for automatic push to all client workstations as described here.
Tip: You can use environment variables like $HOME to change the property value based on a user’s home directory when pushing the property file from Zoom server to a user’s workstation.
| Property | Sample Value | Cross-references |
| THIRD_PARTY_MOUNT_POINT | /Volumes/psan/tpm |
Same as PreHook#TPMPrefix Same as PostHook#TPMPrefix Same as Vantage#TPMPrefix |
|
THIRD_PARTY_MOUNT_POINT1 THIRD_PARTY_MOUNT_POINT2 . . . THIRD_PARTY_MOUNT_POINTN | D\:\\TPM |
Multiple third party mount points are mapped starting from THIRD_PARTY_MOUNT_POINT1 |
| EXTENSIONS_PROXY_MAP | mp4 -> mov, mxf |
Low-res Proxy format (mp4 in the sample) same as Vantage Workflow, PreHook#defaultExtProxy and Vantage#lowProxyExt ProRes format (mov in the sample) same as Vantage Workflow and Vantage#proResExt |
| PLUGIN_METADATA_TO_SHOW | EDIT_Category,EDIT_Brand, EDIT_Source,WKFL_Route to | Defined in Server Metadata Schema |
| LIST_DEF_PROPS |
EDIT_Category|Event, Edit_Brand|People, Edit_Source|Getty, WKFL_Route to|Evan | Defined in Server Metadata Schema |
| IGNORE_PATTERN_IN_LINK_FILENAME | _original | None |
| SHOW_STATUS_ALERT | false | None |
| HI_RES_PATH_PROP | VDEO_Native File Path |
Same as Prehook Hires Path |
| PRO_RES_PATH_PROP | VDEO_ProRes File Path | None |
| PRORES_SUFFIX | -midres | None |
Update Z settings
Use the Settings dialog from Z-Icon to update the following values:
defaultCheckoutLocation: This property defines the location where, by default, any checked out asset is placed. So, it will not prompt to select location every time a user tries to check-out a file from the Zoom repository.
DEF_ZOOM_SERVER: In typical deployments, clients only connect to a single Zoom server and therefore it is recommended that this property is configured to minimize user intervention in running Zoom operations.
alwaysUseDefaultServer: This property directs all Zoom operations from the client to the default server. This must be set to true to execute search operations from inside the Zoom Adobe plugins.
Validate your VideoFX setup
Follow here to check if your VideoFX flow works as expected.