User accounts, group memberships, and credential hashes can be synchronized one way from Azure AD (AAD) to Azure AD Domain Services (Azure AD DS or AAD DS). Azure AD DS integrates with your existing Azure AD tenant, which makes it possible for users to sign in using their existing credentials.
Azure AD DS replicates identity information from Azure AD, so works with Azure AD tenants that are cloud-only, or synchronized with an on-premises Active Directory environment:
- If you have an existing on-premises AD environment, you can synchronize user account information to provide a consistent identity for users on the Azure AD cloud tenant.
- For cloud-only environments, you don’t need a traditional on-premises AD environment to use the centralized identity services of Azure AD DS.
- Azure AD DS provides secure LDAP (LDAPS) access to the user credentials from Azure AD tenant.
- Zoom LDAP connector uses LDAPS to synchronize user & groups from Azure AD by using Azure AD DS as a read-only proxy to Azure AD tenant.
- Currently, Zoom OpenID security realm connector utilizes the Zoom LDAP connector to sync user & group attributes to Zoom Server
This is the first step towards provisioning SSO support via Azure AD OpenID Connect integration.

In the sections below, we will cover how to get the Zoom LDAP connector and Azure AD DS configured to get the flow depicted in the diagram above working with Zoom.
Prerequisites
- Knowledge of your organization’s Azure AD setup
- Administrator access to your Azure Account
- Read the Microsoft Azure AD DS background article
- Ability to create or obtain PKCS12 certificate for your managed domain
- Ability to create DNS entry needed for the setup or work with your DNS admin
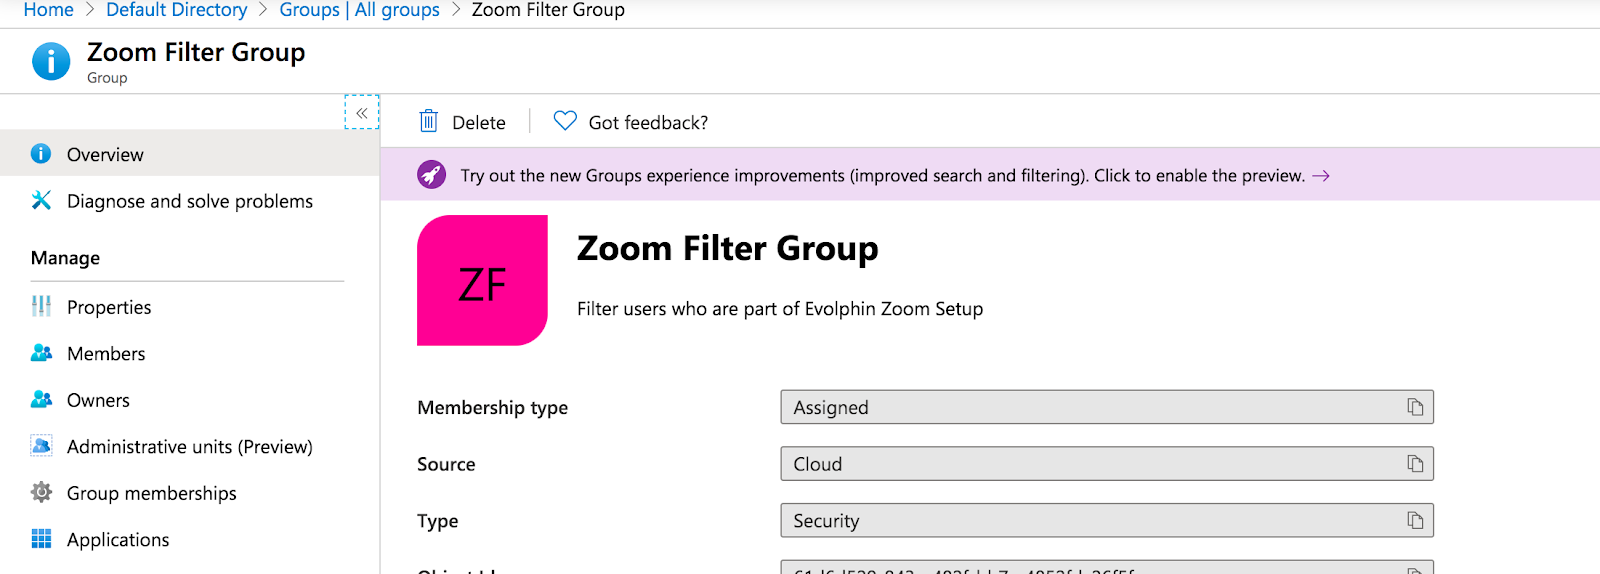
Step 1: Create a Zoom Filter group in Azure AD
In Azure AD (AAD) create a group that will be referred to as the Zoom Filter group in order to do one-way scoped sync from AAD to Azure AD Domain Services tenant:
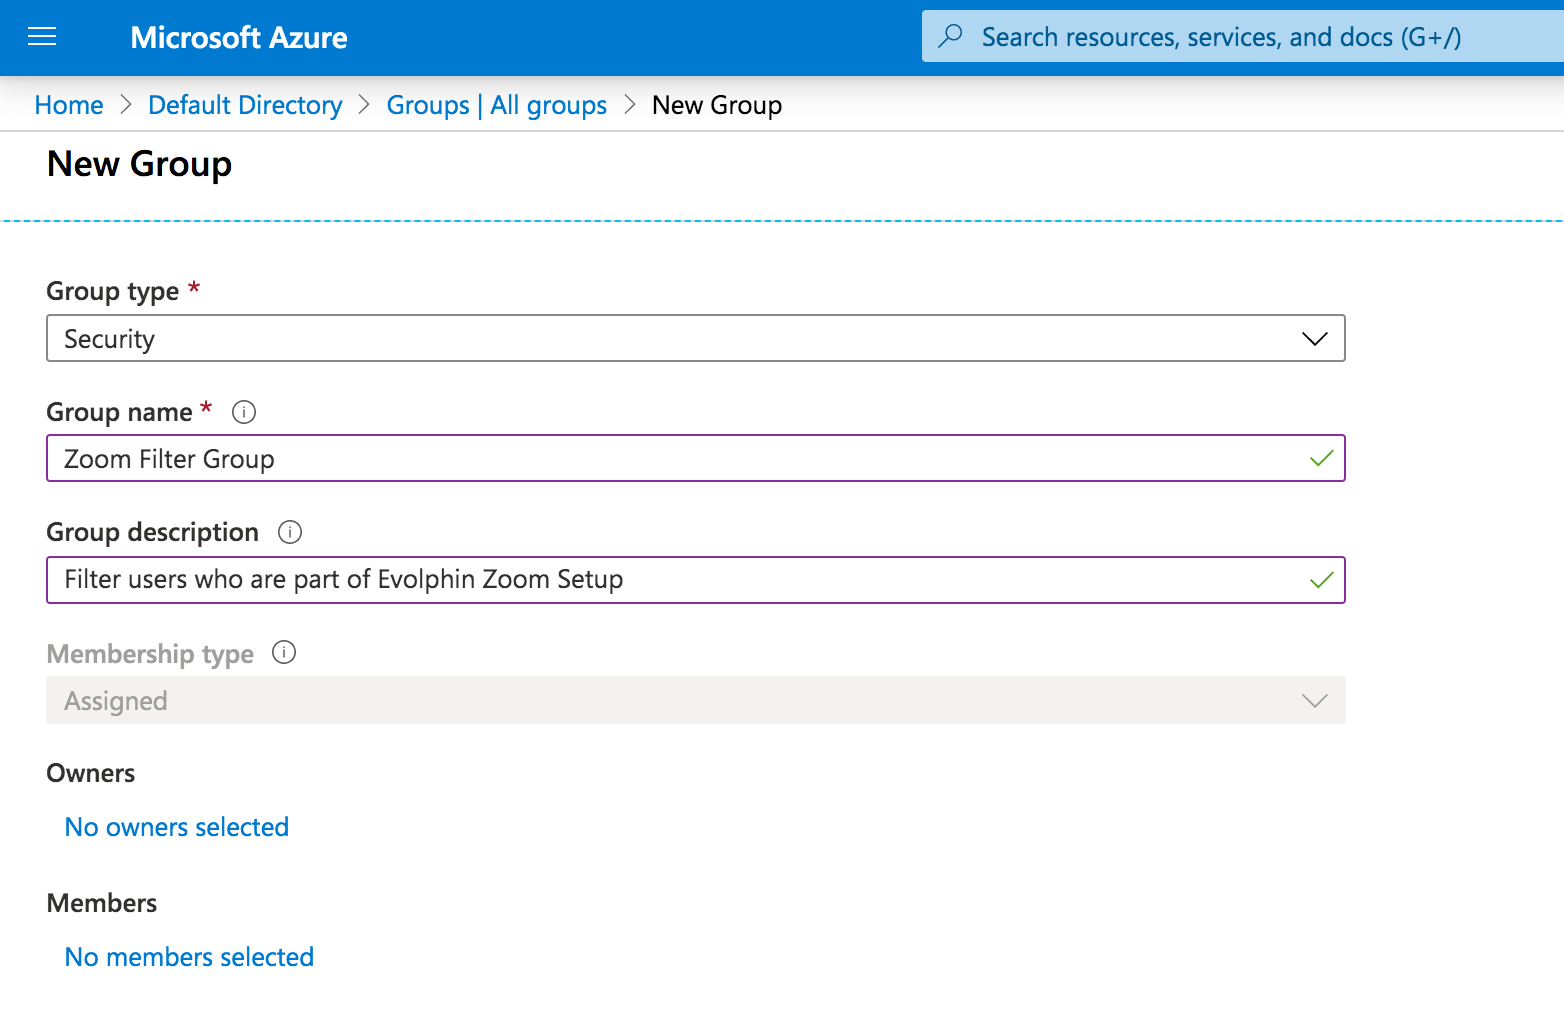
A scoped sync ensures only users & groups that need to have access to Zoom are synced. You don’t want your entire corporate directory in Azure AD to be synced. For example, you may have 1000 people across the entire Azure AD organization, but you may need to sync only 50 users that will use Zoom via the Azure AD DS sync.
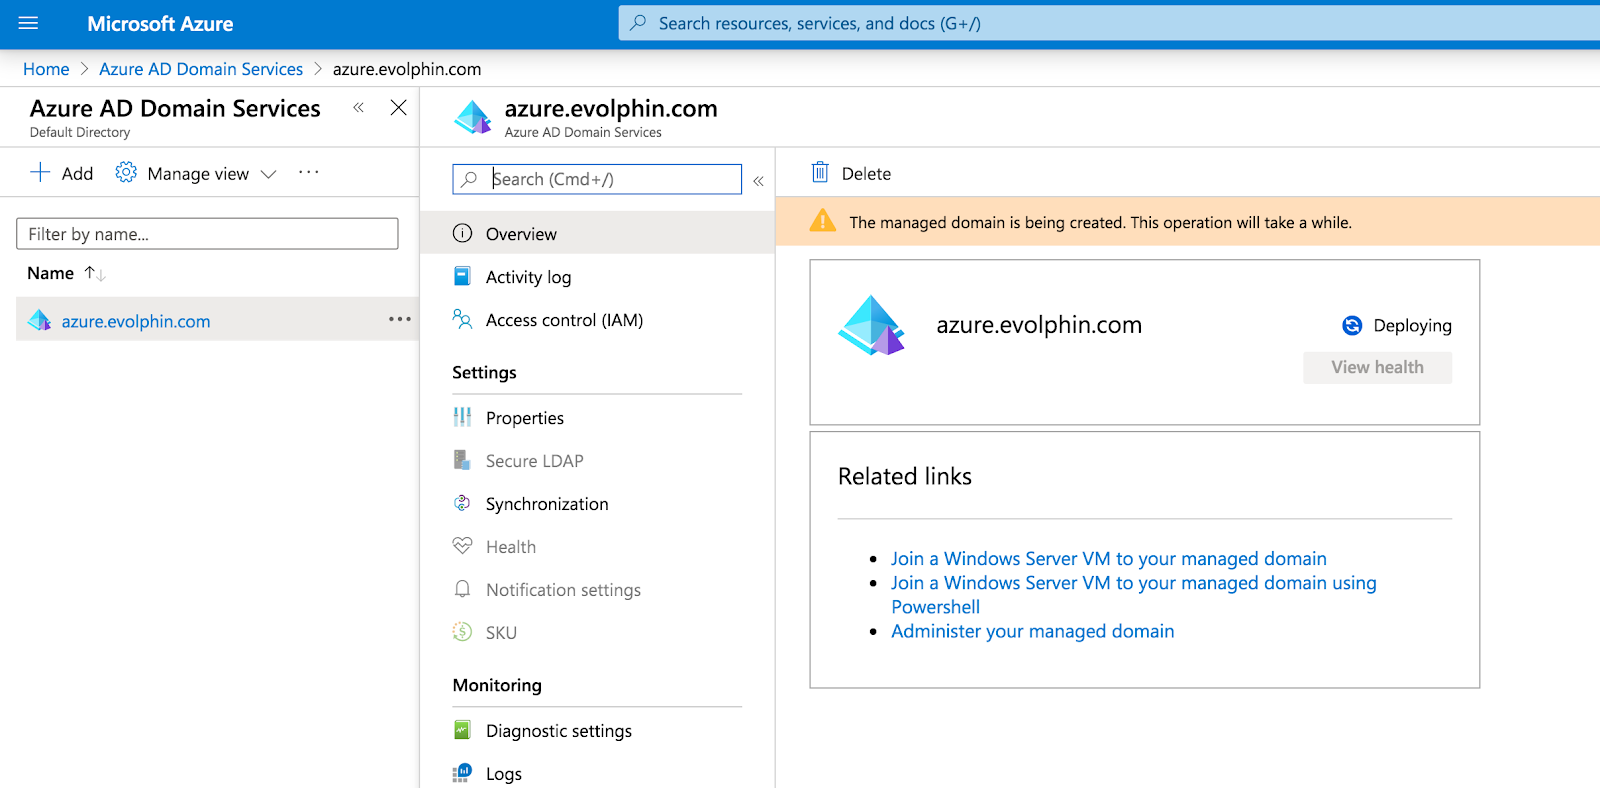
Step 2: Configure an Azure AD DS tenant
After logging in into your Azure console, create a new Azure AD DS tenant, if it doesn’t exist.

Choose a domain name for the new tenant such as azure.<your-company-name>.com.
Step 3: Set up Synchronization in Azure AD DS
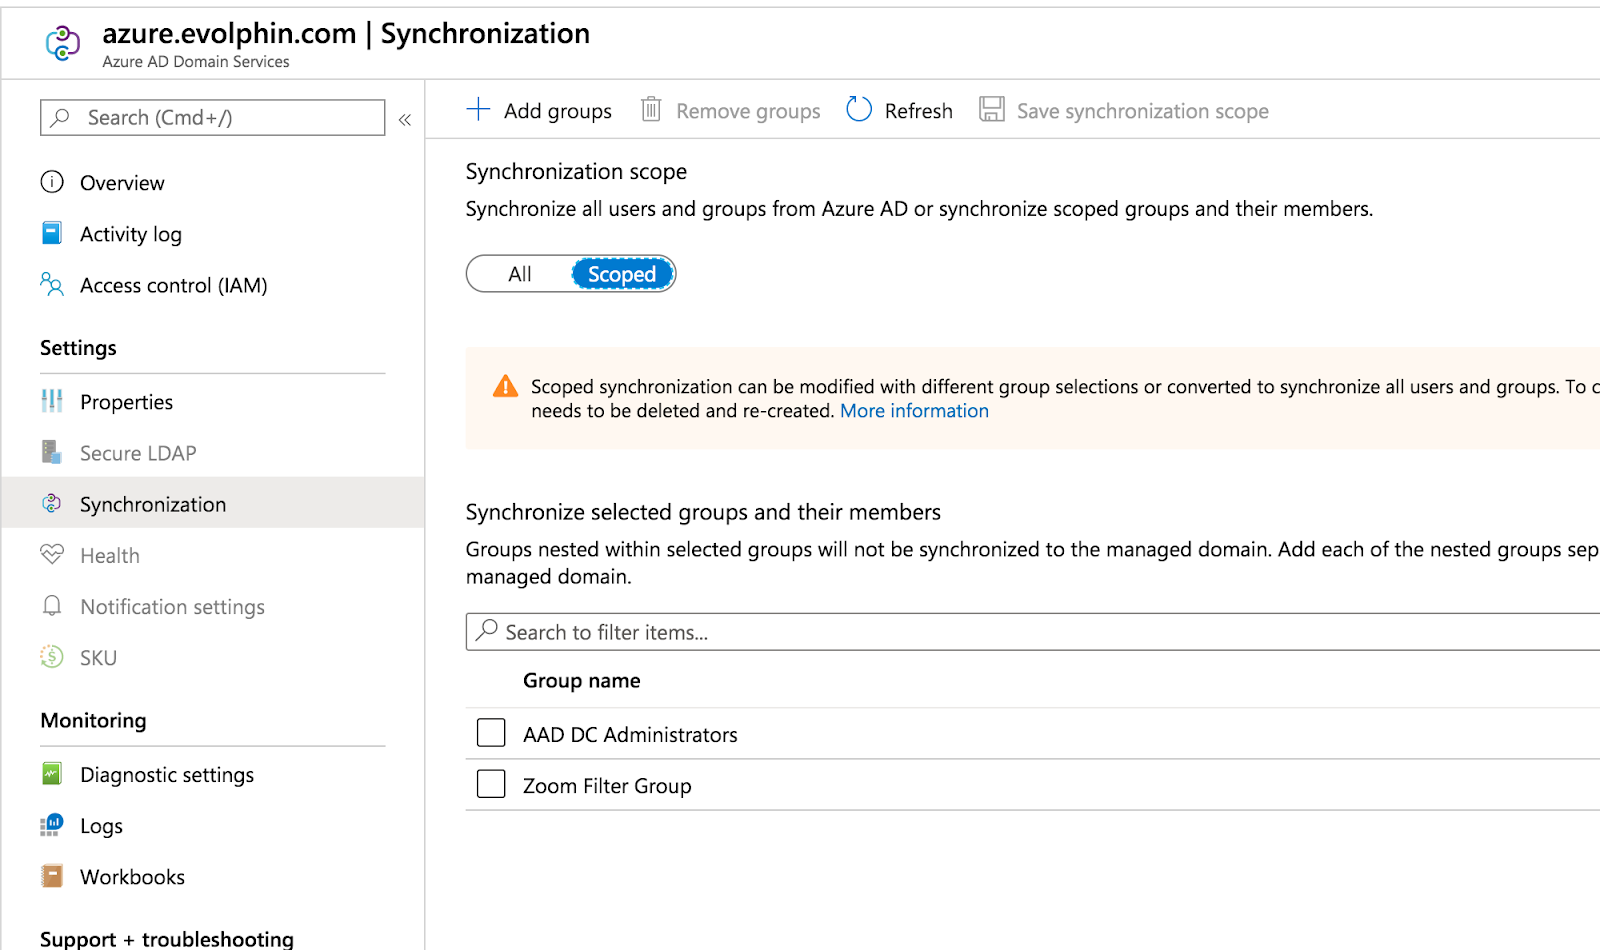
Ensure Scoped Sync is selected and choose a group name, such as Zoom Filter Group we created above, from Azure AD to sync. Wait for the Azure AD DS managed domain to deploy in the Azure Cloud.
This step might take 30-60 mins depending upon Azure Cloud’s workload.
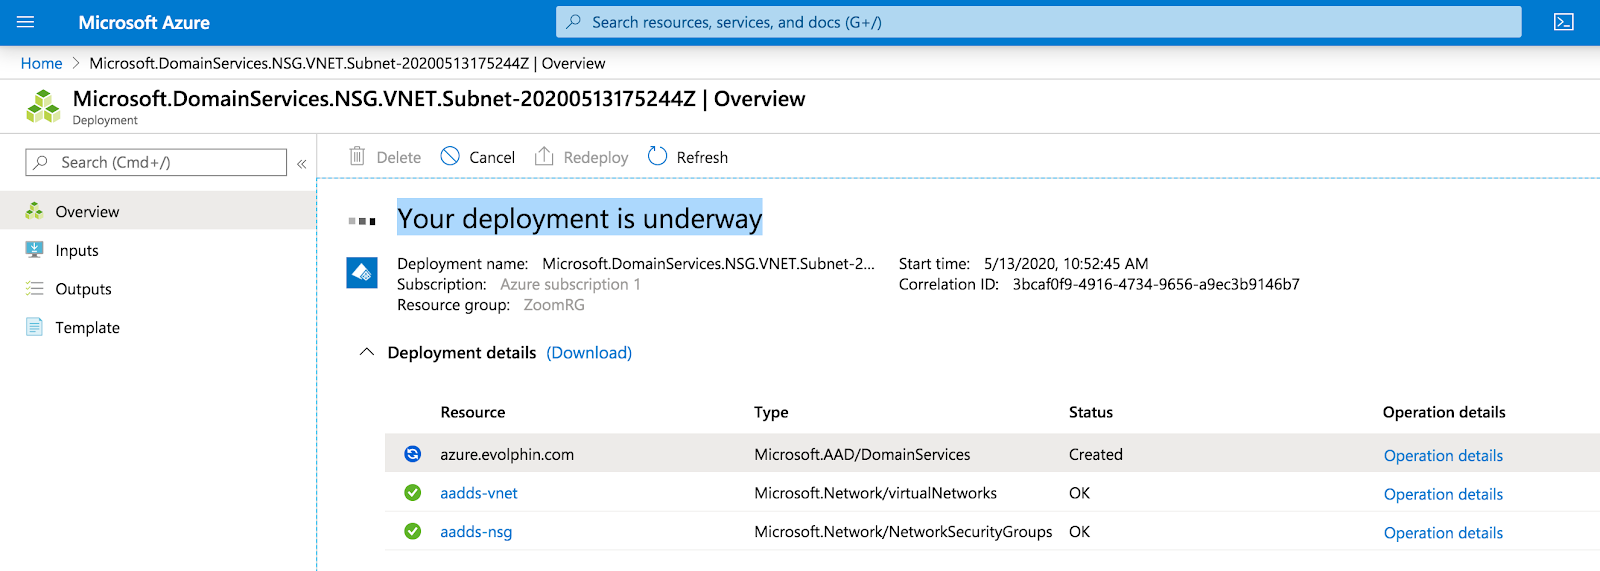
When you first deploy Azure AD DS, automatic one-way synchronization is configured and started to replicate the objects from Azure AD. This one-way synchronization continues to run in the background to keep the Azure AD DS managed domain up-to-date with any changes from Azure AD.
Note, if you are using Azure with Zoom OpenID Connect realm (may be labeled as PingID realm in your version of Zoom Server Web Admin), you will first want to test if Zoom LDAP realm is working. Therefore, you will need passwords synced from Azure AD to Azure AD DS. This often requires passwords to be reset in Azure AD in order for the sync to be triggered. Please check your Azure AD setup to see if a password reset for all users in the Zoom Filter group is necessary. This is a Microsoft Azure AD DS setup requirement.
Step 4: Obtain a valid SSL/TLS wildcard certificate for your Azure AD DS
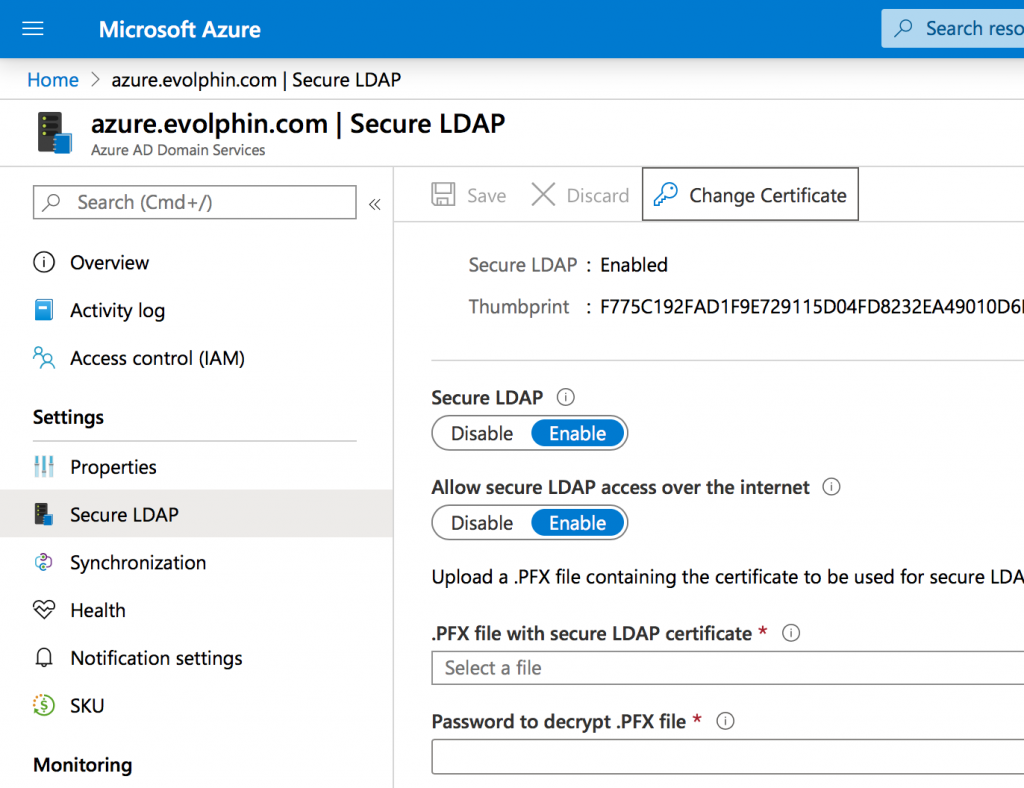
Click on Secure LDAP option to enable the settings shown below:
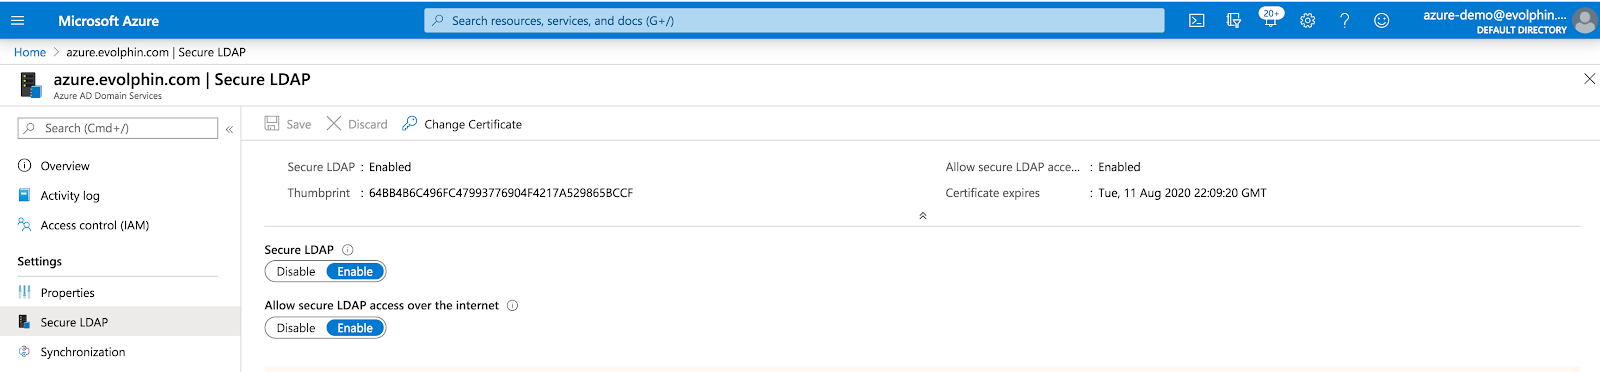
Ask your IT security team to create a PKCS12 certificate with the file extension set to .PFX. See Microsoft requirements for secure LDAP setup here. The certificate must meet the following requirements:
- The certificate must have the same Subject Name as the domain being managed. For instance, if your domain is named azure.evolphin.com, the certificate’s subject name must be *.azure.evolphin.com
- Zoom LDAP connector requires the DNS name of the managed domain such as azure.<company-name>.com also added to the certificate. Without the two entries, LDAP will not work with the Zoom LDAP connector. For example:
- azure.<company-name>.com
- *.azure.<company-name>.com
- Do not use self-signed certificates as the Zoom LDAP connector will not trust it.
Step 5: Assign a public IP and a DNS name
The Azure AD DS tenant uses a couple of IP addresses in the internal virtual network on Azure. In order for the Zoom LDAP connector to connect with it, you must assign an external IP address to it. This external IP address must be associated with the Azure AD DS tenant.
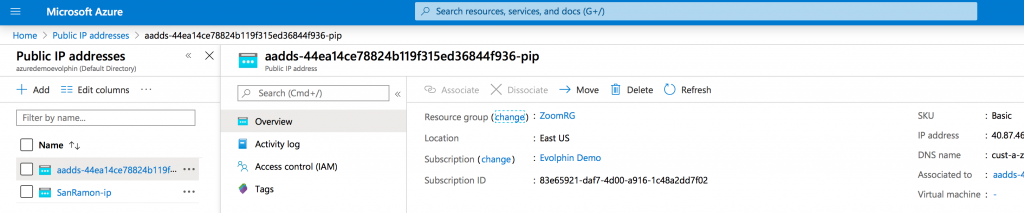
Now that you have an external/public IP address for the Azure AD DS, go ahead and add an A record in your DNS to map a hostname to it. Ensure the hostname is in the same domain as the Azure AD DS. For example, a DNS hostname such as ldaps.azure.<company>.com is in the managed domain azure.<company>.com. The hostname will also match the wildcard entry in the SSL certificate you set up earlier for the Azure AD DS secure LDAP.
Step 6: Open LDAPS port in the inbound security rules
First, obtain the IP address of the Zoom Server that will connect with Azure AD DS over LDAPS port 636. You can get that by doing a ping or DNS lookup on the Zoom DAM/MAM server DNS hostname.
Add an entry for port 636 (LDAPS) in the Azure network security group attached to your Azure AD DS tenant:

In the inbound rules, ensure only the allowed IP addresses are specified:

Under no circumstances should you have a wildcard or allow Any entry in the Source field of the above rule. You do not want to open your LDAPS port to anyone to access.
Step 7: Test LDAPS connectivity from outside Azure
From a workstation or a server that is on the allowed IP list, validate if you can connect to the LDAPS port 636. You can use tools like netcat, telnet etc to check that.
Next use an LDAP test client such as Microsoft Ldp tool or open source Apache Directory Studio to test authentication with your Azure AD DS:


Step 8: Gather the LDAP settings from Azure AD DS
In order to configure the Zoom LDAP connector, gather the following from your LDAP test client connected to you Azure AD DS tenant:
- Base DN: This is typically the domain name specified in X.500 directory standard. For e.g. DC=azure,DC=evolphin,DC=com
- Username attribute: Typically, sAMAccountName derived from the mail prefix in the userPrincipalName
- Bind user’s DN: The DN of a service user that will be used to authenticate with Azure AD DS. For e.g. CN=Service AAD-DS,OU=AADDC Users,DC=azure,DC=evolphin,DC=com
- Bind password: The password of the above user account
- Zoom Filter group’s DN: This is the DN of the filter group created in step 1 of this article. For e.g. CN=Zoom Filter Group,OU=AADDC Users,DC=azure,DC=evolphin,DC=com
Share these settings securely (encrypted document or via a password manager) with you Zoom Server Admin. They can configure and validate the LDAPS connection from your Zoom Server.
Step 9: Validate login using Azure AD credentials from Zoom
Confirm if you can log in using your Azure AD credentials from a Zoom application such as the Web Client, desktop app, creative app plugins, etc. Once this is done, you can optionally configure SSO (Single Sign-On) using Azure AD or a supported OpenID Connect provider.

The set up is now complete. You can move onto SSO setup now.