From Zoom 7.3 onwards, you can conveniently save or update one or more Zoom properties at a single place on the Zoom Server using the Web Management Console. These properties could be for use by the Zoom Server or one or more Zoom Clients.
For a simple Zoom setup that does not use locations (as introduced from Zoom 7.3 onwards), you only need to see how to set properties for one default Global location in Zoom, as described in the Adding properties for a location section.
Alternatively, you can have one or more locations on your Zoom Server, the default being Global. Later, you need to set location for each desktop Zoom Client and each Preview Server. Each location groups a set of properties used by Zoom Clients (desktop and web) using that location, like transcoder setting and sync interval. All web-based Zoom Clients use the location set for the Preview Server.
When you use only one default Global location in the Zoom Server, then only that Global location is available to all Zoom Clients. This default and any other additional locations can still have their own set of properties that we configure using the Server Zoom Properties page in the Web Management Console. This page can be used to maintain a specific set of properties on the server that the Zoom admins want to propagate to all or a subset of Zoom Client machines’ $HOME/.zm directory.
Let us first look at how to add locations, then how to add properties for each location, and later we will see how to set location for Zoom Clients and Preview Servers.
- Adding locations
- Adding properties for a location
- Choosing a location for a Zoom Client
- Setting Preview Server location for web-based Zoom apps
Adding locations
If you wish to add locations to your Zoom Server, follow these steps:
- In the Web Management Console, open the Server Zoom Properties page under the System node in the Admin Menu sidebar.

- The page shows properties added for the location selected in the Location dropdown box above. Only the default location, Global, is present after your Zoom installation, and no properties exist for it. You can add, modify, or delete properties by clicking on the Add, Edit, and Delete buttons on the left (more about that further down on this page). Click Add Location to add a new location.
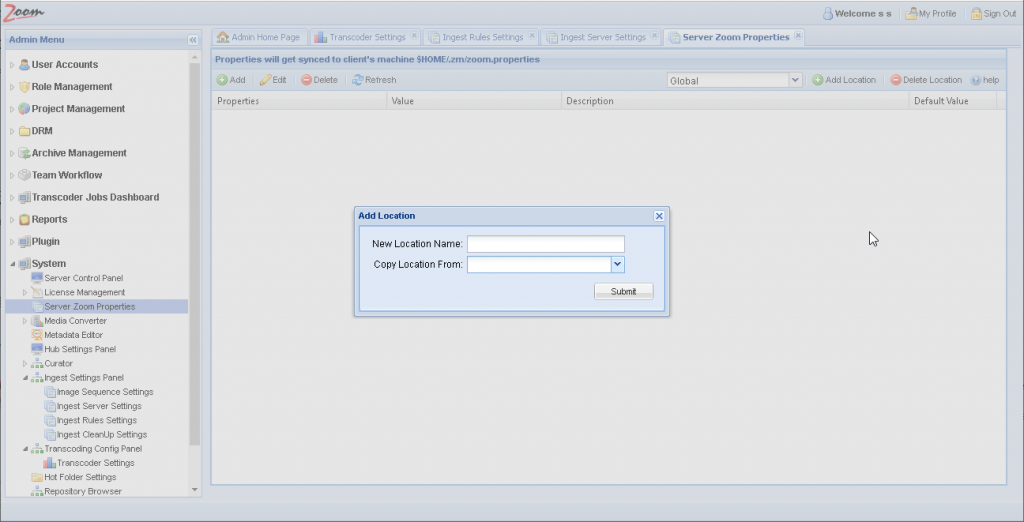
- Specify a name for the location and optionally choose one or more locations from the Copy Location From dropdown list box to copy the configuration from. The new location is created and all properties in the selected locations are also copied to the new location.
Adding properties for a location
You can add one or more properties for a location here. You can choose from a list of available properties or add a new property, and then set its value as needed. The properties set here for all locations are synced with the Zoom Clients for each of those locations. To add a property, follow these steps:
- In the Web Management Console, open the Server Zoom Properties page under the System node in the Admin Menu sidebar.
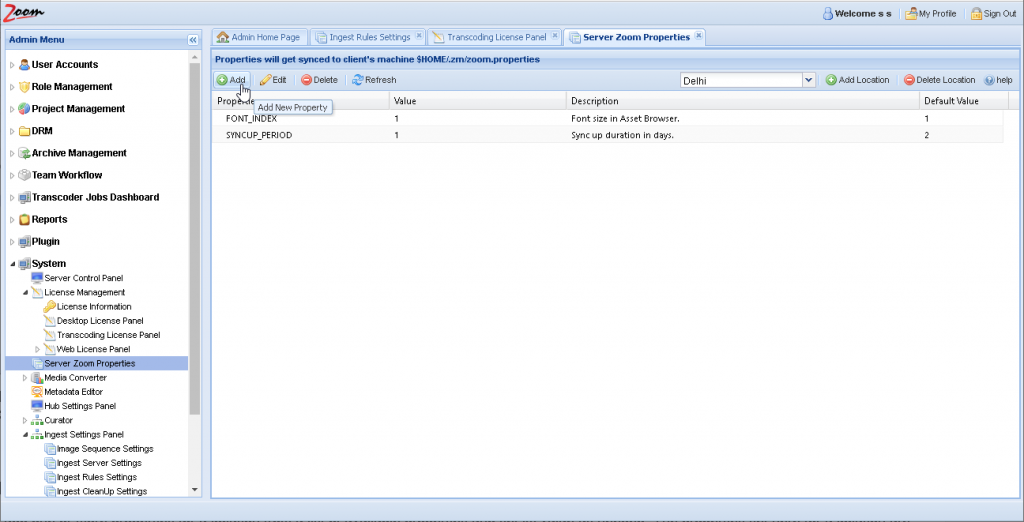
- Choose your desired location from the Location dropdown. Select Global for properties affecting the default location. Click Add in the top bar.
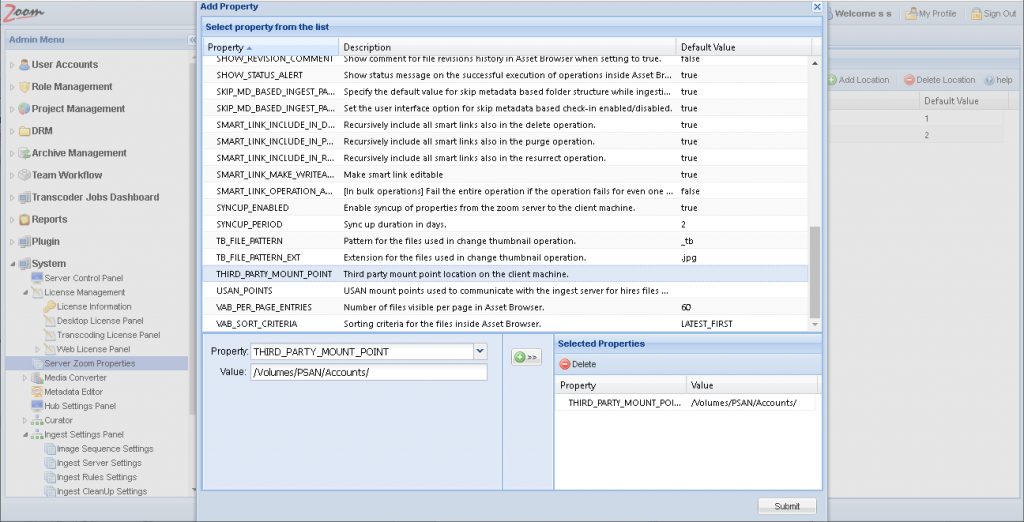
- Select a property from the Properties list. The property is added to the Property box below the list.
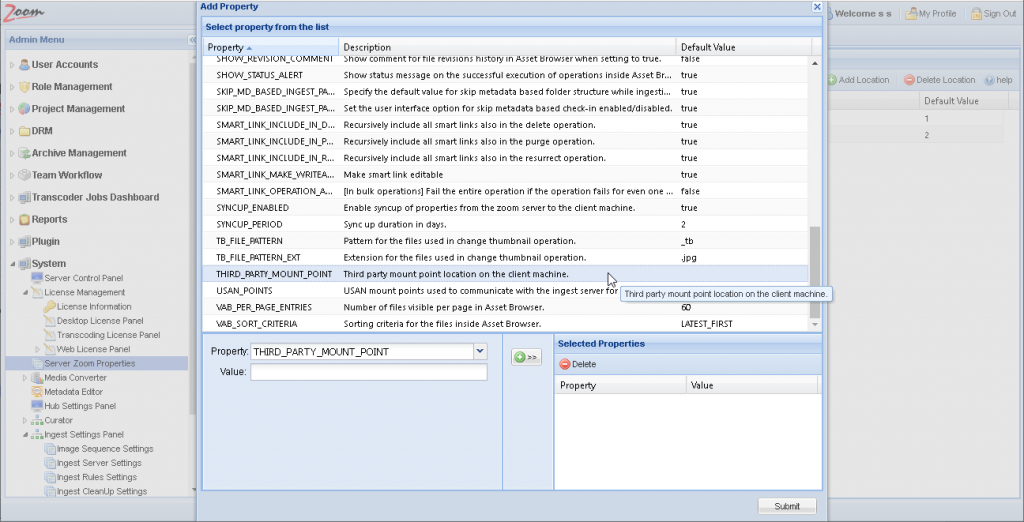
- Specify a value for the Value textbox and click >> to copy the property value pair to the Selected Properties list.
- Optionally, select another property from the Properties list so that it shows in the Property box.
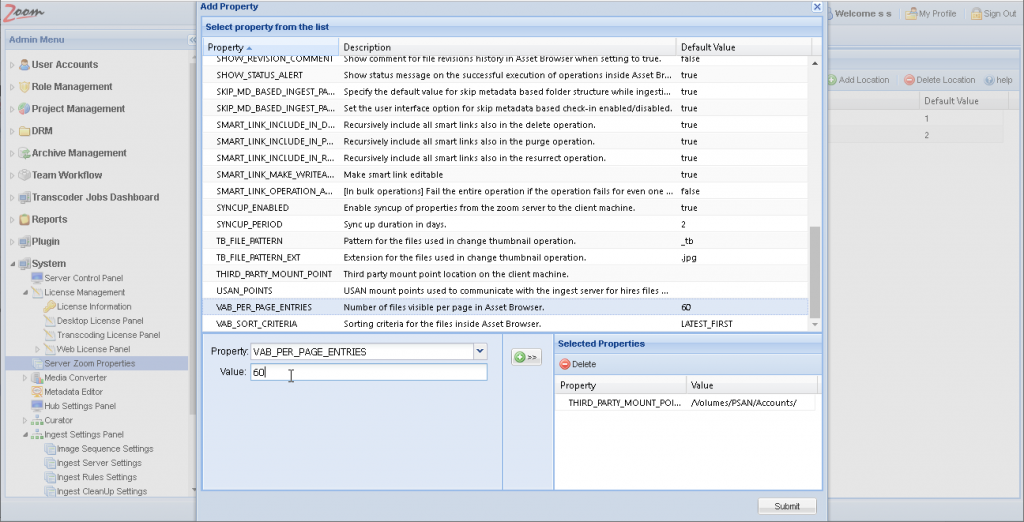
- Again, specify a value and click >> to move this property-value pair to the Selected Properties list. Optionally, add more properties as mentioned above.
- Vice versa, you can also select one or more property-value pairs from the Selected Properties list box and click Delete to remove it from the box.

- You can also add a new property not listed in the Properties list box. This is useful if the property is new and not available in the default list. Type the new property name in the Property box, its value needed in the Value box and click
 to add this property-value pair to the Selected Properties box.
 - When you are satisfied with the properties and their values in the Selected Properties list box, click Submit to add those properties to the selected location.
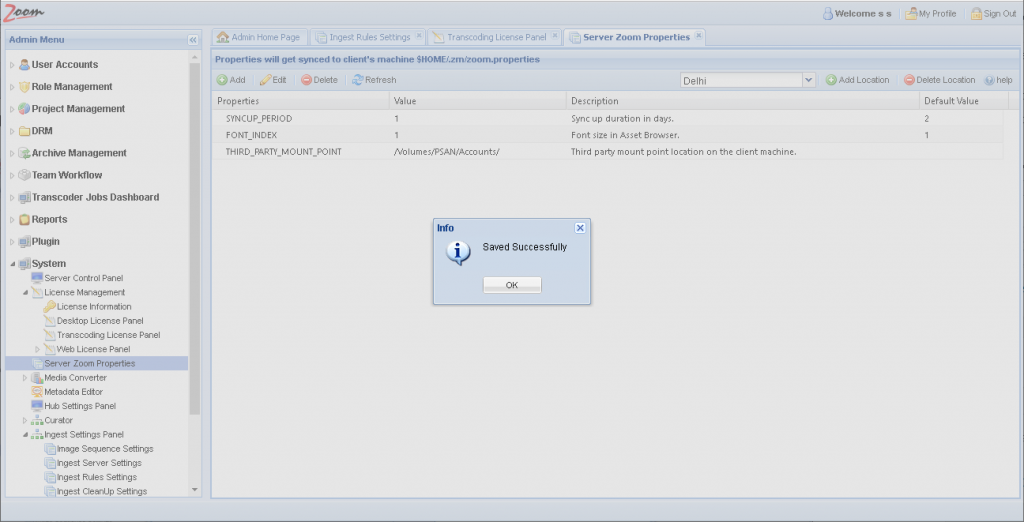
- A ‘Saved Successfully’ prompt confirms the same. You can see the newly added properties in the properties list for that location now.
- Optionally, add more properties for this or other locations as mentioned above.
- When a location is selected in the Locations box, you can also select an existing property for the location and click Edit to modify that property value. Select one or more properties and click Delete to delete those properties.
The properties are now saved for the desired location.
These will be synced automatically to all Zoom Clients and Preview Servers, that have this location set for them (in their own zoom.properties file) as per their sync-up frequency. You can also sync the properties on-demand manually using the Sync Now button in the Z-Settings window on the Zoom Clients. To see the changes in any Zoom Client app like Asset Browser and Evolphin Zoom plugin, you would also need to restart these. In the case of the Evolphin Zoom plugin, you could also Reload Properties from the flyover menu. See the synchronization in detail at Pull Default Client-side settings from Zoom Server .
Choosing a location for a Zoom Client
After setting up locations on the Zoom Server, whenever a Zoom Client logs into the server, it should choose a location from the list provided by the server. This location can also be changed anytime from Server/WC Settings in the Z-settings menu.

Setting Preview Server location for web-based Zoom apps
These locations that are added and configured using the Web Management Console are finally consumed by the Zoom Clients. Desktop clients choose their location while setting up Default Server during login. For the web-based Zoom clients, the location must be configured at the Preview Server.
Follow these steps to set the location for the Preview Server:
- You could set the location for the Preview Server using one of two files. Update any one of these files on the Preview Server:
- Using preview-server.xml:
- Open preview-server.xml for editing from the conf folder in the Zoom installation directory (Windows – [ZoomInstallDir]\conf\ and Linux – [ZoomInstallDir]/conf/)
- Set the tag <currentLocation> to the desired location. If the tag exists then update its value and if it does not exist then add it. For example:
<currentLocation>Bristol</currentLocation>
This location must already be configured on the Zoom Server. - Save and close the file.
- Using zoom.properties:
- Open zoom.properties for editing from the .zm folder for the Preview Server (Windows – [OSInstallDir]\Windows\System32\config\systemprofile\.zm\ and Linux – $Home/.zm/)
- Set the property CURRENT_LOCATION to point to the desired location. If the property exists then update its value and if it does not exist then add it. For example:
CURRENT_LOCATION=Bristol
This location must already be configured on the Zoom Server. - Save and close the file.
- Using preview-server.xml:
- Restart the Preview Server.
The desired location has now been set for the Preview Server. This location will now be used for web-based Zoom clients like the Web Client and Web Asset Browser.