After you have installed or upgraded to the OpenID Connect-enabled version of Zoom, added your Zoom license, and created a default super admin account in Zoom, you are ready to integrate with an OpenID Connect provider. Since the configuration varies for each OpenID Connect (OIDC) provider, for the purposes of this article we assume you are configuring with PingID. If you have a different OIDC provider, the concepts below still apply. If you are using Azure AD as your OIDC provider, please follow the instruction here.
Check that the requirements below are also fulfilled before proceeding with the OIDC provider integration.
Prerequisites
- OIDC Expertise – This setup guide assumes you are a security admin, well versed with the standard ODIC protocol
- LDAP/AD Expertise – This setup guide assumes you are a security admin, well versed with LDAP based directories such as AD
- SSL certificate – keep your SSL certificate ready for configuring on Zoom and PingID machines.
- Ping Federate Server – ensure that your Ping Federate Server is configured and ready to use.
- LDAP – ensure that your Active Directory is set up correctly and LDAP is configured with Zoom. If LDAP is not ready, then follow this post to set it up.
After these requirements are met, follow these steps to configure PingID on your Zoom setup:
- Set up SSL
- Register your Zoom Server on your Ping Federate Server
- Set up Ping on your Zoom Server
- Log into Zoom
These steps are explained in detail below:
Set up SSL
Set up Zoom to use your commercial or self-signed certificate by configuring SSL for Web apps/APIs and Desktop apps. Make sure that SSL certificates are also configured on your LDAP and Ping servers.
Register your Zoom Server on your Ping Federate Server
Once your certificates are placed correctly so that Zoom and Ping Server can run and communicate over SSL, move on to registering your Zoom Server as a new client on your Ping Server.
- Open your PingID admin tool.
- Add a new client on your Ping Server corresponding to your Zoom Server machine.
- Create a Client ID. Note down this Client ID, as it will be used later on the Zoom Server.
- Enter details for Client Name and Description.
- Generate a new secret. Copy this generated secret string to a new empty text file (with no leading or trailing whitespaces). Save this secret file so that you can access it later from your Zoom Server.
- Set Redirect URIs
- Add your Web Management Console’s URL with the suffix /auth/openid/login. For eg., https://[YourZoomServer]:9443/auth/openid/login
- Add URLs for all possible hostnames or IP addresses that anyone on your network uses to access the Web Management Console with the suffix /auth/openid/login
- Add URLs for each HADR Zoom peer with the suffix /auth/openid/login
- Set Logout URIs
- Your Web Management Console’s URL with the suffix /auth/openid/logout.ping. For eg., https://[YourZoomServer]:9443/auth/openid/logout.ping If only one URL can be added here, add the standard hostname URL of the primary HADR Zoom server, that is the higher weightage HADR peer.
- Your Web Management Console’s URL with the suffix /auth/openid/logout.ping. For eg., https://[YourZoomServer]:9443/auth/openid/logout.ping
- Save the settings.
Set up Ping on your Zoom Server
- Log into your Web Management Console with the default super admin. Open Server Control Panel page from under the System node in the Admin sidebar menu.
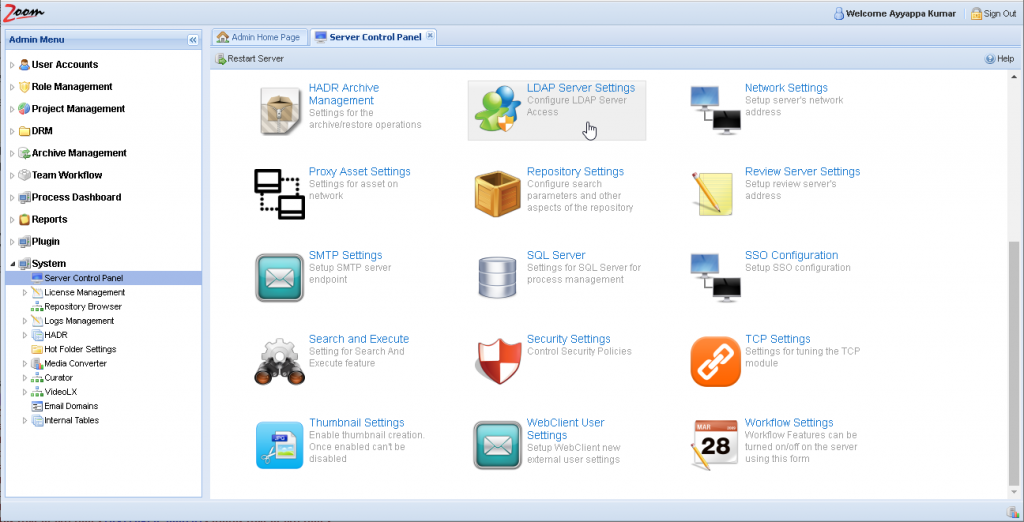
- Click LDAP Server Settings on the Server Control Panel page.
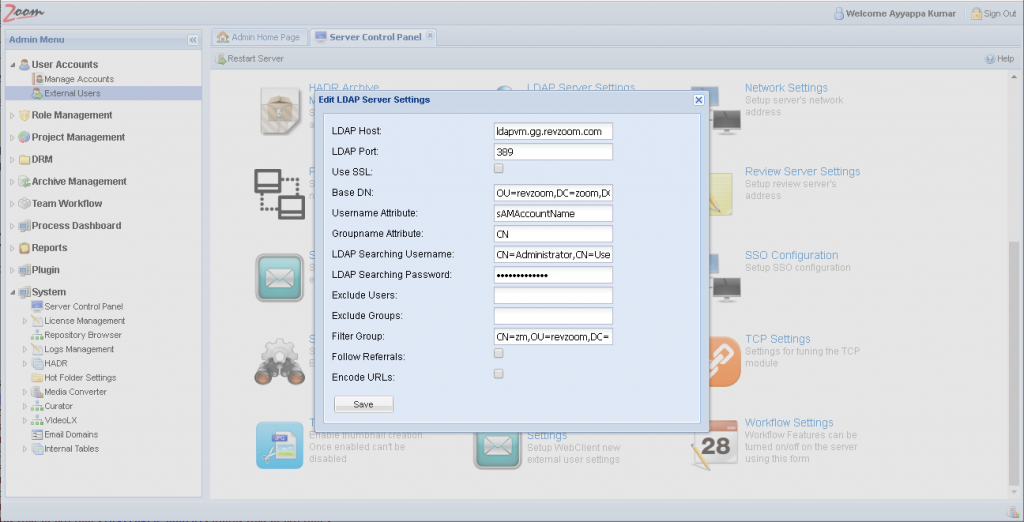
- Update your LDAP settings. For detailed instructions, follow configuring LDAP in Zoom.
- Click Save.

- Click Yes to restart the Zoom Server, so that your changes are implemented. After the LDAP set up, make sure to pull users from LDAP into Zoom and set roles and permissions for each of them. If you are already using Ping to single sign-on but the users are not in Zoom yet, then you will need to login to Zoom using the default super admin by switching to system sign-in at the login prompt. Check the Log into Zoom section for details.
- After the restart, again login to the Web Management Console with the default super admin. Open Server Control Panel page from under the System node in the Admin sidebar menu.
- Click SSO Configuration on the Server Control Panel page.
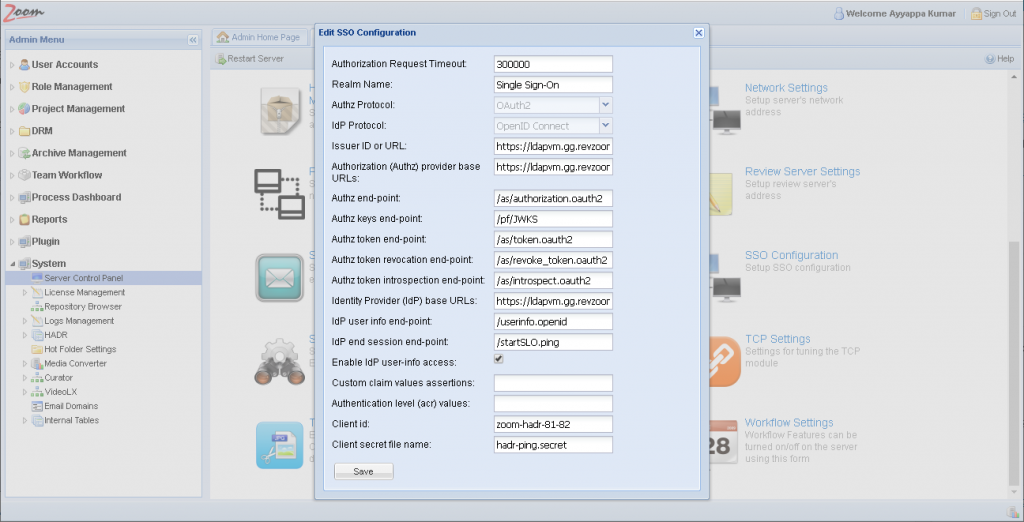
- Set the Client ID to that configured on the Ping Federate Server as shown in the section above.
- Copy the client secret file from the Ping Federate Server (as obtained in the section above) to the [ZoomInstallDir]\conf folder on your Zoom Server and delete it from your Ping Server. Set the client secret file’s permission as restrictive as possible, allowing only read access to the local machine user that runs the Zoom service on the Zoom Server. Enter the name of this secret file in the Client secret file name box in the Web Management Console.
- Click Save after configuring all values.
- Click Yes to restart the Zoom Server so the changes are implemented.
- After the restart, again login to the Web Management Console with the default super admin. Open Server Control Panel page from under the System node in the Admin sidebar menu.
- Click Security Settings on the Server Control Panel page.
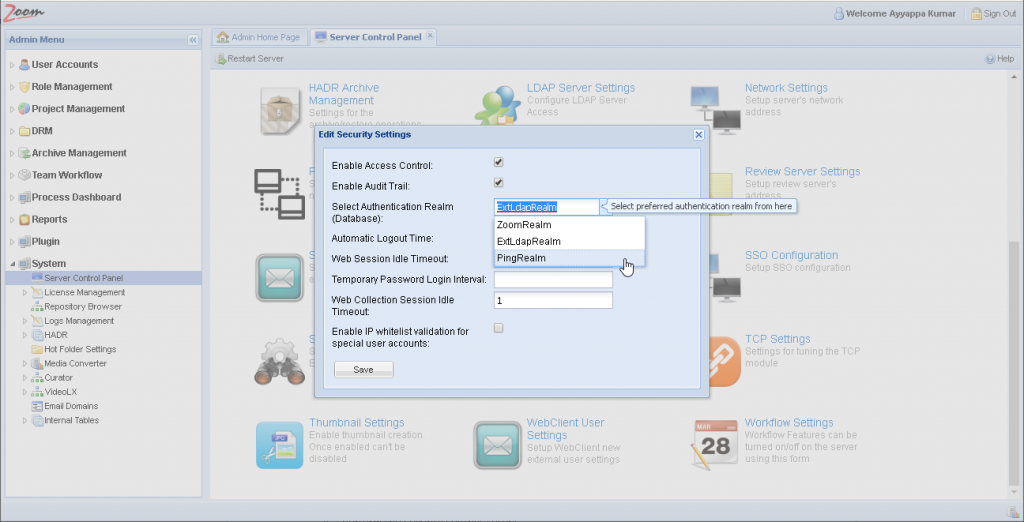
- In the Security Settings window, change the Authentication Realm to PingRealm.
- Set the timeout values as needed. Make sure that the Automatic Logout Time is set to be greater than all other idle timeout values.

- Click Save.
- Click Yes to restart the Zoom Server, so that your changes are implemented.
Log into Zoom
After the LDAP users have been pulled and assigned roles in Zoom, these users can log into Zoom using the Single Sign-On option. If these users log into Zoom before their details have been pulled into Zoom but Ping has already been set up, then they will be able to log in but will not be able to access anything in the Zoom applications. Further, they will also not be able to log out of the global single sign-on session using Zoom applications. Check this article to know more.
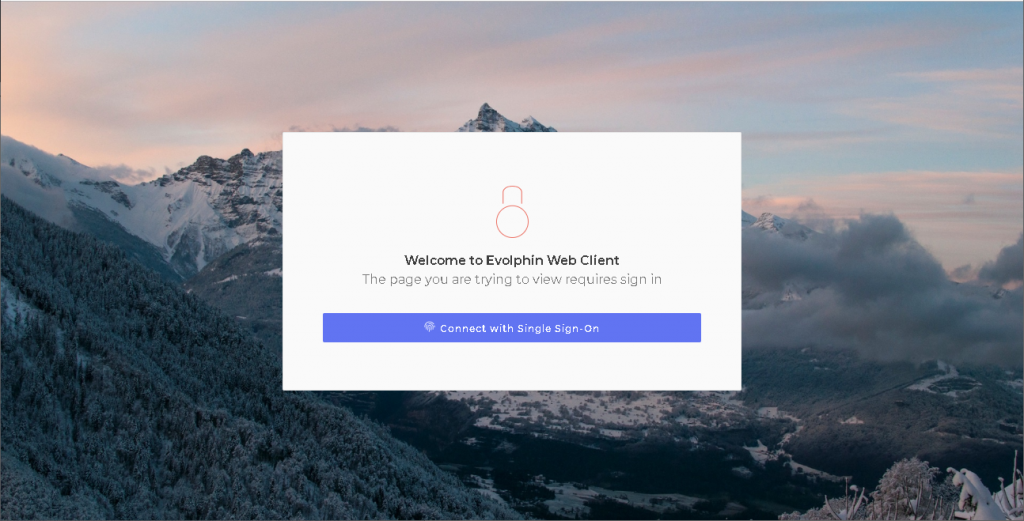
For all users, except the default super admin, click the Connect with Single Sign-On button to log into the Zoom Web Management Console after ping SSO is enabled.

At the login prompt, enter your LDAP username and password, and log in.

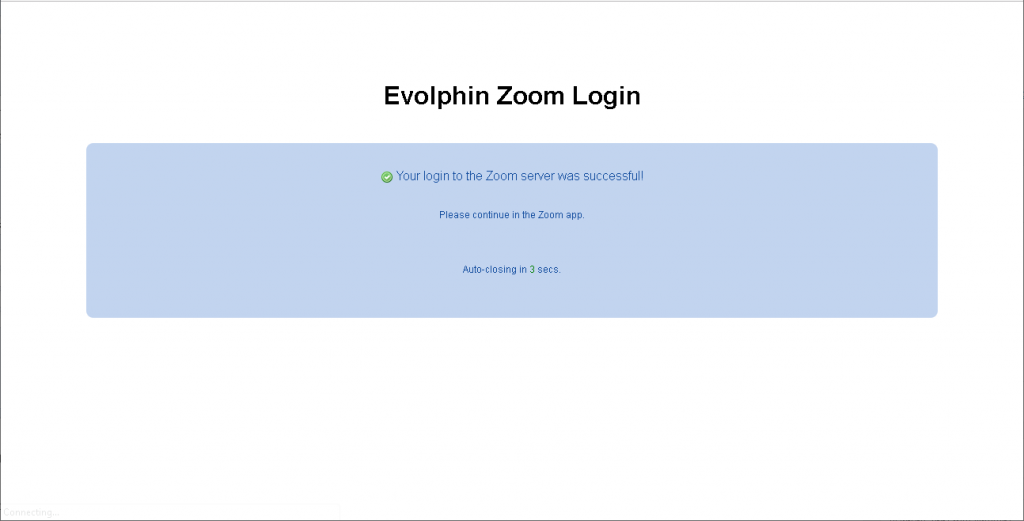
A message confirms a successful login and then disappears to show the logged in Web Management Console window.
Other Zoom applications will show similar Single Sign-On prompts for login.
System login after setting up SSO
If you need to login to the Web Management Console using the default super admin account, you need to toggle System Login at the login prompt.

Click the  System Login button. The login prompt changes to show the system login fields. Log in here with your Zoom default super admin’s username and password.

Click the  Single Sign-On button to go back to the Single Sign-On login prompt.