Working from home or remote office? Zoom client-side Hub can automatically manage hi-res/native media transfers to Zoom MAM in the cloud. The Hub uses available network bandwidth between your workstation and the cloud to maximize the data transfer speeds. It can deal with interrupted transfers due to Internet connection breaking or computer going to sleep. In this article we look at the best practices for using the Hub effectively and more importantly how to monitor the transfers.
Prerequisites
- Completed the setup of the hub on your workstation
- ExternalStore for hi-res/native files is configured as a Zoom Third Party Mount Point. Ask your media manager, if you don’t understand what this means. To check just click on the Z menu > Settings > Advance Properties:

- You are aware of your Internet connection speeds: Upload & Download. If not please try a speed test and note your numbers. For e.g.:

- For large media transfers, ensure your computer will not got to sleep during the transfers. While hub can resume automatically when the computer wakes up, it will delay your transfers:

How to ingest media?
Option 1: Copy on ingest method

- Drag-n-drop files into the Zoom Asset Browser from anywhere on your desktop
- Check-in App will first copy the hi-res media to the configured ExternalStore and then trigger the client-side hub to copy the files to the cloud
Option 2: In-place ingest method
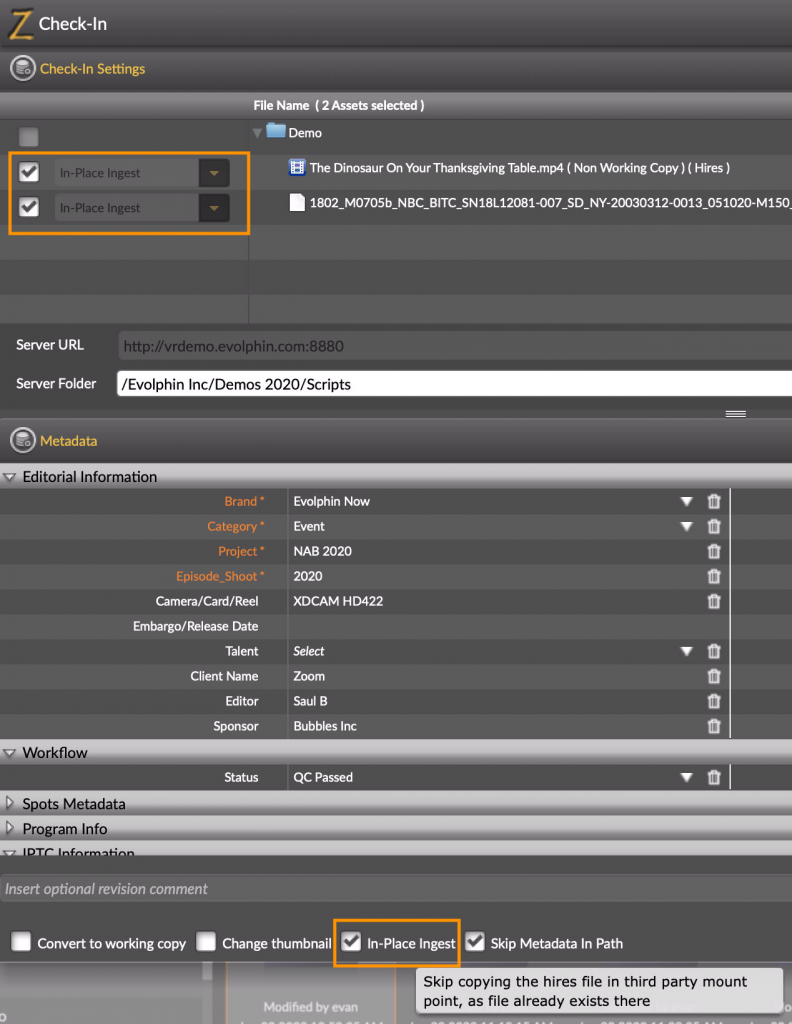
- First copy to the External Store configured as the Third Party Mount Point and then drag-n-drop files into the Zoom Asset Browser
- This method will avoid an extra copy as the files are already in the Zoom ExternalStore, however due care is needed to ensure that you avoid conflicts with other users by using the same relative path in the ExternalStore. Best practice is to pre-create a unique project folder in your ExternalStore that will not conflict with any other user ingest a file with the same path from their remote computer
As soon as you click the Check-in button, the ingest process will start in the following order:
- File is coped to the ExternalStore unless in-place ingest is started
- Placeholder thumbnail with metadata record is added to the MAM. Note: For cloud based transcoding to low-res proxies, the files must first get copied to the cloud. If you try to checkout or playback the placeholder, you will see man Ingest or Transcode Pending message. This means the file is either not uploaded to the cloud or transcoding is in-progress.

You can check the Asset metadata in Zoom Asset Browser or Web Client for status. For example, if Ingest Pending is true, then file is still uploading to the cloud. Once ingest is completed to the cloud and low-rex proxy is generated you will see the metadata change as below:
- In the background, the client-side hub starts uploading the file to the cloud storage
- Once the hi-res media makes it to the cloud, transcoding to low-res proxies can being in the cloud
- Upon transcode finishing, you will see a version 2 of the media asset that has the low-res proxy

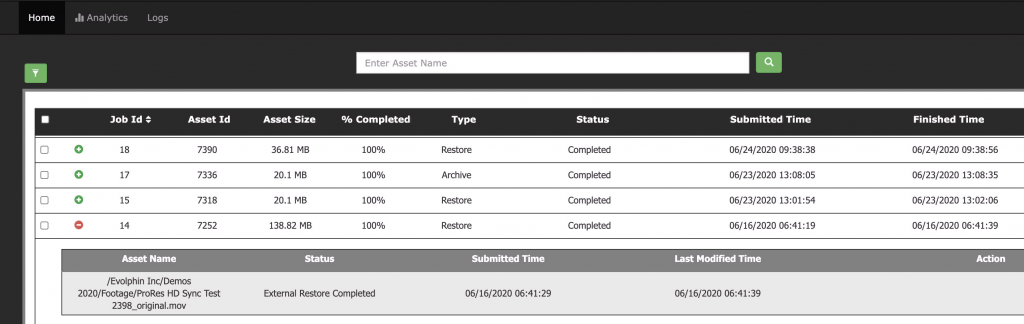
How to check the transfer status?
Click on the Z menu > Hub (Running) > Dashboard to view the transfers in-progress in a Web browser. When it reaches 100% and the status says completed only then the file is copied to S3:
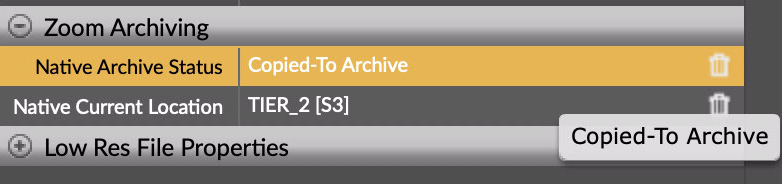
You can also check the status metadata under “Zoom Archiving” group to validate if the file is copied to the cloud storage such as AWS S3:
This field transitions from Pending Archive -> Submitted Archive -> Ongoing Archive -> Copied-To Archive
How to share assets with others?
Assets that have been copied to S3, are ready to be shared with the rest of the team. If you wish to work with an asset that another user has ingested, then you can check the status of the asset in question. If its status reads Copied-To Archive, then you can retrieve it and work with it. To retrieve an asset from S3, use the Restore option from the Asset Browser right-click menu. On clicking this option, you would see an extra set of controls show up like this:
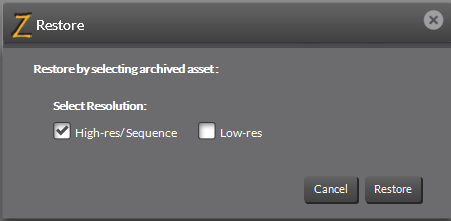
On clicking restore, the client-hub starts the transfer of data from S3 to the user machine. This transfer will take a finite amount of time, the delays of which depend on the file sizes as well as the available network bandwidth. Once the high-res asset is restored to the local TPM successfully, you will see the link icon show up below the asset, indicating that it is available for the user to work with.
If you want to see how long it would take for the asset to become available in your machine, you could check that from the Z menu > Hub (Running) > Dashboard as shown in the previous section.
How to clean up hi-res media from your computer?
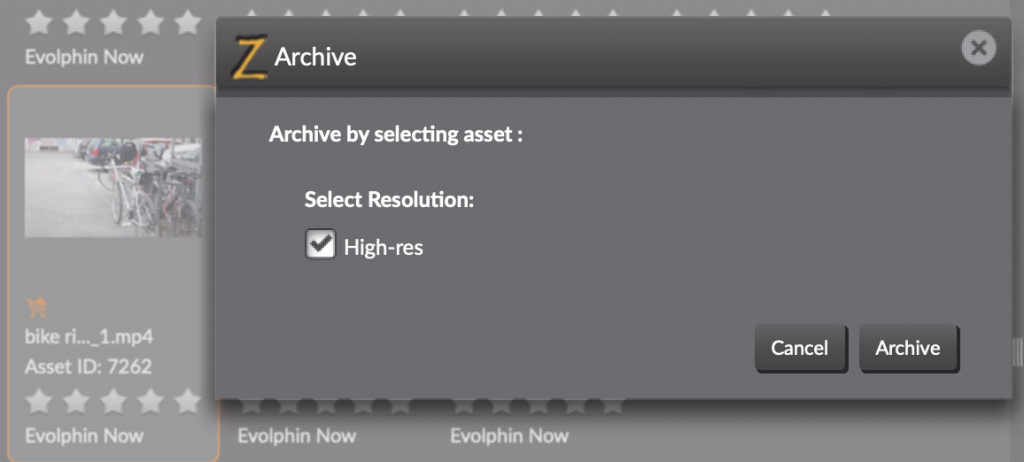
Once you have completed working with a hi-res file, and no longer need it in your local disk, you can clean it up, by invoking the Archive option from the Asset Browser.
When the cleanup operation completes, the link icon from below the asset is removed, indicating that the asset is no longer available locally for editing etc.
Warning: Please do not manually delete, move or rename a hi-res media file that is being copied to the cloud as that will interrupt the pending transfer.
How long will it take to transfer?
The client-side Hub will transfer as fast as the upload or download speed permits. No transfer protocol can defy the laws of physics and transfer faster than the Internet speed available. If you are uploading to the cloud, please note most home Internet connections are asymmetrical, which means you might have just 10 Mbps upload speed even though your download speed is 500 Mbps!
Below are some estimates to show you how long it takes with typical residential Internet speeds. You can try this calculator to check your own numbers.
Remote office to cloud upload estimates:
| Internet Upload Speed | Media size | Upload duration |
|---|---|---|
| 4 Mbps | 100 GB | 55 hours or 2.3 days |
| 10 Mbps | 100 GB | 22 hours |
| 50 Mbps | 100 GB | 4.4 hours |
| 100 Mbps | 100 GB | 2.2 hours |
| 1 Gbps | 100 GB | 13.3 mins |
Cloud to Remote office download estimates:
| Internet Download Speed | Media size | Download duration |
|---|---|---|
| 100 Mbps | 100 GB | 2.2 hours |
| 250 Mbps | 100 GB | 53 mins |
| 500 Mbps | 100 GB | 27 mins |
| 1 Gbps | 100 GB | 13.3 mins |
Note: the above estimates are based on Internet speeds not varying during the transfers, if other users or family members are playing games, streaming movies that will effect the available Internet speed for the transfers.
Recommendations: If you can get a symmetrical Internet connection that allows at-least 50 Mbps uploads, working with 4K media will be lot more faster. But not to despair, if you can’t, as the client-side hub will keep chugging along till it completes the transfer! Just make sure you don’t put your computer to sleep or move/delete the media that is pending copy to the cloud.
How long will it take to create low-res proxies?
Low-res proxies in the cloud can only be generated once the media makes it to the cloud storage. The actual transcoding duration will depend on the load on your transcoder, streams encoded in your native videos. Evolphin cloud service can add more compute resources by scaling up the transcoding container at an extra cost. Typically, it should take 50-100% of the duration of the video to transcode proxies. For e.g. a 90 min feature film might take 6-90 mins to create a proxy.
Note: In a hybrid deployment, with on-premises storage, the transcoding can be done on-premises and therefore doesn’t need to wait for the media to transfer to the cloud. But the downside is you need more IT help to setup on-premises transcoding.
How to purge from the Zoom eco-system?
Use the Zoom purge option of course! When you invoke Purge from the Asset Browser, Zoom takes care of removing the asset in its entirety – that includes the low-res proxy inside the Zoom database as well as the hi-res media on cloud S3 as well as from the TPM locations on various user machines (that may have been brought in by the respective client-hubs from S3). For more details about the purge operations, please check the article here.
This article has given you a quick primer about how to execute some of the common operations involving the client-hub. For a more comprehensive coverage about all available options, please refer to the article here.