The Asset Browser provides easy means of triggering archive, restore operations on Zoom data. In 7.6.x series, we have some additional controls that let us exercise these operations on more specific targets, with ease.
Before we go further, let us recall some key points about Zoom:
- Zoom deals with data in two different ways.
- One is where the data is directly ingested into the Zoom database (direct-ingest assets),
- The other is when the data resides outside the database (external assets), but Zoom controls the access to it, and manages it actively.
- External assets encompass:
- hi-res videos
- mid-res or pro-res videos
- image-sequences
- External assets encompass:
- External assets will always include a low-res component that gets ingested and placed inside the Zoom database (similar to a direct-ingest asset).
- We call this the low-res proxy
- Cloud acts as the central place for all data, in the WFH model. The Zoom database as well as the tier-2 archive storage are both on the cloud.
- S3 on cloud which is usually an archive storage location, also ends up acting like a protected shared storage (think P-SAN in an on-premise deployment). This is the place the users can:
- send their media to, in order to share with their colleagues
- avail themselves of media from, that were ingested by their colleagues.
With this background context, let us now look at the various controls available to power users of Zoom.
Archive Options
Asset copied to S3. Now what?
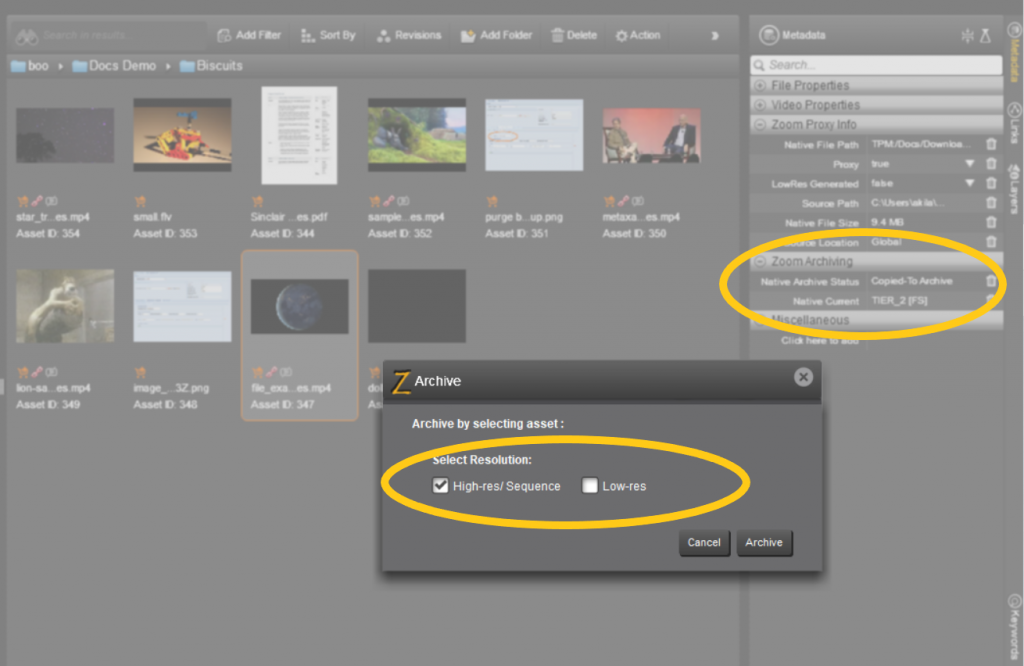
We know that the external media gets copied to the tier-2 archive storage, if it is configured to do so. Once the hi-res data is copied to S3, then the asset becomes available for the rest of the team to retrieve to their local workstations and start working with it. At this point, if you trigger Archive option from your Asset Browser, the inference is that you want to clear out the asset from your local workstation. Therefore you will see a dialog box offering only the option of choosing the data components that are to be removed. You can choose one or both the options and proceed.
Remember: if you have enabled the setting to automatically copy the asset to S3 upon ingest implicitly, then it will get copied to the default archive storage configured in your server settings. See this article for more details about the server settings.
Asset is not on S3 – yet!
If the configuration to automatically copy to S3, upon ingest, is disabled in your deployment, or if the initial copy to S3 failed due to reasons like say, some network disruptions, then, at that point if the user triggers the Archive menu, there are more decisions to be made. Does the user want to only copy to S3 and keep the local copy as is? Or – does the user want to copy to S3 and then get rid of the local copy? The controls reflect this, and let the user choose what they want to accomplish:

Notice how the status metadata field is empty (indicating that it is not copied to S3 as yet). It could alse be Failed Archive, which would invoke similar behavior.
So now, the user gets to choose what exactly she / he intends. If the Keep Source option is kept enabled, then the asset will be copied to S3, but not removed from the local TPM location. If this option is disabled, then the asset gets removed from the local TPM, after being successfully copied to S3.
Some deployments may setup more than one storage targets on their server. In such cases, the user will also be allowed to select the desired storage type from the dropdown.
As of 7.6.2, only Amazon S3 [S3] and file system like tapes, SAN / NAS storages etc [FS] are supported. But in future releases, we will be adding support to extended storages on Amazon like Glacier, Deep Glacier etc, as well as other storage systems like the Flashnet SGL.
Let’s talk about the Low-Res
In both the images above, you see the checkbox marked as Low-res. Enabling this checkbox will archive the low-res proxy component of the asset, which, as explained initially, has been ingested and saved directly into the Zoom database. The processing of low-res proxy is similar to the processing of direct-ingest assets. Upon archiving, the data gets shifted from the Zoom database, into either the tier-1 archive storage location which is configured in the server settings, or to the tier-2 archive storage location, for example, S3. You can check this article on how to configure these settings.
When you archive the low-res or the direct-ingest asset, the asset is marked as ARCHIVED immediately even before any data handling can happen. The archive status for these assets is denoted by the orange circle that shows up below the asset thumbnail in the Asset Browser.

Bulk Archive
Furthermore, it is possible to select a folder, or multiple assets in one go, and then archive them all. The dialog box with options in this case shows all possible asset data components like this:
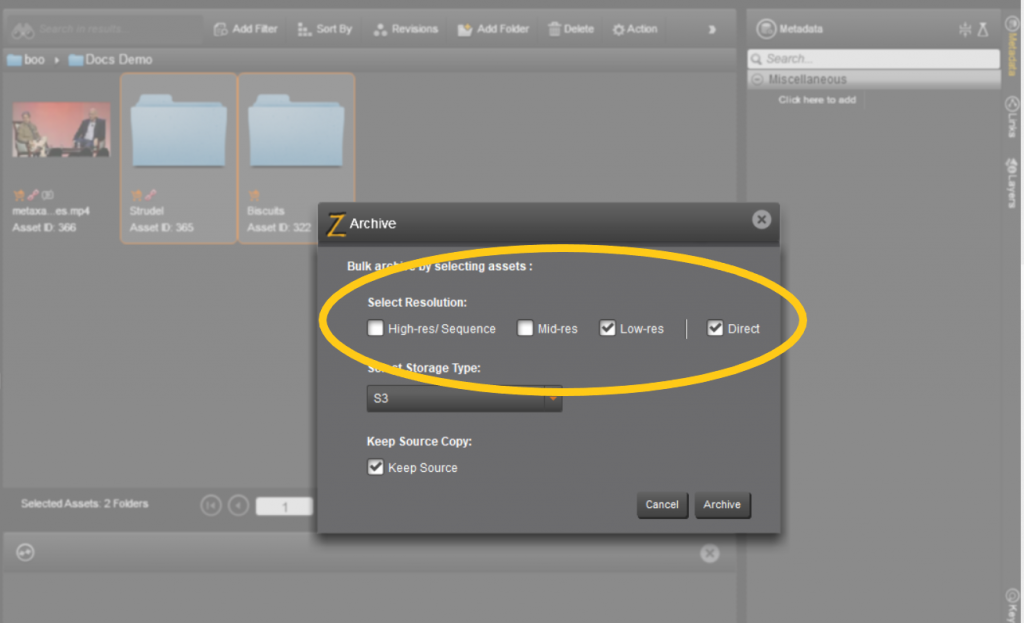
Users are free to enable any or all checkboxes in this case, and the corresponding data component gets handled internally.
Restore Options
Assets that have been successfully archived, are brought back using the Restore option from the Asset Browser right-click menu. In a distributed work force, working remotely from homes, the Restore operation is also how the users will fetch the assets ingested by someone else in the team, from S3.
The additional controls in a restore operation are very similar to those in the archive. When invoked on a single hi-res asset, the restore presents just the option for choosing the data component – hi-res or low-res. Depending on whether the hi-res media is actually archived or not, the corresponding restore option (checkbox) may be enabled or disabled.

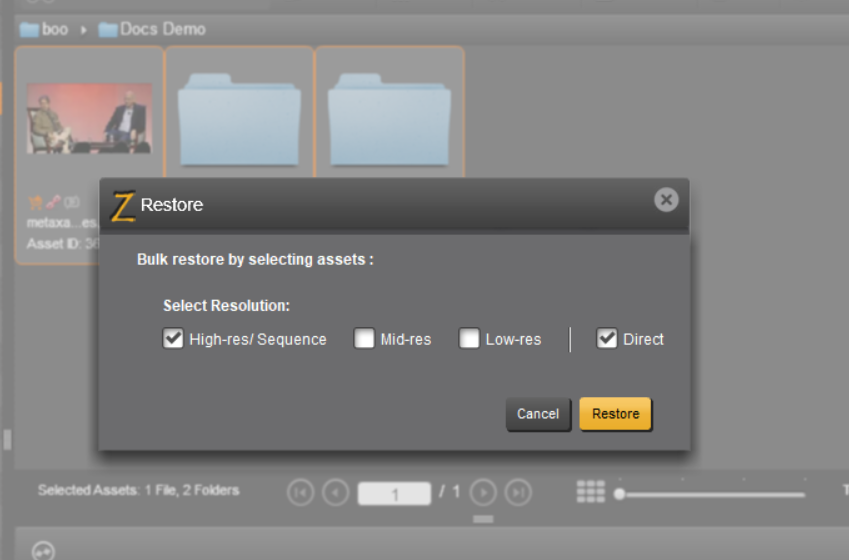
Bulk Restore
Similar to bulk archive, invoking restore on a folder or multiple assets in one go, will bring up the dialog box with checkboxes for all the data components separately. Users are free to choose any or all checkboxes, and execute the operation.
Restore operation involves transferring data from S3 (or any other storage) back into user machine and will take a finite amount of time. Therefore you may not see an immediate update in the UI that reflects completion of the operation. You may have to refresh the Asset Browser central panel after a delay to see the completion status.
The completion of restore would be indicated by the presence of the link icon below a hi-res asset or in the case of low-res / direct-ingest assets, the removal of the orange circle icon from below the asset thumbnail.

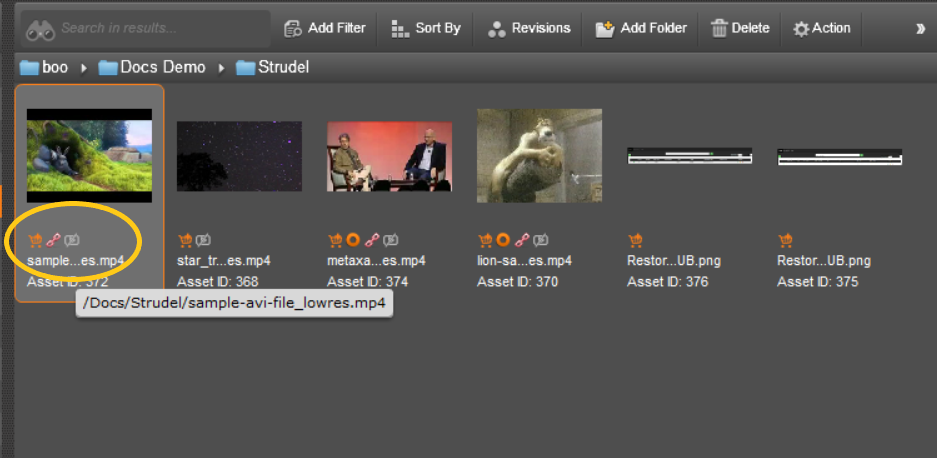
After Restore
Notice how the link icon has come back after restore, and the orange circle indicating the low-res being archived is removed.
Some restore operations, especially of hi-res assets, can take a long time. You can keep track the restore operation status via the client-hub dashboard (for hi-res / mid-res / image-sequence assets) and the server-hub dashboard (for low-res / direct-ingest assets).

