Evolphin Zoom plugin is available as an extension in Adobe Creative apps – Adobe Photoshop, Adobe Illustrator, Adobe InDesign, Adobe Premiere Pro, Adobe After Effects, and Adobe InCopy. This document defines the basic way of working with the Evolphin Zoom plugin in any of these applications. Any specific differences while working with any of these Adobe apps will be pointed out and explained in detail.
Launch Evolphin Zoom extension
The Evolphin Zoom extension panel is usually launched whenever the Adobe application is opened. If it fails to load automatically, then manually open the extension by selecting Evolphin Zoom under Extensions in the Windows menu.

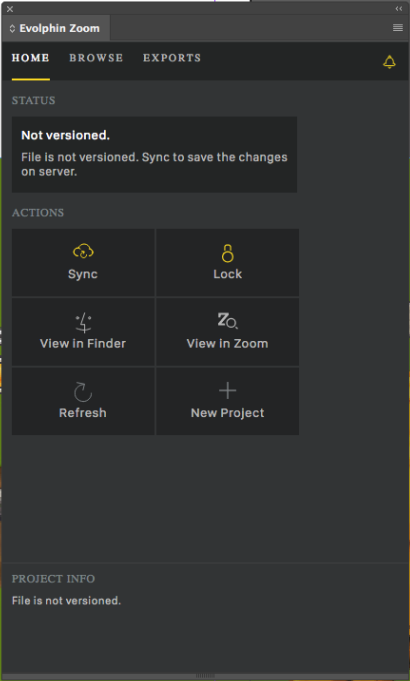
The Evolphin Zoom extension window will open up. This extension looks almost the same in all the Adobe Creative apps mentioned above.
This Evolphin Zoom extension window shows that either no project/file is open or that it is not saved yet.
Create a new or open existing project/file
Depending on the Adobe app being used, you could either open existing project/document or create new from Adobe’s menu.
Alternatively, you can also create a new project/document by clicking New Project in the Zoom plugin window. Follow these steps to use the New Project button in the Zoom plugin to start working with a new project/document:
- Click New Project in the plugin window.
- Select from the templates listed.
- Type a name for the new project and click Create.
- In the Check-In window, choose the Server Folder and click Check-In (go to Check-in files for details about checking in).
- The new project/document is checked in and opened for editing in the Adobe app.
Structure Folders
Sometimes, in Adobe Photoshop, a document is composed of multiple assets used in various layers. In other apps like Adobe Indesign, layouts could use various resources in a single document.
In such instances, it is recommended to save all assets used with your Adobe project/document within a single folder.


You can check-in the containing folder by selecting Check-In parent folder in the Check-In window.

Information about the project
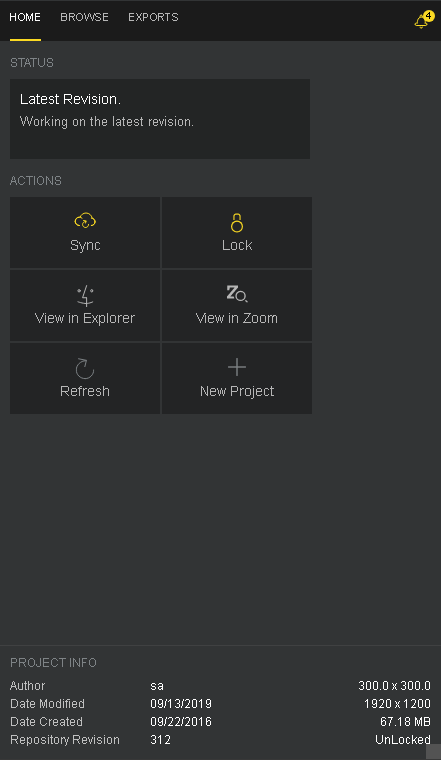
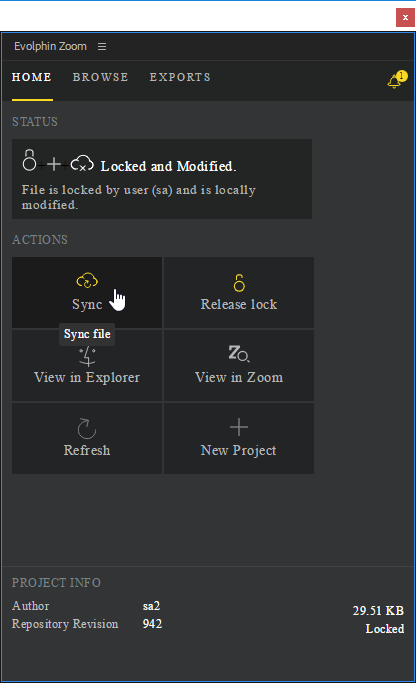
The Home tab in the plugin window displays information about the project/document.
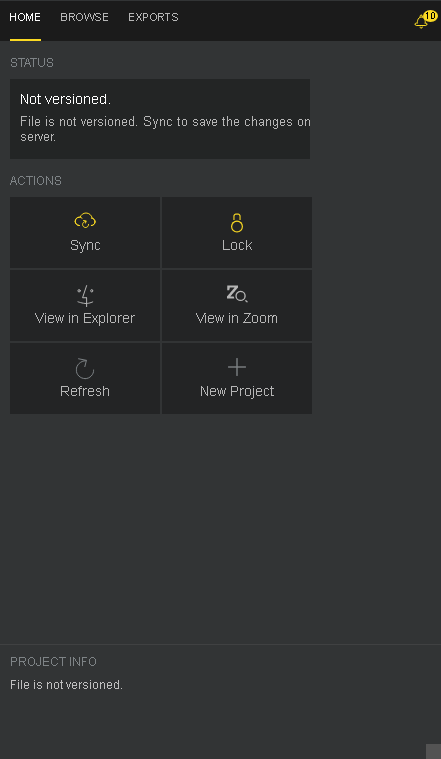
If the project/document is not versioned, the Status and Project Info panels on the Home tab show the same.

If the project/document is versioned, then its information is shown in the Project Info panel, like the author, revision number and size.

If the project/document has been modified since the last check-in, then that is also displayed in the Status panel.
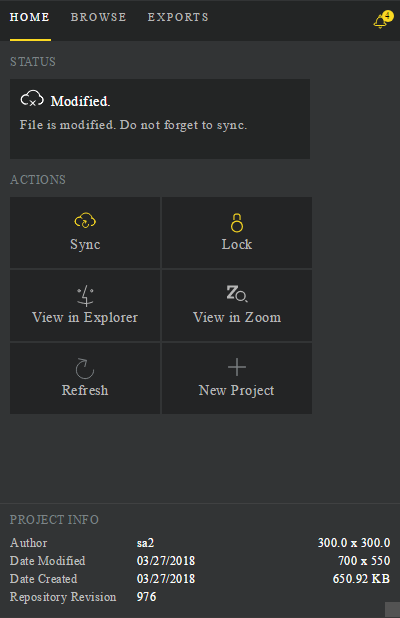
You can now Sync to check-in the changes made to the project/document.
Notifications
The bell  icon on the upper right corner of the plugin window gives notifications about changes made to the working project/document and its linked and exported assets. The number beside the icon denotes unread notifications. Zoom notifies about changed assets, locked or unlocked assets, and added or modified comments.
Click the bell icon to view the notifications.

Click Show more to load more notifications.
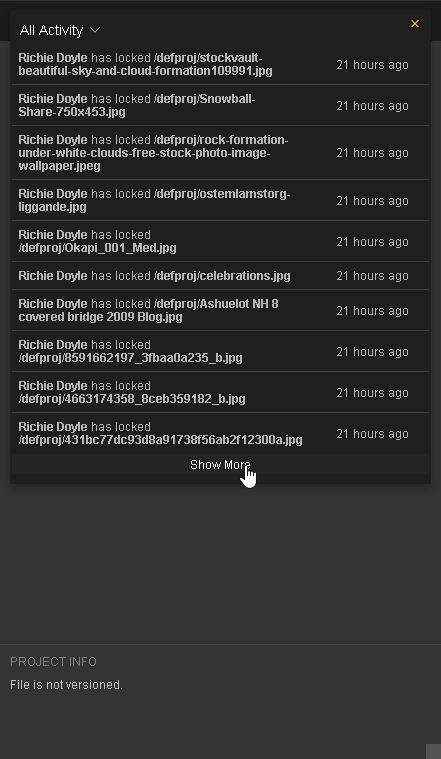
The older notifications are successively listed below the newer ones on clicking Show More.
When hovering over a notification, click on the X button in the right corner of the notification to dismiss that notification.

Click on notifications about comments to view the asset with the comment in the plugin window.
The comment that was listed in the notification is highlighted.
Browse for assets
Zoom 7.0 to 7.2
Click on the Browse tab and then All tab to browse all assets that are available to the logged-in user in the Zoom repository.

The number of assets available in the current folder is shown in the lower right corner of the plugin window. The number of assets selected is shown in the lower left corner of the window. The path to the current folder is listed on the top of the asset display panel.
Click the  button to reveal the Browse menu. Select assets, change display views and sort displayed assets from this menu.

After selecting one or more assets, click  button to link those assets with your project/document. Click
  button to check-out the selected asset(s).
Click  to reload displayed assets so that any new changes are reflected.
Zoom 7.3 onwards
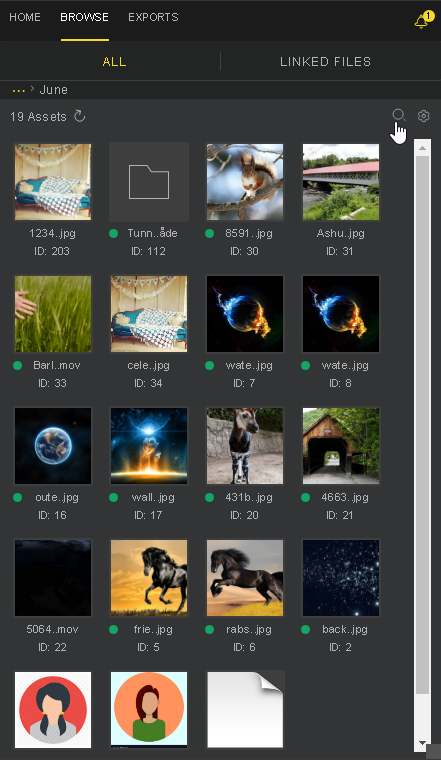
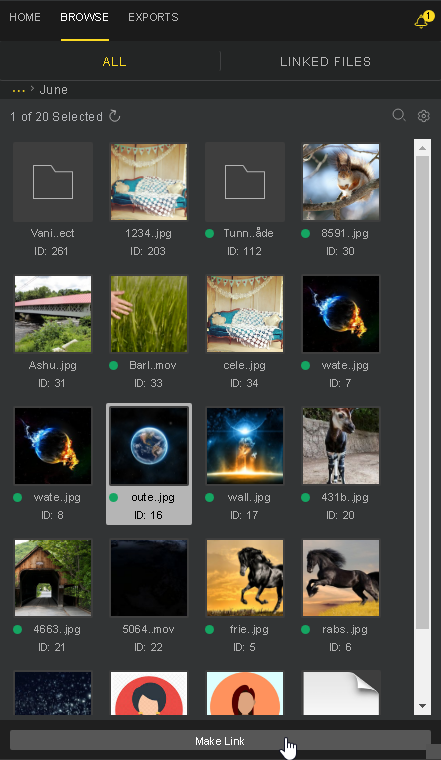
Click on the Browse tab and then All tab to browse all assets that are available to the logged-in user in the Zoom repository. The folders are also listed here.

The total number of assets available in the current folder and the number of assets selected is shown in the upper left corner of the window. The path to the current folder is listed on the top of the asset display panel.
Click the  button to reveal the Browse menu. Select assets, change display views and sort displayed assets from this menu.

Select one or more assets to reveal the Make Link button in the bottom of the plugin window. Click the Make Link button to link the selected assets with your project/document.

Click to reload displayed assets so that any new changes are reflected.
Search for assets
Searching within the Evolphin Zoom plugin has changed to be more adaptive to how we work with Zoom inside the Adobe apps.
Zoom 7.0 to 7.2
Click on the Browse tab and then the Search tab to search within all assets available to the logged-in user in the Zoom repository.
Start searching by either typing a search text or by choosing to view filtered assets.
When you start typing in a search text, all assets that start with this text are listed below the search box.

Press Enter to view all assets that match the search text.

Choose from the Filters drop-down to view all assets filtered on the chosen criteria.

You can narrow down within your results by further filtering text-based search results or by searching within filtered results.

The number of assets returned after searching and filtering are shown in the lower right corner of the plugin window. The number of assets selected is shown in the lower-left corner of the window.
After searching for assets, select one or more assets from the results and click to link those assets with your project/document. Click to check-out the selected asset(s).
Click to reload displayed assets so that any new changes are reflected.
Zoom 7.3 onwards
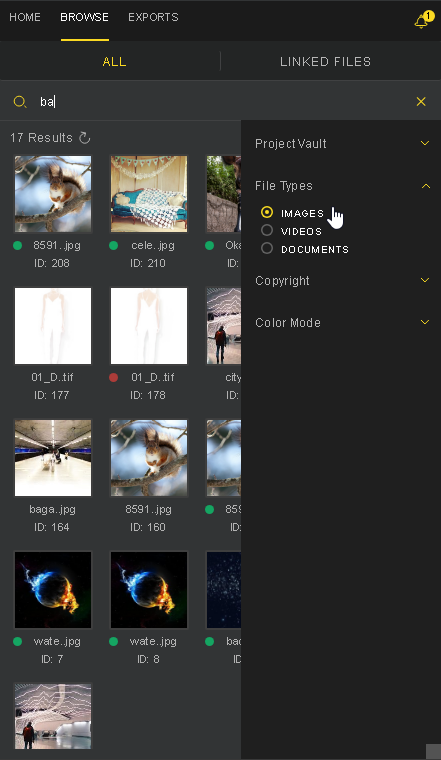
Click on the Browse tab and then the All tab to see the Search button on the upper right corner of the plugin window.
The Search button is also visible on the Linked Files tab if the number of linked assets is more than 10.

On the All tab, start searching within all assets available to the logged-in user in the Zoom repository by either typing a search text or by choosing to view filtered assets.
When you start typing in a search text, all assets that start with this text are listed below the search box.
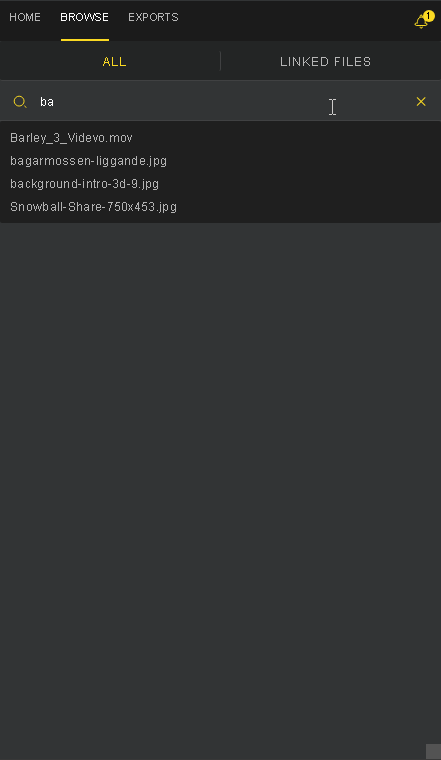
Press Enter to view all assets that match the search text.

Choose from the Filters drop-down to view only those assets that are filtered based on the chosen criteria.

You can narrow down within your results by further filtering text-based search results or by searching within filtered results.
The number of assets returned after searching and filtering and the number of assets selected is shown in the upper left corner of the plugin window.
After searching for assets, select one or more assets from the results and click Make Link to link those assets with your project/document. Click to reload displayed assets so that any new changes are reflected.
On the Linked Files tab, start searching within the linked assets by typing a search text.
Type the search text and press Enter to view linked assets that match the search text.

After searching within linked assets, select one or more assets from the results and click Low res, Mid res, or High res to change the resolution of the selected linked assets. The resolution will be switched if it is configured in Zoom and available for the selected assets.
Configuring search filters
The filters listed while searching in the Adobe plugin can be configured for a Zoom Client using its zoom.properties or configured at the Zoom Server to be propagated to Zoom Clients.
- On the Zoom Client machine, open zoom.properties file from $Home/.zm For Example: C:\Users\joe\.zm\zoom.properties
- Metadata based drop-down filters can be updated by adding LIST_DEF_PROPS followed by the metadata eg. IPTC_City

- Multiple drop-down filters can also be added in the structured search view by adding “,” separated values in LIST_DEF_PROPS. For example : LIST_DEF_PROPS = IPTC_City,FIPR_Color Mode

- You can also filter your search results based on File-type filters already set up from the Asset Browser. For example, you may only want to see Images, or Videos, or Layouts, etc., each of these File-type filters can be configured by adding FILE_TYPE_FILTER inside LIST_DEF_PROPS in zoom.properties. There are other preconfigured faceted search filters available for use as filters here with LIST_DEF_PROPS. Use one or more search filters to make your custom search filters list for your Evolphin Zoom plugin.
- Save the file.
- Click Reload Properties in the Evolphin Zoom plugin panel’s flyover menu to reflect the changes made in zoom.properties.

View asset details
Zoom 7.0 to 7.2
Double-click any asset thumbnail in the Browse tab (in the All, Linked Files, or Search tabs) to open that asset’s details.

This shows details about the asset like the path in Zoom, asset ID, and metadata. It also has buttons to Checkout/Make Link, Show/Hide Metadata, Reload Metadata, and Show/Hide Collection Info. Click Show Metadata and Show Collection Info to view metadata and collection information respectively for the asset. The buttons change to Hide Metadata and Hide Collection Info.
You can click  to open the collection listed in a Web Client window.
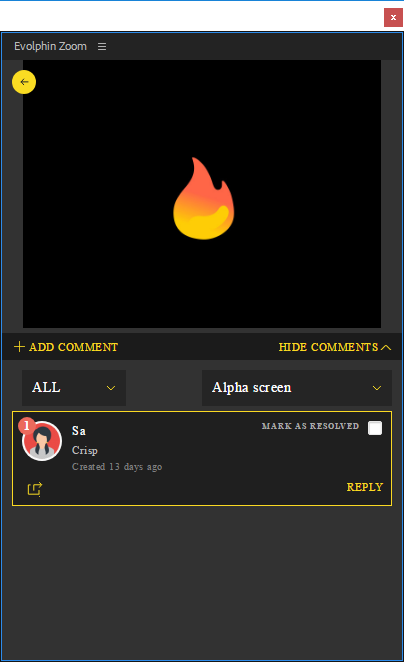
Double-click on the asset image on this page to load asset preview.

This page shows Comments that the asset as part of the collections that it belongs to.

You can add, edit, delete, or reply to comments from here. You can also click  to view the comment inside the collection on the Web Client window.
Zoom 7.3 onwards
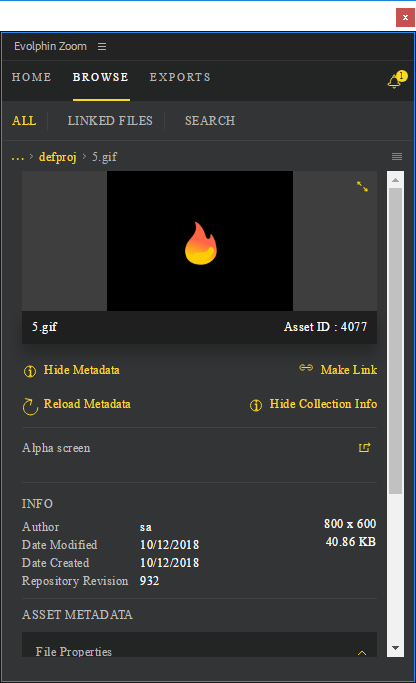
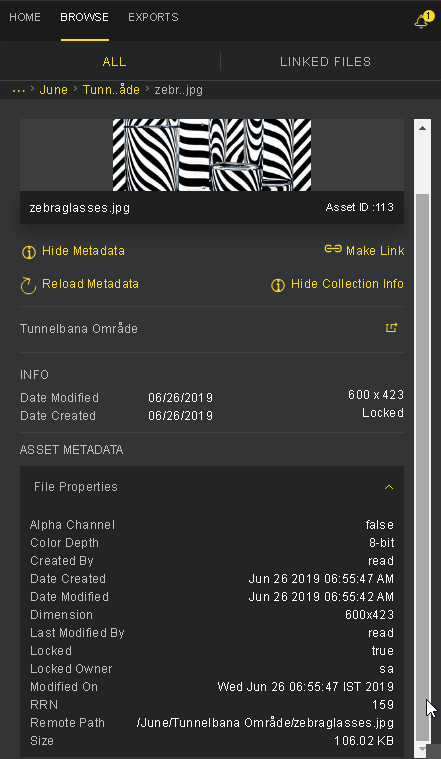
Double-click any asset thumbnail in the Browse tab (in the All or Linked Files tabs) to open that asset’s details.

This shows details about the asset like the path in Zoom, asset ID, and metadata. It also has buttons to Checkout/Make Link, Show/Hide Metadata, Reload Metadata, and Show/Hide Collection Info. Click Show Metadata and Show Collection Info to view metadata and collection information respectively for the asset. The buttons change to Hide Metadata and Hide Collection Info.
You can click to open the collection listed for the asset in a Web Client window.
Double-click on the asset image on this page to load asset preview.
This page shows Comments that the asset as part of the collections that it belongs to.
You can add, edit, delete, or reply to comments from here. You can also click to view the comment inside the collection on the Web Client window.
Links
Zoom 7.0 to 7.2
Assets can be linked in all Adobe Creative apps.
You could add a new linked file by dragging and dropping it into your Adobe app workspace. This will create a new unversioned link to that file which will also appear in the Linked Files tab.
You could also add links to existing checked-out assets in the Zoom repository by browsing or searching for those assets and then making links to these. Follow these steps to checkout and then link assets from inside the plugin window:
- Browse for assets in the plugin window.

- Select the asset and click Checkout from the top bar or the context menu on the asset.

- Now click Make link in the top bar or the asset context menu.

- The asset will be added to the open Adobe project/document and will also show up in the Linked Files tab.

- The asset is successfully linked in your Adobe project/document.
Zoom 7.3 onwards
Assets can be linked in all Adobe Creative apps.
You could add a new linked file by dragging and dropping it into your Adobe app workspace. This will create a new unversioned link to that file which will also appear in the Linked Files tab.
You could also add links to assets available in the Browse tab by browsing or searching for those assets and then making links to these.
Select one or more assets in the Browse tab and click Make Link towards the bottom of the window to link these assets.
You can also select Make Link option from the asset context menu.

The asset will be added to the open Adobe project/document and also show up in the Linked Files tab.

The asset is automatically checked out and successfully linked in your Adobe project/document.
Checkout assets
Zoom 7.0 to 7.2
Select one or more assets from the Browse tab and click Checkout from the top bar or from the context menu on one of the selected assets.
The selected assets are checked out and the folder is opened showing their checkout location.
Zoom 7.3 onwards
Select one or more assets from the Browse tab and then select Checkout from the context menu on one of the selected asset.

The selected assets are checked out and the folder is opened showing their checkout location.
Lock and unlock
You can lock or unlock the project and assets open in your Adobe app so that it may not be modified by someone else. This feature works the same as in the Asset Browser. To lock or unlock the project and assets, click the Lock or Release Lock button on the Home tab.

After these files are locked, you can either make changes and click Sync to check-in the changes, or you can click Release Lock to remove your exclusivity on the project and linked assets.

Sync
You can check-in changes made to any project or linked assets since the last time it was synced with Zoom. The Sync button will also update assets here that were modified on the server.
Once the Home tab shows that the project status is unversioned or modified, you can click Sync to begin.
The Check-In window is displayed. Choose the relevant details and click Check-In.
The files are now checked into Zoom. For details about check-in options, go to the section Check-in options.
Check-in options
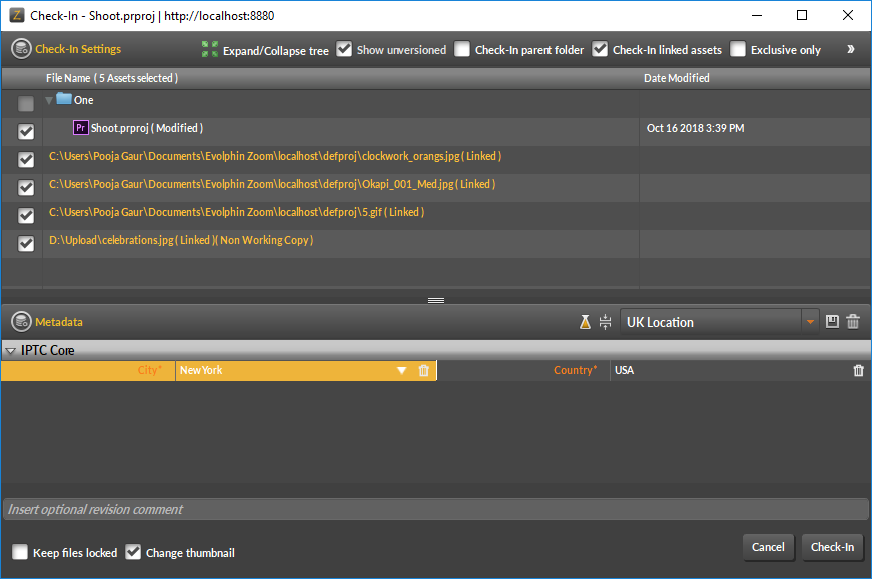
The Check-In window displays a lot of options to choose from.

Choose from:
| Option | Description |
|---|---|
| Expand/Collapse tree | Click to toggle between viewing expanded or collapsed folders in the check-in window. By default, folders are viewed as expanded. |
| Show unversioned | Click to toggle between viewing only the project/document files or all unversioned files in the parent folder. |
| Check-in parent folder | Checks-in the containing folder. |
| Check-in linked assets | Click to toggle between checking-in linked assets along with the project/document check-in. |
| Exclusive only | Click to toggle between checking-in only the project/document and their linked files but not any other unversioned files. |
| Convert to working copy | Copies the file from its current location to its location in the default working copy folder on your computer. |
| Metadata selection | If enabled, choose/enter values for mandatory metadata fields or select from a preset from the preset drop-down. |
| Keep files locked | Zoom automatically unlocks assets when performing a check-in. Enabling this will keep the assets locked after check-in. |
| Change thumbnail | Zoom will search for a _tb file in the same directory as the asset. |
*some or all of these settings may not be available at every check-in as these depend on your Zoom configuration and the files being checked in.
Revert
Revert is the opposite of Sync. When you revert a project, you instruct Zoom to lose all changes made to the project/document since the last check-in. This includes losing unversioned links.
Choose Revert Project from the flyover menu to revert changes.
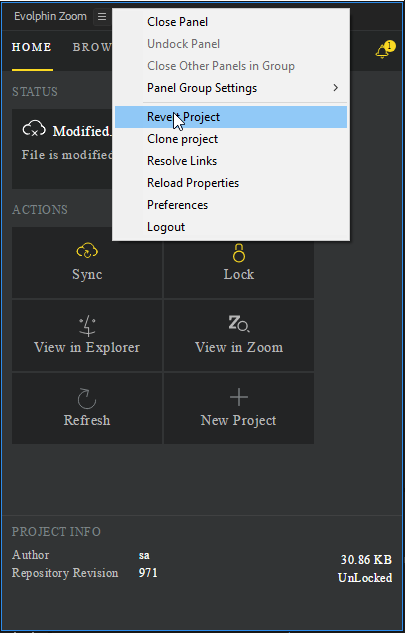
The project is reverted to the last versioned state.
View in Explorer/Finder and View in Zoom
You can view the project/document in the file system or in the Zoom repository.
Click the View in Explorer button on Windows and View in Finder button on Mac to view the project/document file in the Windows Explorer or Finder respectively. The
Similarly, click the View in Zoom button to view the project/document file in the Asset Browser. You cannot do this with an unversioned project as it does not exist in the Zoom repository.
View in Finder/Explorer was called Reveal in Finder/Explorer in Zoom 6.0 or below. Similarly, View in Zoom was called Zoom Repository in Zoom 6.0 or below.![]()
![]()
Resolve Links
The Resolve Links feature serves to fix links in your main Adobe project/document. If there is any broken or unversioned link in the project/document, then it is replaced with the current link from the working copy.
Resolve links looks for files in the order – third-party mount points, auto-checkout mount points, working copy. This means that if you want to resolve links only from the working copy, make sure auto-checkout mount point and third-party mount points do not have copies of your linked files. For high-res files, by default, the links will be resolved in the order of high-res, mid-res, low-res (auto-checkout mount point and then working copy).
Resolve links will not work properly if the links have been re-ordered. So, if there is a need to re-order the links in the main file, make sure to issue Resolve Links before re-ordering.
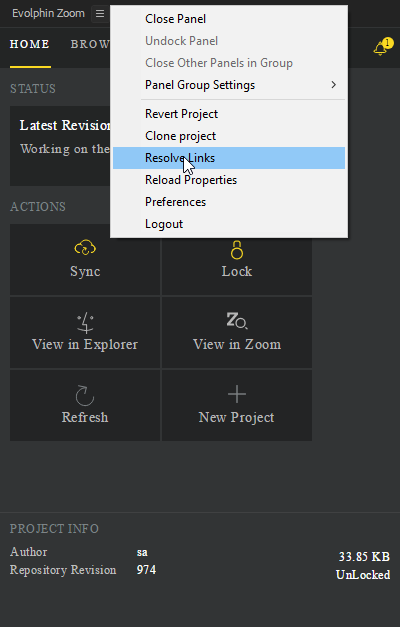
To resolve links, click Resolve Links from the flyover menu.
If the project had links to resolve then these are resolved successfully with a message.

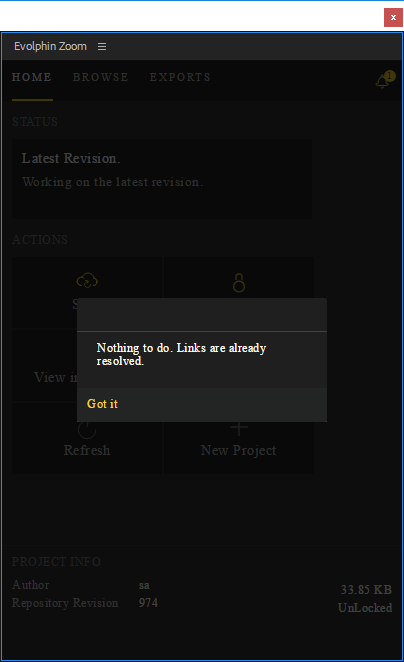
If the versioned project had nothing to resolve then resolve links gives the following message.
If the project is unversioned, then also resolve links does not work. This message is shown.

For example, you have a PhotoShop file Main.psd. This file has links to ~/Desktop/links/Link1.jpg and ~/Desktop/links/Link2.jpg. Main.psd is checked-in to Zoom along with the links, with Convert to WC enabled. In this case, Main.psd, Link1.jpg, and Link2.jpg will all get checked into the Zoom repository and the versioned copy of Main.psd would open up in PhotoShop. After check-in, resolve links will run automatically so that the links of Main.psd get updated to the versioned copies of Link1.jpg and Link2.jpg instead of the original linked files in ~/Desktop/links. If it fails in any case, make sure to run Resolve Links manually.
Clone Project
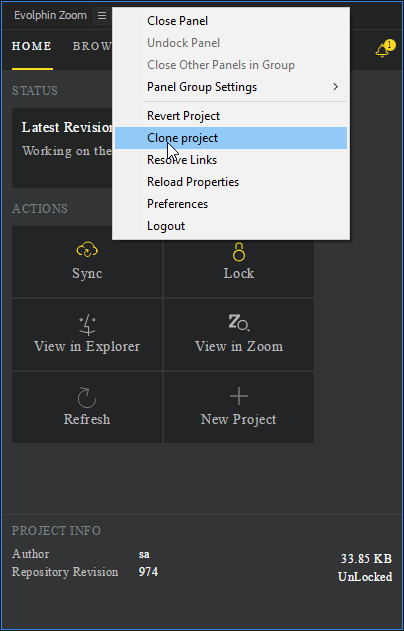
Cloning a project is used to create a new project by taking the changes so far in the current project. To clone a project, select Clone project from the flyover menu.
Check-In window is displayed showing Smart Copy Settings.

Select the suffix name option, the server folder where the clone project will be checked-in, the required metadata values (if any) and click Smart Copy.

A message is displayed about creating the cloned project.
Preferences and Reload Properties
There are some common preferences that can be set for the plugin from any supported Adobe Creative app. To view and change these preferences, select Preferences from the flyover menu.

The preferences are shown in the plugin window.

These options are available:
- Group Project templates: Select this option to group project templates that are used while creating a new project. By default, this is false.
- Extract Links & Layers: When enabled this will allow links to be extracted in some Creative apps like Adobe Photoshop and also allows links to be checked-in with the project/document. When disabled, links will not be saved with the project/document in Zoom and the Links tab will not be visible. By default, this is enabled.
- Show Link Metadata: Enter metadata that should be displayed for assets in the Links tab in List view. A comma separated list of metadata can be entered in the following format MetadataGroupCode_MeadataLabel. The values are case sensitive. For example, you could use the following, IPTC_City,IPTC_Copyright
- Show Confirmation Dialog for Auto-Save in Links: When enabled, Zoom will ask before saving a modified/unversioned asset that the user has linked (in Adobe Photoshop and Illustrator). When disabled, Zoom will autosave the modified/unversioned asset automatically as per the auto-refresh interval set in Zoom.
- Default Export Zoom Destination / Default Zoom Destination for Export: Specify the name of the destination path in Zoom where unversioned exported assets are saved.
- Default Export Folder Name / Default Folder Name for Export: Specify the name of the default export folder name that will be created inside the destination while checking-in.
- Show Confirmation Dialog for Auto-Save in Export: When enabled, Zoom will ask before saving a modified/unversioned asset that the user is trying to export. When disabled, Zoom will autosave the modified/unversioned asset automatically as per the auto-refresh interval set in Zoom.
- Show Filter’s Count / Show Number of Results per Filter: Show the number of assets that are filtered while viewing filters at the time of searching for assets.
- Notification Count / Notifications to Load: Specify the count of notifications displayed on clicking the notification bell icon. The user will have to click Show More to load more notifications.
Update the fields as required and click Save to save these changes. The changes are saved in the Zoom plugin for all supported Adobe apps.
To see the changes in other open Adobe apps, click Reload Properties inside the plugin in those apps.

This will reload the properties set for the plugin.
Export
Zoom Adobe plugin makes it easier to export files with specific presets and have them automatically synced in your Zoom repository. The exported asset could also be added to a collection.
The feature is available through the following Adobe applications only, Adobe Premiere Pro, InDesign, Photoshop, After Effects, and Sketch.
Some of these apps use export presets, and a few default presets are available in some apps. You can add your own custom export presets for Adobe Premiere Pro using Web Management Console. For Adobe InDesign and After Effects, custom presets may be added from the apps themselves.
Follow these steps to export an asset:
- Click on the Exports tab.
For Adobe Photoshop, if your project is unversioned/modified and you also have confirmation enabled for autosave in exports, then you will be shown a confirmation dialog to choose between having the option to modify the asset before export.

- If you choose No, then the options to modify the asset will not be available. If you choose Yes, then the option to modify the asset, like dimensions, resolution, and DPI will be available. If the original project/document file was versioned, then no confirmation will be displayed and the Export tab will be shown.
No confirmation dialog is shown for other Adobe apps.

- Choose the presets and options available for your specific Adobe Creative app and choose the export location. Choose to sync after export so that the exported file is also checked-in. Now, click Export. If you choose a custom export location, then Sync after export will not be available.
- The export process begins by launching Adobe Media Encoder in Adobe Premiere Pro. For other apps, the export is handled internally. Once the export is complete, a message about successful export is displayed in the Export tab.

If the new asset was synced with Zoom, then it may also be added to a collection by choosing the collection name and clicking Add to Collection. This option is not available if the new asset was not synced.
View Exported Files
Zoom 7.0 to 7.2
- Access all exported files by clicking on the Exported Files tab.
- Double-click an asset name to access its details. Select an asset and click View Collections to view the name of all collections that contain that asset. You can also add the asset to a collection from here.
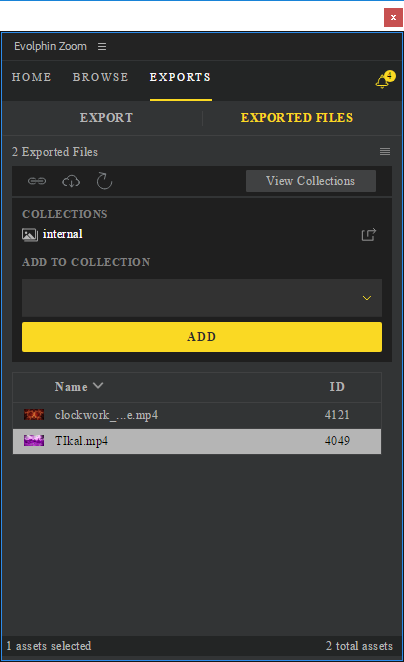
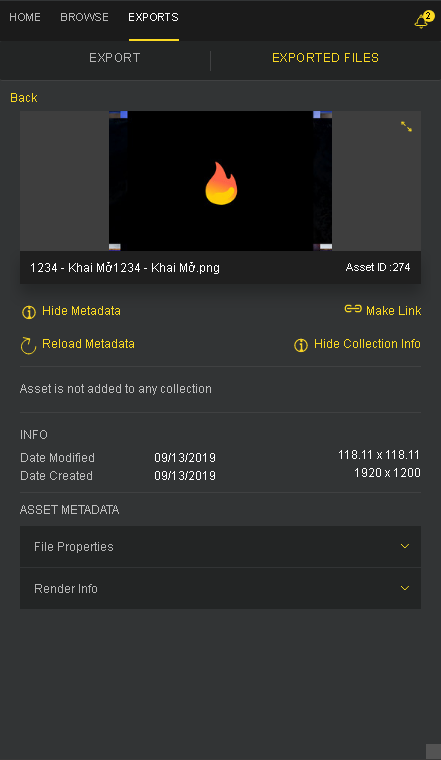
Zoom 7.3 onwards
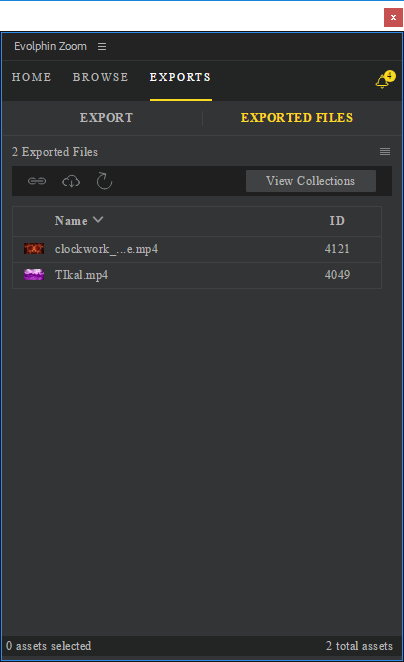
- Access all exported files by clicking on the Exported Files tab.

- Double-click an asset name to access its details. Like viewing asset details, you can view collection info and metadata for the exported asset.